


Espresso Brewing Guide: Master the Art of Perfect Shots at Home
Welcome to the captivating world of home espresso brewing! If you’re a “Home Coffee & Culinary Arts” enthusiast, you’ve likely dreamt of crafting that perfect, café-quality shot right in your kitchen. This comprehensive espresso brewing guide is designed to transform that dream into a delicious reality. At its heart, espresso is a concentrated coffee beverage made by forcing a small amount of nearly boiling, pressurized water through finely ground coffee. It’s an art form, yes, but also a science, demanding precision, understanding, and practice. This guide will walk you through everything a home barista needs to know, from selecting the right equipment and understanding key variables to executing the step-by-step brewing process and troubleshooting common challenges. Prepare to unlock the secrets to mastering the rich crema, intense aroma, and exquisite flavor that define a truly exceptional espresso.
This ultimate espresso brewing guide covers all aspects of crafting the perfect shot, from essential equipment to advanced techniques. We delve into the nuances of grind size, water temperature, and extraction time, providing practical tips for every stage of your brewing journey. Whether you’re a beginner looking to understand the basics or an experienced home barista aiming to refine your skills, this guide offers invaluable insights. Learn how to diagnose common problems, maintain your machine for longevity, and explore delicious espresso-based beverages. By following our expert advice, you’ll gain the confidence and knowledge to consistently pull perfect espresso shots, elevating your home coffee experience to a professional level.
What Makes a Perfect Espresso Shot?
Before we dive into the mechanics of brewing, it’s crucial to understand what espresso truly is and what characteristics define a perfect shot. Espresso isn’t just a type of coffee bean or a dark roast; it’s a unique brewing method that originated in Italy, known for its rapid, high-pressure extraction. This process yields a highly concentrated beverage with a complex flavor profile and distinct visual characteristics.
What is Espresso? A Definition and Its Characteristics
Espresso is defined by its method of preparation: hot water, typically between 195-205°F (90-96°C), is forced through a compacted bed of “finely ground coffee” at approximately 9 bars of pressure. This intense extraction, usually lasting 25-30 seconds, produces a small, potent shot of coffee. The resulting beverage is characterized by:
- Concentration: Espresso is much more concentrated than other brewing methods, delivering intense flavors in a small volume.
- Crema: A hallmark of a well-pulled espresso, crema is a reddish-brown emulsion of coffee oils, proteins, and sugars, formed by the CO2 released during extraction. It contributes to the espresso’s aroma and mouthfeel.
- Body: Espresso typically has a rich, full body due to the oils and suspended solids extracted under pressure.
- Complex Flavor: A balanced espresso offers a symphony of flavors, ranging from sweet and nutty to fruity and chocolatey, often with a pleasant bitterness.
What is the Ideal Espresso Taste Profile?
A perfect espresso shot strikes a delicate balance between sweetness, acidity, and bitterness. It should be:
- Balanced: No single flavor should overpower the others. It should not be excessively “sour” (under-extracted) or overly “bitter” (over-extracted).
- Sweet: Natural sugars in the coffee should be evident, contributing to a pleasant finish.
- Clean: The flavors should be distinct and not muddled, with a smooth finish.
- Aromatic: The aroma should be inviting and complex, reflecting the quality of the coffee beans and the skill of the “barista.”
What Essential Espresso Equipment Do Home Baristas Need?

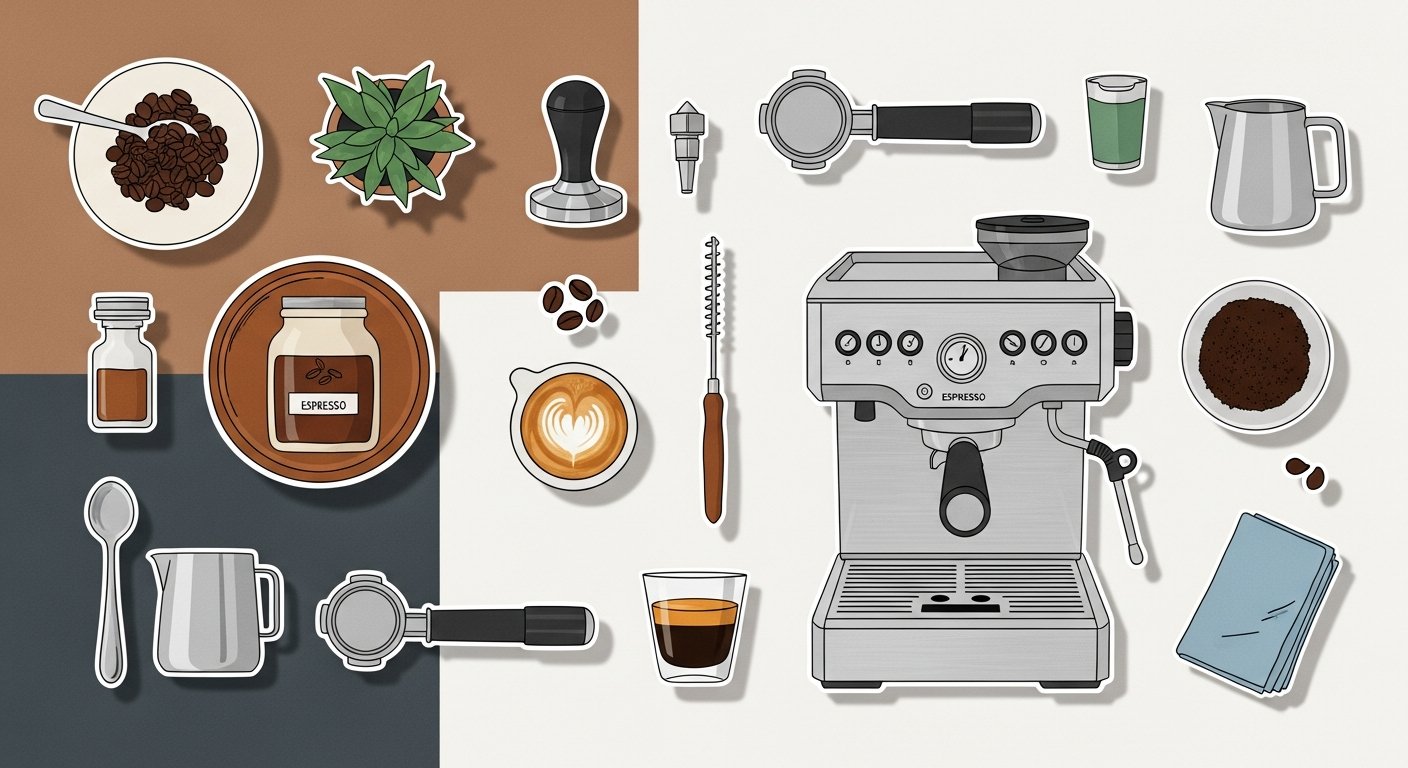
Achieving that perfect shot at home begins with the right tools. Investing in quality equipment is arguably the most crucial step in your espresso journey. Each piece plays a vital role in controlling the “key variables” that influence your final brew.
Which Espresso Machine is Right for Your Home?
The espresso machine is the centerpiece of your setup, responsible for generating the “high pressure” and precise “water temperature” needed for extraction. Machines vary widely in price, features, and control levels.
- Manual Lever Machines: Offer ultimate control as you manually pull a lever to generate pressure. Rewarding but require significant skill.
- Semi-Automatic Machines: The most popular choice for home baristas. They feature an electric “pump” (either “vibratory” or “rotary”) to provide pressure, and you control the start and stop of the shot. Many come with a “PID controller” for stable “water temperature” and a “pressure gauge” to monitor extraction.
- Automatic Machines: You press a button, and the machine brews a pre-programmed volume of espresso. Less control over individual “extraction time” but simpler to use.
- Super-Automatic Machines: Grind beans, tamp, brew, and even froth milk all at the touch of a button. Convenience is key, but often with less control and quality compared to semi-automatics.
Consider the “boiler type” (single, “heat exchanger,” or “dual boiler”) for temperature stability, especially if you plan to steam milk often. A “portafilter size” of 58mm is standard for many professional machines and offers better shot consistency.
Why is a Quality Coffee Grinder Non-Negotiable for Espresso?
A high-quality coffee grinder is as important as, if not more important than, your espresso machine. Espresso requires a very fine, uniform grind, which only a dedicated burr grinder can achieve.
- Burr Grinders: Essential for espresso. They crush beans between two abrasive surfaces (either “conical” or “flat burrs”). This provides consistent “grind uniformity,” which is critical for even extraction.
- Grind Settings: Look for a grinder with “stepless” adjustment (infinite settings) or very fine “stepped” adjustments to dial in your espresso precisely.
- Low Retention: A good grinder minimizes “retention” (old grounds left in the grinder) to ensure you’re always using fresh coffee.


What Essential Barista Tools and Accessories Are Needed?
These tools, while seemingly small, significantly impact shot quality and consistency.
- Precision Scale: A digital “scale” accurate to 0.1 grams is indispensable for weighing your “coffee dose” and “espresso yield.” Consistency is king.
- Tamper: Used to compress the “finely ground coffee” in the “portafilter.” A good “tamper” should fit your portafilter perfectly (e.g., 58mm) and allow for a level tamp.
- Distribution Tool (WDT Tool): A “distribution tool” or WDT (Weiss Distribution Technique) tool helps break up clumps and distribute the grounds evenly in the portafilter, preventing channeling.
- Knock Box: A practical accessory for cleanly discarding used coffee pucks.
- Milk Pitcher & Thermometer: For steaming milk (if your machine has a steam wand).
- Cleaning Supplies: Group head brush, backflushing detergent, descaling solution.
To help visualize the options for espresso machines, here’s a comparison:
| Machine Type | Cost (Attribute) | Ease of Use (Attribute) | Control Level (Attribute) | Ideal User (Attribute) | Key Feature (Attribute) |
|---|---|---|---|---|---|
| Manual Lever | Medium-High | High (steep learning curve) | Very High | Experiemental, hands-on enthusiast | Direct control over pressure |
| Semi-Automatic | Medium-High | Medium | High | Dedicated home barista | Balance of automation & control |
| Automatic | Medium | High | Medium | Convenience-focused user | Pre-programmed shot volume |
| Super-Automatic | High | Very High | Low | Busy user wanting minimal effort | Bean-to-cup automation |
How Do You Brew Espresso Step-by-Step?
Mastering espresso is a journey of refinement, but following a consistent, step-by-step process is the cornerstone of success. This section outlines the core actions for pulling a perfect shot.
1. Preparation: Warm-Up and Cleanliness
Before you even touch the coffee, ensure your machine is ready.
- Turn On Machine: Allow your “espresso machine” at least 20-30 minutes to fully heat up. This ensures the “boiler type” (or “heat exchanger”) reaches stable “water temperature” and the group head is hot.
- Clean Portafilter: Ensure your “portafilter” is clean and dry from any previous use. Residue can impact flavor.
- Flush Group Head: Briefly run water through the group head to rinse out any old grounds and further stabilize temperature.
2. Grinding the Coffee Beans
Precision here is paramount for proper “extraction.”
- Weigh Beans: Using your “precision scale,” weigh out your desired “coffee dose” (typically 18-20 grams for a double shot). Use fresh “coffee beans” with a recent “roast date.”
- Grind: Grind the beans using your “burr grinder” to a very fine consistency, resembling powdered sugar or fine salt. The “grind settings” will need frequent adjustment depending on your beans and desired outcome.
3. Dosing and Distribution
Evenness is key to prevent “channeling.”
- Fill Portafilter: Transfer the “finely ground coffee” into your “portafilter” basket.
- Distribute: Use a “distribution tool” or WDT tool to break up clumps and evenly distribute the grounds. Gently tap the portafilter on your counter to settle the grounds.
4. Tamping the Coffee
This compresses the coffee bed for consistent water flow.
- Level Tamp: Place the “portafilter” on a level surface. Hold your “tamper” straight and apply firm, even “tamping pressure” (around 20-30 lbs, but consistency is more important than exact force). Twist slightly on removal to polish the surface.
- Check for Levelness: Ensure the coffee puck is perfectly level. An uneven tamp can lead to uneven extraction and “channeling.”
5. Extraction: The Moment of Truth
This is where the magic happens, under “high pressure” and controlled “water temperature.”
- Lock In Portafilter: Quickly insert and lock the “portafilter” into the group head. Do this immediately after tamping to prevent heat loss.
- Place Cup & Scale: Place your pre-warmed “espresso shot” glass on your “precision scale” under the portafilter spouts. Tare the scale.
- Start Shot: Initiate the brew cycle. If your machine has “pre-infusion,” it will gently wet the puck before applying full pressure.
- Monitor Extraction: Watch the stream. It should start as a dark, viscous liquid, gradually lightening to a tiger-stripe pattern. Aim for an “extraction time” of 25-30 seconds.
- Stop Shot: End the shot when your desired “espresso yield” is reached (e.g., 36-40 grams for an 18-20 gram dose).
6. Serve Immediately and Clean Up
Espresso is best enjoyed moments after brewing.
- Serve: Swirl the “espresso shot” gently to combine the “crema” and shot, then serve immediately.
- Knock Out Puck: Remove the “portafilter” and knock the used coffee puck into your “knock box.”
- Wipe & Rinse: Rinse the portafilter and wipe the group head clean to prevent grounds from hardening. If you steamed milk, purge and wipe the steam wand immediately.
What Key Variables Influence Your Espresso Shot?

Every element in the brewing process is a “variable” that, when adjusted, will alter the outcome of your “espresso shot.” Understanding these factors is fundamental to diagnosing issues and “dialing in” your espresso to perfection.
How Do Grind Size and Consistency Affect Espresso?
The “grind size” is perhaps the most impactful variable.
- Impact: A finer grind offers more surface area for water to interact with, increasing resistance and slowing “extraction time.” A coarser grind does the opposite.
- Effect:
- Too Fine: Leads to over-extraction (“bitter,” choked shot, slow flow).
- Too Coarse: Leads to under-extraction (“sour,” watery, fast flow, poor “crema”).
- Adjustment: Adjust your coffee grinder settings in small increments.
What is the Importance of Coffee Dose and Espresso Yield (Brew Ratio)?
The relationship between your input coffee and output espresso is critical.
- Dose (grams): The amount of “finely ground coffee” placed in the portafilter (e.g., 18g).
- Yield (grams/ml): The weight or volume of the final “espresso shot” (e.g., 36g).
- Brew Ratio: The ratio of “coffee dose” to “espresso yield” (e.g., 1:2 ratio means 18g in, 36g out). Common ratios range from 1:1 (ristretto) to 1:3 (lungo).
- Impact: A higher yield for the same dose can lead to thinner, weaker shots, while a lower yield will be more concentrated.

How Does Water Temperature Impact Espresso Extraction?
The “water temperature” significantly affects solubility and extraction.
- Recommended Range: 195-205°F (90-96°C). Most espresso machines with a “PID controller” allow precise temperature adjustment.
- Impact:
- Too Low: Under-extraction, “sour” flavors, thin “crema.”
- Too High: Over-extraction, “bitter,” burnt flavors.
What Role Do Extraction Time and Pressure Play in Espresso?
These two variables are closely linked and dictate how quickly and effectively the “flavor compounds” are dissolved.
- Extraction Time (seconds): Typically 25-30 seconds for a double shot. This is heavily influenced by “grind size” and “tamping pressure.”
- Pressure (bars): The force applied by the machine’s “pump” to the water. Most machines operate around 9 bars. A “pressure gauge” helps monitor this.
- Impact:
- Too Fast: Under-extraction, weak, “sour.”
- Too Slow: Over-extraction, “bitter,” burnt.
Here’s a summary of how each variable impacts your shot:
| Variable (Entity) | Recommended Range (Attribute) | Impact on Shot (Attribute) | Troubleshooting Indicator (Attribute) |
|---|---|---|---|
| Grind Size | Fine (powdered sugar) | Too fine: over-extraction, bitter, slow flow. Too coarse: under-extraction, sour, fast flow. | Extraction time, taste, flow rate |
| Coffee Dose | 18-20g for double shot | Too low: weaker, less body. Too high: restricted flow, potential channeling. | Shot volume, taste, flow rate |
| Espresso Yield | 36-40g for double shot (1:2 ratio) | Higher yield: weaker. Lower yield: stronger, potentially under-extracted. | Taste, concentration |
| Water Temperature | 195-205°F (90-96°C) | Too low: sour, thin body. Too high: bitter, burnt notes. | Taste |
| Extraction Time | 25-30 seconds | Too fast: under-extracted, sour. Too slow: over-extracted, bitter. | Taste, visual flow |
| Pressure | ~9 bars | Too low: weak, watery. Too high: restricted, bitter (often linked to grind). | Pressure gauge, flow rate |
What Are Common Espresso Problems and How Do You Fix Them?
Even with the best equipment and technique, you’ll encounter imperfect shots. This is where troubleshooting skills come into play. Learning to identify “common espresso problems” based on taste, visual cues, and “extraction time” is a key part of becoming an expert home barista.
How Do You Diagnose and Adjust Your Espresso Shot?
Your palate, eyes, and scale are your best diagnostic tools. When a shot isn’t perfect, only change one variable at a time to isolate the cause. Start with “grind size,” as it has the most profound effect.
Here’s a breakdown of frequent issues and their solutions:
| Problem (Entity) | Symptom (Attribute) | Cause (Attribute) | Solution (Attribute) |
|---|---|---|---|
| Sour Shot (Under-extracted) | Sharp, acidic, watery, pale crema, very fast flow. | Grind too coarse, too low dose, too low water temperature, too short extraction time. | Grind finer, increase dose, increase water temp, extend extraction (by grinding finer). |
| Bitter Shot (Over-extracted) | Harsh, burnt, acrid, dark splotchy crema, very slow flow or choked shot. | Grind too fine, too high dose, too high water temperature, too long extraction time. | Grind coarser, decrease dose, decrease water temp, shorten extraction (by grinding coarser). |
| Too Fast Extraction | Shot runs in less than 20 seconds, watery, weak. | Grind too coarse, underdosing, inadequate tamping, old/stale beans. | Grind finer, increase dose, ensure firm and level tamp, use fresh beans. |
| Too Slow Extraction | Shot runs in over 35 seconds, drips slowly or chokes, very dark. | Grind too fine, overdosing, over-tamping, dirty shower screen. | Grind coarser, decrease dose, ensure consistent tamp, clean machine. |
| No Crema / Thin Crema | Shot looks thin, no reddish-brown layer. | Stale coffee beans, grind too coarse, under-extraction, too low water temp, low “pressure.” | Use fresh beans (within 2-3 weeks of roast date), grind finer, check temperature/pressure. |
| Channeling | Water channels through cracks in coffee puck, leading to uneven extraction (squirt/spray). | Uneven grind distribution, uneven tamp, old/stale coffee, too fine grind. | Use WDT tool, tamp level, use fresh beans, adjust grind slightly coarser if needed. |
Beyond the Basics: What Are Advanced Espresso Techniques and Recipes?
Once you’ve mastered the fundamentals of “espresso brewing,” there are numerous “advanced techniques” and delightful recipes to explore, further enriching your “Home Coffee & Culinary Arts” experience.
How Can You Refine Your Espresso Technique?
- Pre-infusion: Many semi-automatic machines offer “pre-infusion” where a small amount of water at low pressure wets the coffee puck before full pressure is applied. This helps to saturate the grounds evenly, reducing “channeling” and promoting a more uniform extraction. Experiment with different pre-infusion times.
- Pressure Profiling: Advanced machines allow you to manually adjust the “pressure (bars)” during the shot. This can highlight different “flavor compounds” and manipulate “body” and “crema.”
- WDT (Weiss Distribution Technique) & RDT (Ross Droplet Technique): While mentioned earlier, perfecting these techniques can significantly improve grind distribution and reduce static cling during grinding, ensuring a more even bed of coffee.
What Espresso-Based Beverages Can You Explore?
Espresso is the foundation for countless popular drinks. Mastering basic milk frothing is the next logical step.
- Milk Frothing: Using your machine’s steam wand, aim for milk that’s sweet, velvety, and without large bubbles. Practice creating a “microfoam” that’s pourable and shiny.
- Classic Recipes:
- Espresso Macchiato: Espresso with a dollop of foamed milk.
- Cappuccino: Equal parts espresso, steamed milk, and foamed milk.
- Latte: Espresso with a larger volume of steamed milk and a thin layer of microfoam.
- Americano: Espresso diluted with hot water.
- Flat White: Espresso with microfoamed milk, similar to a latte but with less foam and a stronger coffee taste.
- Latte Art: Once you’ve mastered frothing, you can start practicing “latte art,” pouring the microfoam into patterns like hearts and rosettas.
How Do You Maintain Your Espresso Machine for Longevity?
Just like any precision equipment, your “espresso machine” requires regular care and cleaning to perform optimally and last for years. Neglecting maintenance can lead to poor performance, inconsistent shots, and costly repairs.
What Are Daily Espresso Machine Cleaning Rituals?
These simple steps should be performed after every brewing session:
- Backflushing: If your machine has a 3-way solenoid valve (common in semi-automatics), “backflush” daily with water and weekly with a specialized espresso machine detergent. This cleans the group head and prevents coffee oils from building up.
- Clean Portafilter and Basket: Remove the basket, rinse thoroughly, and wipe dry.
- Purge and Wipe Steam Wand: Immediately after steaming milk, purge the steam wand to clear any milk residue, then wipe it clean with a damp cloth. Milk dries quickly and can clog the wand.
- Wipe Down Machine: Keep the exterior of your machine clean from coffee splatters and water spots.
What Weekly and Monthly Espresso Machine Maintenance is Needed?
- Group Head Screen and Gasket: Remove the shower screen and clean it with a brush to remove trapped coffee grounds. Inspect the group head gasket for wear and replace if necessary.
- Deep Clean Portafilter Baskets: Soak portafilter baskets in a solution of espresso machine cleaner to remove stubborn coffee oils.
- Clean Grinder: Use a grinder brush and vacuum to remove old grounds from your coffee grinder burrs and chute. Periodically run grinder cleaning tablets.
How Often Should You Descale Your Espresso Machine?
Depending on your water hardness and usage, “descaling” should be done every 1-3 months. Limescale buildup from water minerals can damage heating elements and restrict water flow.
- Use Descaling Solution: Follow your machine manufacturer’s instructions for using a food-safe “descaling solution.”
- Water Quality: Consider using filtered water or a water softener to reduce mineral buildup and improve coffee taste.
Espresso vs. Other Home Brewing Methods: A Quick Comparison
Within the broader “Coffee Brewing & Equipment” cluster, espresso stands out due to its unique characteristics. Understanding how it compares to other popular home brewing methods highlights its distinct advantages and flavor profiles.
What Are the Key Distinctions Between Espresso and Other Brewing Methods?
Unlike “drip coffee,” “pour-over,” or “French press,” espresso uses high pressure and rapid extraction to create a highly concentrated beverage. Here’s a quick comparison:
- Brewing Method:
- Espresso: High pressure (9 bars), short contact time (25-30 seconds), very “finely ground coffee.”
- Drip Coffee/Pour-Over: Gravity-fed, lower pressure, medium “grind size,” longer brew time (3-5 minutes).
- French Press: Full immersion, no pressure, coarse “grind size,” longer steep time (4 minutes).
- Concentration:
- Espresso: Highly concentrated, forms the base for milk drinks.
- Drip/Pour-Over: Less concentrated, typically consumed black or with a splash of milk.
- French Press: Full-bodied but less concentrated than espresso, often with sediment.
- Body and Mouthfeel:
- Espresso: Rich, full body due to suspended solids and oils, often with “crema.”
- Drip/Pour-Over: Cleaner, lighter body, depending on filter type.
- French Press: Heavy, sometimes gritty body due to unfiltered nature.
- Flavor Profile:
- Espresso: Intense, complex, balanced sweet-acid-bitter.
- Drip/Pour-Over: Highlights nuanced flavors, brighter acidity.
- French Press: Bold, rich, robust flavors, often with more bitterness.
The “antonyms/related concepts” demonstrate that while all are coffee, espresso uniquely prioritizes intensity, speed, and the creation of crema through a pressurized brewing environment. This makes it ideal for specific drink types and a distinct sensory experience.
Conclusion: Your Journey to Espresso Mastery Begins Now
Embarking on the journey to master home espresso is a rewarding experience that deeply enriches your “Home Coffee & Culinary Arts” skills. This espresso brewing guide has provided you with the foundational knowledge and expert insights needed to consistently pull delicious shots.
Remember, espresso brewing is a blend of art and science. It demands precision with your “coffee dose,” “grind size,” “water temperature,” and “extraction time,” but it also encourages experimentation and refinement based on your taste preferences. Don’t be discouraged by imperfect shots; each one is a learning opportunity. Pay attention to the “key variables,” troubleshoot systematically, and most importantly, enjoy the process.
We encourage you to experiment with different coffee beans and “roast levels,” practice your milk frothing, and share your results with fellow enthusiasts. With dedication and the insights from this guide, you are well on your way to becoming a skilled home barista, capable of crafting “perfect shots” that rival your favorite café.