


Sharpen Your Skills: Essential Knife Techniques for Every Home Cook
The Foundation of Flavor: Why Mastering Basic Knife Skills Matters
In the bustling world of a professional kitchen, a chef’s prowess is often first judged by their knife skills. But this isn’t just a professional eccentricity; it’s a fundamental aspect of cooking that directly impacts the taste, texture, and presentation of every dish, even in a home setting. For the dedicated home cook, embracing basic knife skills is akin to learning the alphabet before writing a novel – it’s the indispensable first step that empowers you to create culinary masterpieces with precision and ease.
One of the most immediate benefits of honing your knife skills is significantly enhanced safety. A sharp knife, wielded with proper technique, is far less dangerous than a dull one. A dull knife requires more force to cut, increasing the likelihood of it slipping and causing injury. Conversely, a sharp blade glides through ingredients cleanly, reducing the effort needed and giving you greater control. Learning the correct grip and hand positions, such as the crucial “claw grip” for your guiding hand, actively keeps your fingers away from the blade, dramatically minimizing the risk of cuts.
Beyond safety, efficiency is another cornerstone. Imagine slicing through a mountain of vegetables for a stir-fry or finely dicing aromatics for a foundational soffritto in mere minutes, rather than painstakingly chopping each piece. Mastering the fundamental cuts – slicing, dicing, mincing, and julienning – allows you to process ingredients quickly and consistently. This consistency is not merely aesthetic; it’s vital for even cooking. Uniformly cut vegetables cook at the same rate, preventing some pieces from becoming overcooked and mushy while others remain raw and crunchy. This precision ensures that every component of your dish reaches its optimal texture and flavor simultaneously, elevating the overall quality of your meals.
Furthermore, developing proficient basic knife skills for home cooks cultivates confidence. The initial apprehension often associated with handling sharp tools transforms into a sense of mastery and enjoyment. This newfound confidence can inspire you to tackle more complex recipes, experiment with new ingredients, and approach cooking with a more adventurous spirit. It’s a skill that pays dividends with every meal you prepare, transforming the often-tedious prep work into a satisfying and productive part of your cooking experience. Ultimately, these skills are not just about cutting food; they are about building a stronger connection with your ingredients and enhancing the joy of cooking itself.
Your Essential Blade Arsenal: Selecting the Right Knives and Holding Them

You don’t need a professional chef’s elaborate knife block to excel in the kitchen. For the home cook, a few well-chosen, high-quality knives are far more effective than a drawer full of mediocre ones. Understanding which knives to use and, more importantly, how to hold them correctly, is paramount for developing excellent basic knife skills for home cooks.
The Essential Trio:
- The Chef’s Knife (8-inch or 10-inch): This is your workhorse, the most versatile knife in your kitchen. Its broad, curved blade is designed for rocking motions, making it ideal for chopping, slicing, dicing, and mincing a wide range of ingredients, from vegetables and fruits to meats. For most home cooks, an 8-inch chef’s knife offers the best balance of maneuverability and cutting power.
- The Paring Knife (3-inch or 4-inch): Small and nimble, the paring knife is perfect for delicate tasks that require precision, such as peeling small fruits and vegetables, trimming, mincing garlic, or deveining shrimp. Its short blade allows for excellent control in hand.
- The Serrated Knife (Bread Knife, 8-inch to 10-inch): With its saw-like edge, a serrated knife is specifically designed to glide through foods with tough exteriors and soft interiors without crushing them. Think crusty bread, tomatoes, or even delicate cakes.
While specialty knives like boning knives or cleavers have their place, investing in a good chef’s knife, a reliable paring knife, and a sharp serrated knife will cover 90% of your kitchen cutting needs and provide the best foundation for learning basic knife skills for home cooks.
Mastering the Grip: The Pinch Grip
The way you hold your knife is the single most critical factor for both safety and control. Forget the ‘handle-only’ grip often seen in movies; the professional and safest grip is the “pinch grip.”
Steps to the Perfect Pinch Grip:
- Grip the Handle: Hold the knife handle with your remaining three fingers (middle, ring, pinky) comfortably wrapped around it.
- Pinch the Blade: Crucially, pinch the base of the blade (where the blade meets the handle, often called the bolster) between your thumb and forefinger. Your thumb should be on one side of the blade, and your forefinger should be on the other, resting against the flat side of the blade.
- Relax Your Wrist: Keep your wrist relaxed and your elbow slightly bent. The knife should feel like an extension of your arm, not a separate tool you are trying to wrangle.
Why the Pinch Grip Works: This grip provides superior control over the blade’s movement, allowing for more precise cuts and reducing the chance of the knife slipping. It distributes the weight of the knife more effectively, reducing hand fatigue during long prep sessions. It’s the standard for professional chefs because it maximizes both safety and efficiency, making it an indispensable part of developing solid basic knife skills for home cooks.
The Guiding Hand: Mastering the Claw Grip
Once you’ve mastered holding the knife correctly with your dominant hand, the next critical step for safety and precision lies with your non-dominant hand – your guiding hand. This hand is not just holding the food; it’s actively protecting your fingers and guiding the blade. The technique you’ll learn here is called the “claw grip,” and it’s an absolute game-changer for anyone looking to improve their basic knife skills for home cooks.
What is the Claw Grip?
The claw grip involves curling your non-dominant hand’s fingers inward, tucking your fingertips and knuckles away from the path of the blade. Your knuckles become the protective barrier and the guide for your knife, while your fingertips are safely tucked underneath. This creates a stable platform for your food and a protective “shield” for your digits.
Steps to Executing the Claw Grip:
- Position Your Hand: Place your non-dominant hand on top of the ingredient you are cutting (e.g., an onion half, a carrot, a bell pepper).
- Form the Claw: Curl your fingers inward, so your fingertips are bent and tucked underneath your knuckles. Your thumb should be tucked back, bracing the food from behind, away from the blade’s path.
- Expose Your Knuckles: Your knuckles, particularly the middle knuckles of your index and middle fingers, should be the most forward part of your hand, forming a protective wall against the knife.
- Guide the Blade: As you cut, the flat side of the knife blade should rest gently against your knuckles, which act as a guide. Each time you push the knife forward to cut, slide your knuckles back slightly, maintaining contact with the blade. This ensures consistent cuts and keeps your fingers safely out of the way.
Why the Claw Grip is Essential:
- Finger Protection: This is the primary benefit. By keeping your fingertips tucked and your knuckles exposed, you create a barrier that prevents the knife from accidentally slicing your fingers. This is particularly crucial when cutting quickly or working with slippery ingredients.
- Consistent Sizing: Using your knuckles as a guide allows you to make uniform slices or dices. As you cut, you can slide your hand back in small, consistent increments, ensuring each piece is roughly the same size. This consistency is vital for even cooking and professional presentation.
- Increased Speed: Once comfortable, the claw grip allows you to cut much faster and with greater confidence. You won’t have to slow down out of fear of cutting yourself, leading to quicker prep times and less fatigue.
- Enhanced Control: The stability provided by the claw grip helps to steady the food, preventing it from rocking or sliding, which further contributes to safety and precision.
Practicing the claw grip with a variety of vegetables – starting slowly with something forgiving like a potato or bell pepper, then moving to an onion or carrot – will quickly build muscle memory. It might feel awkward at first, but with consistent practice, it will become second nature, dramatically improving your safety and efficiency as you develop your basic knife skills for home cooks.
Fundamental Cuts: Precision on Your Plate
With a proper grip and a protective guiding hand, you’re ready to tackle the core techniques that form the backbone of basic knife skills for home cooks. Mastering these fundamental cuts will not only make your food look more professional but, more importantly, ensure even cooking and better flavor distribution. We’ll focus on three essential categories: Slicing, Dicing, and Julienne, along with a crucial technique for aromatics: Mincing.
1. Slicing: The Rocking Motion
Slicing is one of the most common knife techniques, used for everything from cutting rounds of cucumber to thin strips of meat. The key is to utilize the entire blade of your chef’s knife with a smooth, rocking motion.
Technique for Slicing:
- Set Up: Position your ingredient (e.g., a bell pepper half, a cucumber) on your cutting board, using your claw grip to stabilize it.
- Initiate the Cut: Place the tip of your chef’s knife on the cutting board, near the top of the ingredient.
- Rock and Roll: Push the knife forward and down, allowing the blade to glide through the ingredient. As the knife moves forward, gradually bring the heel of the blade down to complete the cut. It’s a fluid, rocking motion – the tip stays in contact with the board, or very close to it, as the heel moves up and down.
- Guide with Knuckles: Maintain contact between the side of the blade and your guiding knuckles, moving your hand back incrementally with each slice to achieve consistent thickness.
Practical Example: Bell Pepper Strips (Fajita style)
Cut the bell pepper into quarters, removing seeds and membranes. Lay each quarter flat. Using the rocking motion with your guiding hand in a claw grip, slice into uniform strips for fajitas or stir-fries. Aim for strips about ¼-inch wide.
2. Dicing: Building Blocks of Flavor
Dicing creates uniform cubes, essential for stews, soups, and salsas. The consistency ensures even cooking and a pleasant texture. We’ll focus on medium dice (approx. ½-inch cubes) and small dice (approx. ¼-inch cubes).
Technique for Dicing (e.g., Onion, Carrot, Celery):
- Square Up the Ingredient: For ingredients like carrots or potatoes, first trim the ends and peel. Cut off one side to create a flat base, allowing the ingredient to sit stably on the board.
- Create Planks (Slices): Using the slicing technique described above, cut the ingredient into uniform planks (slices) of your desired dice thickness (e.g., ½-inch for medium dice, ¼-inch for small dice). Lay these planks flat.
- Create Sticks (Julienne-like): Stack a few planks (if manageable) and cut them again into uniform sticks of the same thickness. For an onion, you would typically make horizontal cuts from root to tip (without cutting through the root end), then vertical cuts.
- Dice: Finally, gather your sticks and cut across them, perpendicular to your previous cuts, creating uniform cubes.
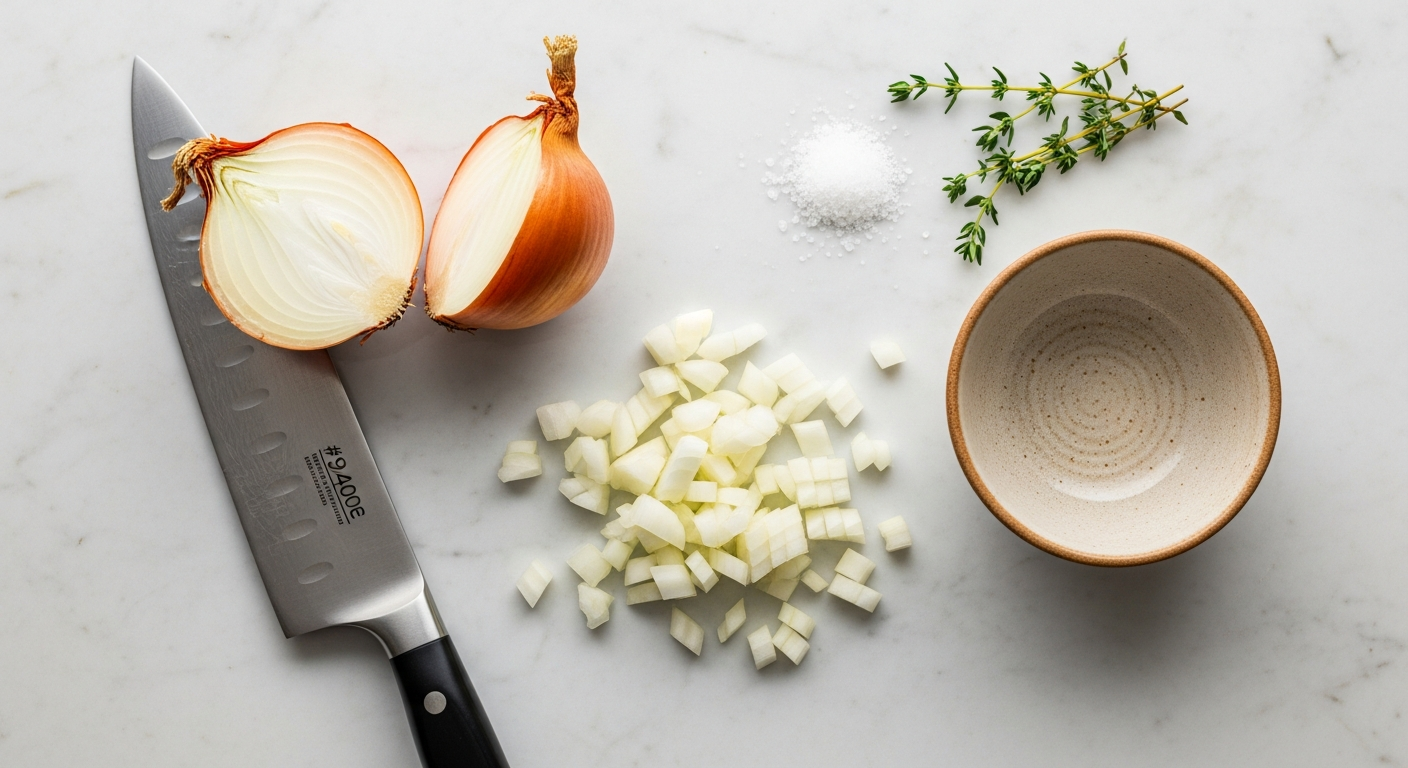
Practical Example: Dicing an Onion (Small Dice)
Cut an onion in half from root to tip. Peel it. Lay one half flat.
- Make horizontal cuts, parallel to the cutting board, towards the root end but not cutting through it. (1-3 cuts depending on onion size).
- Make vertical cuts, perpendicular to the horizontal cuts, also towards the root end. (3-5 cuts).
- Turn the onion 90 degrees and slice across your previous cuts, using your claw grip to guide, to create small dice.
This method is incredibly efficient for learning basic knife skills for home cooks for dicing aromatics.
3. Julienne: Elegant Matchsticks
The julienne cut produces long, thin matchstick-like strips (typically ⅛ x ⅛ x 2 inches). It’s great for salads, garnishes, and quick-cooking stir-fries.
Technique for Julienne (e.g., Carrot, Zucchini):
- Square Up: Trim the ends of your vegetable (e.g., carrot) and peel. Cut it into manageable lengths (e.g., 2-3 inches). Square off the sides to create a rectangular block – this minimizes waste and provides stability.
- Create Planks: Slice the block lengthwise into thin planks (approx. ⅛-inch thick).
- Create Matchsticks: Stack a few planks evenly. Then, slice lengthwise again into thin, uniform matchsticks (approx. ⅛-inch wide).
This technique, while appearing intricate, builds directly on your slicing skills and reinforces the importance of precision in basic knife skills for home cooks.
4. Mincing: Ultra-Fine Flavors
Mincing creates very fine pieces, ideal for garlic, ginger, and herbs, allowing their flavors to distribute evenly and quickly throughout a dish.
Technique for Mincing (e.g., Garlic):
- Rough Chop: First, roughly chop the garlic cloves or herbs.
- Gather and Rock: Pile the chopped ingredients into a small mound on your cutting board. Place the tip of your chef’s knife on the board and rock the blade rapidly back and forth over the pile, using your non-dominant hand to cup the tip of the blade and guide it, without applying downward pressure.
- Scrape and Repeat: Periodically scrape the pile back together with the blade and repeat the rocking motion until the desired fineness is achieved.
Consistent practice with these fundamental cuts will not only speed up your prep but also elevate the presentation and overall quality of your home-cooked meals, truly solidifying your basic knife skills for home cooks.
Beyond the Cut: Maintaining Your Knives
Mastering basic knife skills for home cooks extends beyond just the act of cutting; it encompasses the crucial practice of knife maintenance. A sharp knife is not only more efficient but, counter-intuitively, far safer than a dull one. A dull blade requires excessive force, increasing the risk of slips and serious injury. Understanding how to keep your knives in prime condition is an indispensable part of being a confident and competent cook.
Sharpening vs. Honing: Knowing the Difference
These two terms are often used interchangeably, but they refer to distinct processes vital for knife care:
- Honing (with a Honing Steel):
- Purpose: Honing doesn’t sharpen a knife; it realigns the microscopic edge of the blade that gets bent or folded over with regular use. Imagine the edge as a row of tiny teeth – honing straightens them out.
- Frequency: This should be done frequently, ideally before or after every use, or at least a few times a week, depending on how often you cook.
- How to: Hold the honing steel vertically or angled. Place the heel of your knife blade against the top of the steel at a 15-20 degree angle. Draw the knife down and across the steel in a smooth, arcing motion, pulling the entire blade edge across the steel. Repeat 5-10 times on each side of the blade, alternating sides. Maintain a consistent angle.
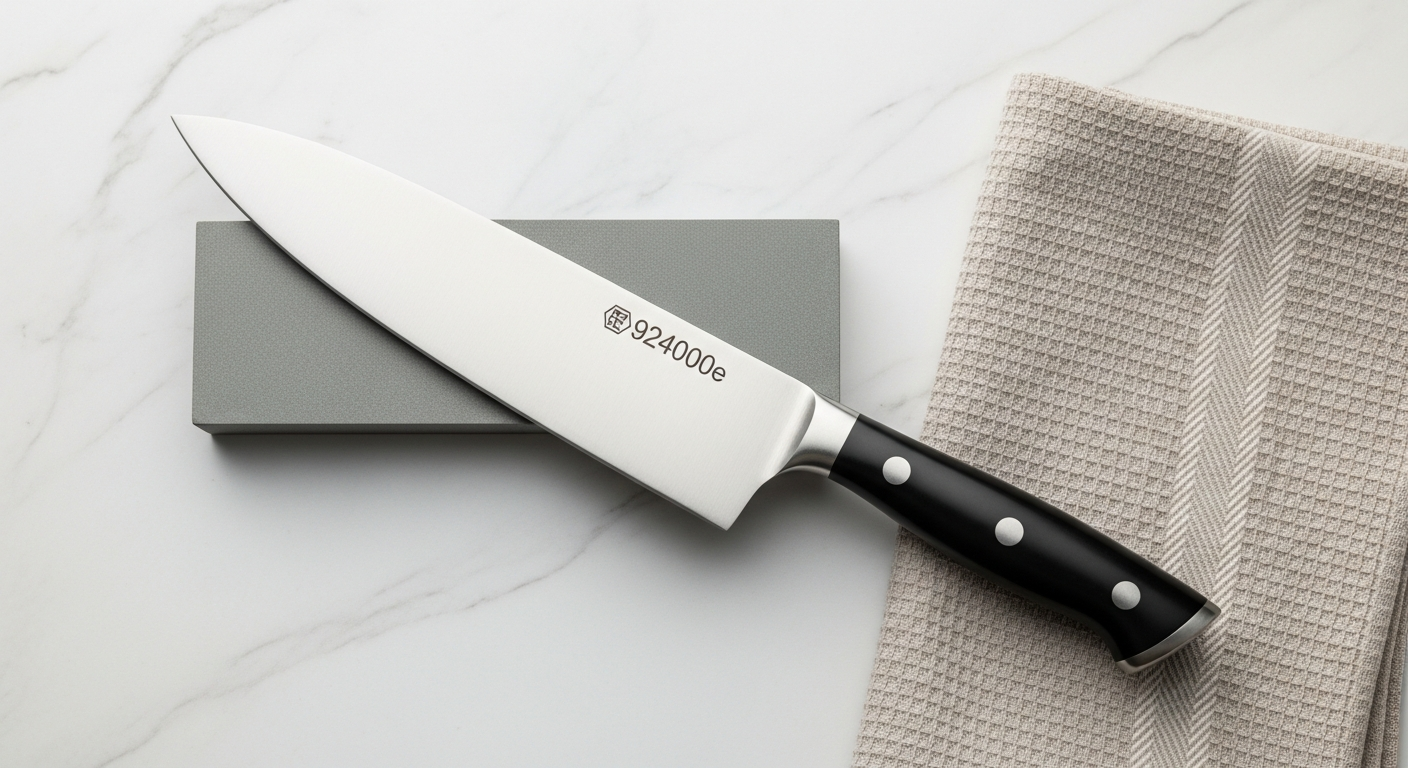
- Sharpening (with a Whetstone or Professional Service):
- Purpose: Sharpening actually removes a tiny amount of metal from the blade to create a new, sharper edge. This is what you do when your knife feels truly dull and honing no longer brings back its bite.
- Frequency: Depending on use, a home cook might sharpen their main knives once every 3-6 months. Paring knives might need it less often, while a chef’s knife in constant use might need it more.
- How to: Sharpening with a whetstone requires practice to maintain the correct angle and can be intimidating for beginners. Many home cooks opt for professional sharpening services or use electric sharpeners, which offer convenience but can remove more metal if not used correctly. For whetstones, you’d typically start with a coarser grit stone, then move to a finer grit to refine the edge.
A quick test for sharpness: try slicing a ripe tomato or a piece of paper. If the knife struggles or tears, it’s time for some maintenance.
Cleaning and Storage: Protecting Your Investment
- Hand Wash Immediately: Never put your good knives in the dishwasher. The harsh detergents, high heat, and jostling against other items can dull the blade, damage the handle, and even cause rust. Hand wash immediately after use with warm, soapy water and a non-abrasive sponge.
- Dry Thoroughly: After washing, immediately dry your knives with a clean towel. Leaving them to air dry can lead to water spots and rust, especially on carbon steel blades.
- Proper Storage:
- Knife Block: A classic and safe way to store knives, keeping them protected and organized.
- Magnetic Strip: Saves counter space and allows for easy access. Ensure blades are placed carefully to avoid hitting each other.
- Blade Guards: Ideal for storing knives in a drawer, preventing them from dulling against other utensils and protecting your hands when reaching in.
- Cutting Boards Matter: Always use wood, bamboo, or high-density plastic cutting boards. Avoid glass, stone, or ceramic boards, as these are incredibly hard and will rapidly dull your knife blades.
By integrating these maintenance practices into your routine, you’ll not only prolong the life of your valuable kitchen tools but also ensure that every time you approach your cutting board, you’re doing so with a perfectly sharp and ready-to-work blade. This commitment to maintenance is a sign of a truly skilled home cook who understands that the journey of mastering basic knife skills for home cooks is ongoing.
Common Knife Mistakes to Avoid for Home Cooks
Even with the best intentions, home cooks often fall into common pitfalls that can hinder their knife skills development and even lead to injury. Being aware of these mistakes is the first step to correcting them and further refining your basic knife skills for home cooks.
- Using a Dull Knife: As emphasized, a dull knife is more dangerous than a sharp one. It requires more force, increasing the chance of slipping. Make sure to hone your knife regularly and sharpen it when needed.
- Incorrect Grip: Holding the knife by the handle alone (the “hammer grip”) offers poor control and can lead to fatigue and imprecise cuts. Always use the pinch grip for maximum control and safety.
- Ignoring the Claw Grip: Failing to tuck your guiding hand’s fingertips and expose your knuckles is a recipe for cuts. The claw grip is your primary defense against injury.
- Cutting on Unstable Surfaces: A wobbly cutting board is a hazard. Place a damp cloth or paper towel underneath your cutting board to keep it from sliding around.
- Using the Wrong Knife for the Job: While a chef’s knife is versatile, trying to peel small fruits with it or slice bread with a paring knife will lead to frustration and potentially dangerous situations. Use the right tool for the task.
- Rushing the Process: Speed comes with practice. Trying to cut too fast before you’ve developed muscle memory can lead to inconsistent cuts and accidents. Start slow, focus on technique, and speed will naturally follow.
- Improper Cleaning and Storage: Dishwashers are bad for knives. Leaving them wet can cause rust. Storing them loosely in a drawer can dull edges and pose a safety risk. Always hand wash, dry immediately, and store properly.
By consciously avoiding these common errors, you’ll accelerate your learning curve and ensure a safer, more enjoyable experience in the kitchen, solidifying your journey in mastering basic knife skills for home cooks.
Conclusion: The Path to Culinary Confidence Starts Here
Embarking on the journey to master basic knife skills for home cooks might seem daunting at first, but as you’ve discovered, it’s a remarkably rewarding endeavor. From understanding the vital importance of safety and efficiency to selecting the right tools, perfecting your grip, and executing fundamental cuts with precision, each step brings you closer to becoming a more confident, capable, and creative cook. We’ve demystified the chef’s knife, celebrated the protective power of the claw grip, and broken down essential techniques like slicing, dicing, julienning, and mincing, transforming what were once intimidating tasks into achievable culinary triumphs.
Remember, cooking is a skill that improves with practice, and knife work is no exception. Don’t be discouraged if your first attempts at dicing an onion aren’t perfectly uniform, or if your julienned carrots resemble more like uneven sticks. Every cut, every guided motion, and every moment spent at the cutting board contributes to your muscle memory and overall proficiency. Think of your kitchen as a culinary dojo, and your knife as an extension of your artistic expression.
The benefits extend far beyond neat piles of vegetables. With newfound proficiency, you’ll experience:
- Enhanced Safety: Fewer slips, fewer nicks, and a greater sense of control.
- Increased Efficiency: Faster prep times mean more time enjoying your meals and less time laboring over ingredients.
- Superior Flavors and Textures: Uniform cuts lead to even cooking, unlocking the full potential of your ingredients.
- Culinary Confidence: The ability to tackle any recipe with poise and precision, expanding your cooking repertoire.
Your next step? Pick up your chef’s knife. Find a bell pepper, a potato, or an onion. Start slowly, focusing on your grip and your guiding hand. Practice the rocking motion, then try to create a few even slices. With consistent, mindful practice, you’ll soon find that the once-dreaded task of food preparation becomes a meditative, enjoyable, and ultimately, empowering part of your cooking experience. Continue to explore, experiment, and enjoy the journey – your kitchen awaits your sharpened skills!
Frequently Asked Questions
Why is a sharp knife safer than a dull knife?
▾
How often should I hone my knife, and how often should I sharpen it?
▾
What’s the best way to clean my kitchen knives?
▾
Can I really learn advanced knife skills at home, or do I need formal training?
▾
My hands get tired quickly when I’m chopping. Is there something I’m doing wrong?
▾
Learn more about us on our About Us page.