


Unlocking the Barista Within: Your Comprehensive Guide to Cafe-Quality Cappuccino at Home
Ah, the cappuccino. That perfect symphony of rich espresso, velvety steamed milk, and a delicate crown of microfoam. It’s more than just a coffee; it’s a moment of pure indulgence, a ritual that signals the start of a productive day or a comforting pause in the afternoon. For many of us, the allure of a cafe-quality cappuccino remains a special treat, savored in the warm embrace of our favorite coffee shop. But what if we told you that the secret to crafting this exquisite beverage isn’t confined to the skilled hands of a professional barista?
At Cafe Serre, we believe that the joy of exceptional food and coffee should be accessible to everyone, right in the comfort of their own kitchen. The journey to making a truly magnificent cappuccino at home might seem daunting, shrouded in the mystique of complex machinery and esoteric techniques. Yet, with the right knowledge, a little patience, and a dash of passion, you can transform your countertop into a personal espresso bar, capable of producing drinks that rival your most cherished cafe experiences.
This comprehensive guide is your warm invitation into the world of home barista-ship. We’ll demystify the process, break down the essential components, and equip you with the practical tips and expert insights needed to pull a perfect espresso shot, steam luscious microfoam, and finally, pour that beautiful, layered masterpiece. Get ready to awaken your inner barista and discover the profound satisfaction of sipping your own handcrafted cafe-quality cappuccino. Let the aroma fill your home, and let the warmth of this newfound skill envelop you.
The Foundation: Understanding the Cappuccino Trinity
Before we dive into the nitty-gritty of machines and techniques, it’s crucial to understand the three fundamental pillars that form the cappuccino: espresso, milk, and their harmonious ratio. Each component plays an indispensable role, and mastering them individually is the first step toward achieving perfection.
Espresso – The Heartbeat of Your Cappuccino
Espresso is not just strong coffee; it’s a concentrated, aromatic shot of coffee brewed by forcing hot, pressurized water through finely-ground coffee beans. A perfect espresso shot is the very soul of your cappuccino, providing the intense coffee flavor that shines through the milk. It should have a rich, reddish-brown crema on top – a dense, emulsified layer that indicates a well-extracted shot.
- Freshness is Key: Always start with freshly roasted coffee beans. Look for a “roasted on” date, not a “best by” date. Beans are typically at their peak 5-14 days post-roast.
- Grind Consistency: Espresso requires a very fine, consistent grind, similar to powdered sugar or fine sand. An inconsistent grind leads to uneven extraction, resulting in sour or bitter flavors.
- The Right Machine: While various machines can make coffee, a true espresso machine is designed to deliver the precise pressure and temperature needed for authentic espresso.
Milk – The Velvety Embrace
The milk in a cappuccino is not just heated milk; it’s steamed and textured to create a luxurious microfoam – a silky, uniform foam with tiny, imperceptible bubbles. This microfoam integrates beautifully with the espresso, adding sweetness, body, and a creamy mouthfeel.
- Type of Milk: Whole milk is often the gold standard due to its fat and protein content, which contribute to a stable, creamy microfoam. However, many excellent barista-style oat milks (like Oatly Barista Edition or Minor Figures Oat Milk) and some almond milks can also produce fantastic results. Experiment to find your favorite.
- Starting Temperature: Always start with very cold milk. This gives you more time to properly texture the milk before it gets too hot.
- Pitcher Choice: A stainless steel steaming pitcher with a spout designed for pouring latte art is ideal.
Ratio – The Perfect Harmony
Traditionally, a cappuccino adheres to a roughly 1:1:1 ratio: one-third espresso, one-third steamed milk, and one-third airy foam. This classic balance ensures that the espresso’s intensity isn’t completely overwhelmed by the milk, creating a harmonious blend of flavors and textures. Modern interpretations might lean slightly more towards milk for a creamier texture, but the core principle remains: a balance between coffee and milk components.
Essential Gear for the Home Barista

Just as a chef needs their knives, a home barista requires specific tools to craft cafe-quality drinks. Investing in the right equipment is perhaps the most significant step in elevating your home coffee experience. While you don’t need to break the bank, choosing wisely will pay dividends in consistency and quality.
Espresso Machine Choices
This is where the magic happens, converting water and ground coffee into liquid gold. Espresso machines vary widely in price and complexity, but for cafe-quality results, semi-automatic machines offer the best balance of control and performance for the aspiring home barista.
- Entry-Level Semi-Automatics: These machines are excellent starting points, offering manual control over shot pulling and a steam wand for milk. They often require a bit of practice but deliver excellent results.
- Recommendation: The Breville Bambino Plus is a fantastic compact option, known for its fast heat-up time and impressive steam power. The Gaggia Classic Pro is another highly respected choice, a robust machine with a loyal following, celebrated for its durability and moddability.
- Mid-Range Semi-Automatics: Stepping up, you’ll find machines with more robust build quality, better temperature stability, and more powerful steam wands, allowing for greater consistency and control.
- Recommendation: The Rancilio Silvia is a legendary machine, a workhorse that, with a little practice, can produce exceptional espresso and steam. Machines with PID controllers (Proportional-Integral-Derivative) offer precise temperature control, crucial for consistent espresso.
- Super-Automatics (for convenience): While they offer unparalleled convenience, grinding, tamping, and brewing with the touch of a button, they often sacrifice some control over the variables that contribute to truly cafe-quality espresso. Their milk frothing systems can be good, but rarely match the microfoam achievable with a manual steam wand. If convenience is paramount, a machine like the Jura ENA 4 offers excellent bean-to-cup coffee, but for ultimate cappuccino quality, a semi-automatic is preferred.
The Indispensable Grinder
Many home baristas make the mistake of skimping on the grinder, but it is arguably the most critical piece of equipment after the espresso machine itself. A consistent, fine grind is absolutely essential for proper espresso extraction.
- Why Burr Grinders are Crucial: Blade grinders “chop” coffee beans inconsistently, creating a mix of fine dust and large chunks. This leads to uneven extraction, where some particles are over-extracted (bitter) and others are under-extracted (sour). A burr grinder, either conical or flat, crushes the beans uniformly, allowing for precise control over grind size.
- Grind Settings for Espresso: Espresso requires a very fine setting. Your grinder should offer many small adjustments to allow you to “dial in” your espresso.
- Recommendation: The Baratza Encore ESP is an excellent entry-level electric burr grinder specifically designed for espresso, offering fine adjustments. For a step up in build quality and grind consistency, the Eureka Mignon Specialita is a popular choice among enthusiasts, known for its quiet operation and precise stepless adjustment.
Steaming Pitchers & Thermometers
- Stainless Steel Pitcher: A good quality stainless steel milk pitcher is essential. Look for one with a comfortable handle and a well-defined spout for pouring. Having a couple of sizes (e.g., 12oz and 20oz) can be useful depending on how many drinks you’re making.
- Thermometer: While experienced baristas can judge milk temperature by hand, a small clip-on thermometer is invaluable for beginners to ensure you don’t overheat (scald) the milk, which ruins its sweetness and texture. Aim for 140-150°F (60-65°C).
Accessories That Make a Difference
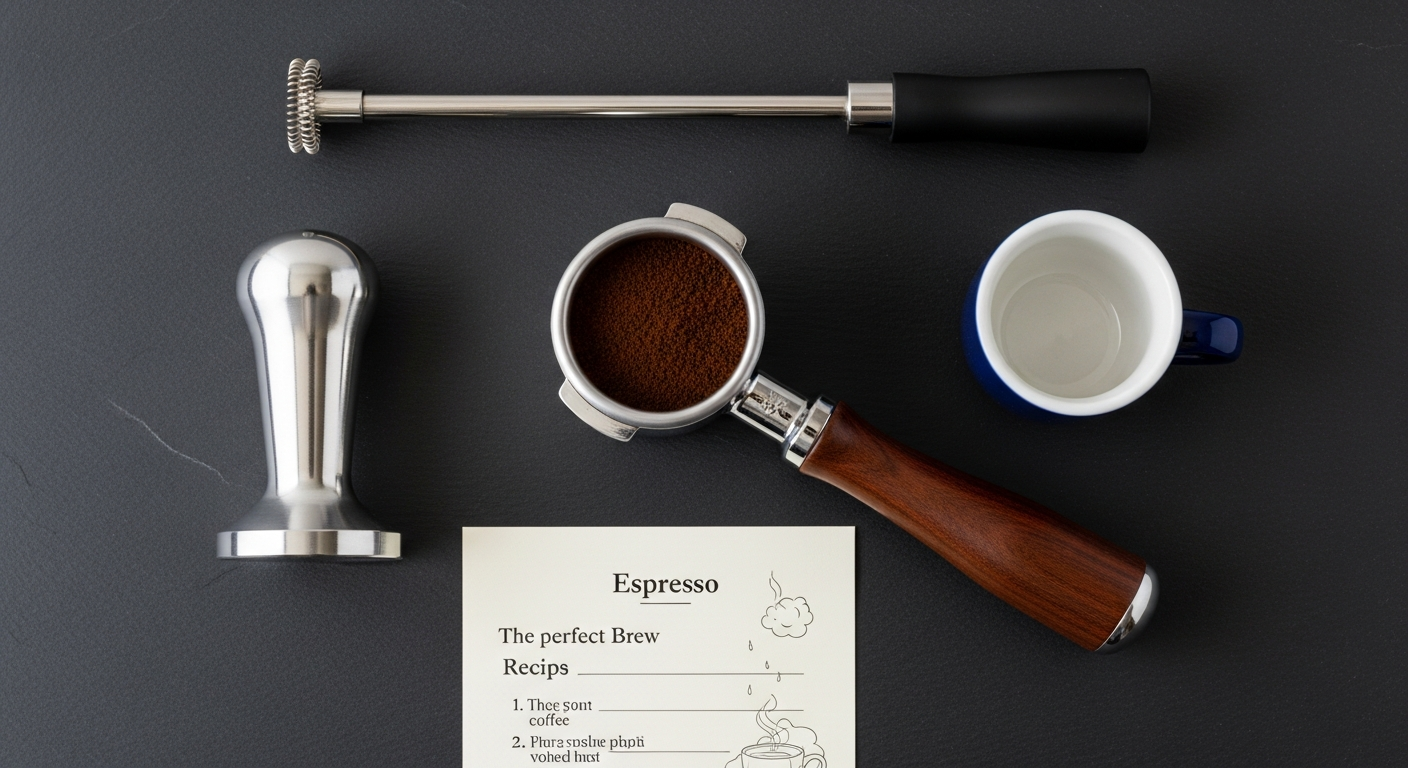
- Tamper: Most machines come with a plastic tamper, which is rarely adequate. Invest in a solid, heavy metal tamper that fits your portafilter basket perfectly (usually 58mm or 54mm, check your machine’s specifications). A calibrated tamper can help ensure consistent pressure.
- Knock Box: A dedicated container for knocking out spent coffee pucks is a must-have for cleanliness and convenience.
- Precision Scale: A small digital scale accurate to 0.1 gram is critical for consistent dosing of coffee and measuring espresso yield. This eliminates guesswork and helps you reproduce perfect shots.
- Espresso Cups/Glasses: Pre-heating your cups is a small but significant step. Ceramic or glass cups designed for cappuccino (typically 6-8 oz) will keep your drink warm longer.
- Cleaning Brushes and Cloths: Keeping your machine clean is paramount for both hygiene and longevity. A group head brush, steam wand cleaning cloth, and backflushing blind basket are essential.
Mastering the Espresso Shot
The espresso shot is the canvas upon which your cappuccino is painted. Getting it right requires attention to detail, precision, and a willingness to “dial in” your settings. Think of it as a delicate dance between time, temperature, pressure, and finely ground coffee.
Choosing Your Beans Wisely
The quality of your final drink begins with the beans. Don’t underestimate this step.
- Freshness Above All: Always buy whole beans with a “roasted on” date. Avoid beans that are past 4-6 weeks from roast, as they quickly lose their volatile aromatics and crema-producing oils.
- Roast Level: While personal preference plays a role, medium to dark roasts often perform best for espresso, offering balanced flavors and good crema. Lighter roasts can be more challenging to extract properly for espresso, often yielding brighter, more acidic shots.
- Storage: Store beans in an airtight container, away from light, heat, and moisture. Do not store them in the refrigerator or freezer for daily use, as this can introduce moisture and freezer burn.
The Art of Grinding
This is where consistency is king. The grind size dictates how quickly water flows through the coffee, directly impacting extraction.
- Dialing In: This refers to the process of adjusting your grinder to achieve the ideal espresso shot. For a typical double shot (around 18-20 grams of coffee), you’re aiming for an extraction time of 25-30 seconds, yielding 36-40 grams of liquid espresso.
- If your shot extracts too quickly (under 20 seconds): The grind is too coarse. The water flows too freely, resulting in an under-extracted, sour, and watery shot with thin crema. Adjust your grinder finer.
- If your shot extracts too slowly (over 35 seconds): The grind is too fine. The water struggles to pass through, leading to an over-extracted, bitter, and thick shot with dark, patchy crema. Adjust your grinder coarser.
- Small Adjustments: Make very small adjustments to your grinder and pull a new shot to test. It’s a process of trial and error, but incredibly rewarding when you hit the sweet spot.
Dosing and Tamping with Precision
Once you have the perfect grind, consistency in dosing and tamping is paramount.
- Dosing: Use your precision scale to weigh your ground coffee. For a double shot, 18-20 grams is a common starting point. Grind directly into your portafilter basket.
- Distribution: Before tamping, ensure the coffee grounds are evenly distributed in the basket. You can gently tap the portafilter on your counter or use a distribution tool to level the grounds. Uneven distribution leads to channeling (water finding paths of least resistance), resulting in inconsistent extraction.
- Tamping Technique:
- Place the portafilter on a flat, stable surface.
- Hold the tamper like a doorknob, ensuring your wrist is straight.
- Apply firm, even pressure straight down onto the coffee bed. The goal is to create a perfectly level and compact puck.
- Give the tamper a slight twist (a “polish”) as you lift it to remove any loose grounds from the edges.
Avoid over-tamping or tamping at an angle. The pressure isn’t as critical as the consistency and levelness of the tamp.
Pulling the Perfect Shot
With your portafilter locked into the group head, you’re ready for the moment of truth.
- Pre-infusion (if available): Some machines offer a pre-infusion phase, where a small amount of low-pressure water is applied to the coffee puck before full pressure. This saturates the grounds evenly, leading to a more consistent extraction.
- Extraction Time and Yield: Start the timer as soon as you activate the pump. Watch for the first drops of espresso to appear. Aim for 36-40 grams of liquid espresso (for an 18-20g dose) in 25-30 seconds.
- Visual Cues: A well-extracted shot should emerge from the spouts as a steady, thick stream, resembling warm honey or a “mouse tail.” The crema should be a rich, reddish-brown color, dense, and uniform.
- Troubleshooting:
- Too Blonde/Pale Crema, Fast Extraction: Under-extracted. Grind finer.
- Dark, Mottled Crema, Slow Extraction: Over-extracted. Grind coarser.
- No Crema: Stale beans, too low temperature, or very coarse grind.
The Magic of Milk Steaming and Texturing
Steaming milk for a cappuccino is an art form. The goal is to transform cold milk into a velvety, glossy liquid with a consistency often compared to wet paint or melted ice cream – this is microfoam. It’s crucial for both texture and sweetness.
Starting with the Right Milk
- Cold is Gold: Always start with milk directly from the refrigerator. The colder the milk, the more time you have to introduce air and properly texture it before it overheats.
- Fill Level: Fill your steaming pitcher about one-third to halfway full. Milk expands significantly, so don’t overfill.
Positioning the Steam Wand
This is arguably the most critical step for achieving microfoam. The steam wand performs two main actions: aerating (stretching) and texturing (integrating).
- Purge the Wand: Before steaming, quickly open the steam valve to clear any condensed water from the wand. Close it immediately.
- Submerge and Aerate (“Stretching”):
- Submerge the tip of the steam wand just below the surface of the milk, near one side of the pitcher.
- Open the steam valve fully and quickly.
- You should hear a gentle “tss-tss-tss” sound, like paper tearing. This is air being introduced into the milk. Avoid large, gurgling bubbles.
- Maintain this sound for a few seconds, lowering the pitcher slightly as the milk level rises. You’re aiming to increase the volume of the milk by about 15-20% for a cappuccino (less for latte).
Texturing for Microfoam (“Integrating”)
Once you’ve introduced enough air (the “stretching” phase), it’s time to integrate that air evenly throughout the milk.
- Submerge Deeper: Lower the pitcher so the steam wand tip is fully submerged, about 1-2 cm below the surface.
- Create a Vortex: Angle the pitcher slightly to create a strong swirling motion, a “vortex” in the milk. This whirlpool action breaks down any larger bubbles and evenly distributes the air, heating the milk consistently.
- Feel the Heat: Keep your free hand on the bottom of the pitcher. Continue steaming until the pitcher becomes too hot to comfortably hold (around 140-150°F or 60-65°C). Overheating the milk will burn its natural sweetness and destroy the microfoam. If using a thermometer, stop just before it hits 150°F.
- Shut Off Steam and Purge: Close the steam valve fully, then immediately remove the pitcher. Immediately purge the steam wand again to clear any milk residue, and wipe it clean with a dedicated damp cloth. This prevents milk from drying and clogging the wand.
Troubleshooting Milk Issues
- Too Many Large Bubbles: You introduced too much air too quickly, or the wand was not properly submerged during the texturing phase.
- Flat, Lifeless Milk: Not enough air introduced during the stretching phase, or milk was overheated.
- Burnt Taste: Milk was steamed too hot.
Bringing It All Together: The Cappuccino Assembly
With a perfectly pulled espresso shot and beautifully textured microfoam, you’re now ready for the grand finale: assembling your cappuccino. This is where the magic truly comes to life, culminating in a drink that is both delicious and visually appealing.
The Pour – Art and Science
The pour is not just about getting the milk into the cup; it’s about integrating the milk and espresso seamlessly to create that characteristic cappuccino texture and, if you’re feeling adventurous, some simple latte art.
- Prepare Your Espresso: Your espresso shot should ideally be pulled just before you start steaming your milk, or immediately after. It needs to be fresh and hot.
- Swirl Your Milk: After steaming, tap the pitcher gently on the counter to pop any remaining large bubbles, then swirl the milk vigorously. This redistributes the microfoam evenly throughout the milk, making it glossy and pourable. It should look like wet paint.
- The Integration Pour:
- Hold your espresso cup firmly.
- Start pouring the milk from a moderate height (about 4-6 inches above the cup) into the center of the espresso. This initial pour helps to integrate the espresso and milk without creating too much foam on top.
- As the cup fills and the liquid level rises, lower the pitcher closer to the surface of the drink.
- Continue pouring steadily, maintaining a consistent stream.
- The Finish (Optional Latte Art):
- For a classic cappuccino, you might stop at this point, aiming for a consistent layer of foam across the top.
- If you want to try a simple “white dot” or “heart,” once the cup is about two-thirds full, gently tilt the cup towards you and wiggle the pitcher slightly from side to side as you continue to pour, bringing the pitcher even closer to the surface. This motion will cause the thicker microfoam to emerge and create a pattern on the surface.
Practice is key here. Don’t be discouraged if your first few pours aren’t perfect. The goal is a delicious drink, and the art will follow.
The Ideal Serving
- Pre-heated Cups: Serve your cappuccino in pre-heated ceramic or glass cups. A cold cup will rapidly pull heat from your drink, diminishing its enjoyment.
- Immediate Enjoyment: A cappuccino is best enjoyed immediately after preparation, while the microfoam is at its peak and the flavors are perfectly integrated.
The Ritual – More Than Just a Drink
Making cappuccino at home is more than just following a recipe; it’s about embracing a ritual. It’s the aroma of freshly ground coffee, the satisfying whir of the grinder, the hiss of the steam wand, and the quiet concentration of the pour. This process can become a meditative start to your day or a comforting break that connects you more deeply to the simple pleasures of life. Enjoy the journey, savor the process, and delight in the delicious results of your newfound barista skills.
Maintaining Your Barista Setup
Just like any precision instrument, your espresso machine and grinder require regular cleaning and maintenance to ensure longevity, optimal performance, and, most importantly, the continued production of delicious coffee. Neglecting cleaning can lead to clogged components, off-flavors, and costly repairs.
Daily Cleaning Rituals
These simple steps should be performed after every use, or at least at the end of each day.
- Purge and Wipe Steam Wand: After every milk steaming session, immediately purge the steam wand for a second or two to clear any milk residue, then wipe it thoroughly with a dedicated damp cloth. This prevents milk from drying inside and outside the wand, which is very difficult to remove once hardened and can harbor bacteria.
- Rinse Portafilter and Basket: Remove the portafilter from the group head and knock out the spent coffee puck into your knock box. Rinse the portafilter and basket under hot water to remove any lingering coffee grounds and oils.
- Flush Group Head: After removing the portafilter, run the machine’s pump for a few seconds (without the portafilter in place). This flushes out any loose coffee grounds from the group head screen and gasket, ensuring a clean brewing environment for your next shot.
- Wipe Down Machine: Use a damp cloth to wipe down the exterior of your machine, including the drip tray and any splashes, to keep it looking pristine.
Regular Descaling
Minerals present in water (especially hard water) can build up inside your machine’s boiler and water lines, forming limescale. This scale can impede water flow, reduce heating efficiency, and eventually damage your machine. Descaling removes these mineral deposits.
- Frequency: The frequency of descaling depends on your water hardness and how often you use your machine. For most home users with moderately hard water, descaling every 1-3 months is a good guideline. If you use filtered water, you might extend this, but it’s still necessary.
- Process: Always follow your machine manufacturer’s descaling instructions, as the process can vary. Typically, it involves running a descaling solution (usually a citric acid-based product) through the machine, followed by several rinses with clean water.
- Warning: Never use vinegar to descale, as its acidity can damage internal components, especially seals and gaskets, in many espresso machines. Stick to recommended descaling solutions.
Backflushing and Group Head Care
Backflushing is a cleaning process specific to espresso machines with a three-way solenoid valve (common in semi-automatic machines). It uses water pressure to clean out built-up coffee oils and grounds from the group head and internal lines.
- Blind Basket: For backflushing, you’ll need a “blind” portafilter basket – one without holes.
- Frequency: Backflush with water weekly, and with a specialized espresso machine detergent (like Cafiza) every 1-2 weeks, depending on usage.
- Process (with detergent):
- Insert the blind basket into your portafilter and add a small amount (e.g., 1/2 teaspoon) of espresso detergent.
- Lock the portafilter into the group head.
- Run the pump for 10-15 seconds, then stop for 5-10 seconds. You’ll hear the pressure release as the detergent solution flows into the drip tray.
- Repeat this cycle 5-10 times.
- Remove the portafilter, rinse it thoroughly, and reinsert it (without detergent).
- Repeat the backflushing cycle with just water 5-10 times to flush out all detergent residue.
- Finally, pull a “dummy” espresso shot with just water to ensure no detergent taste remains.
- Gasket and Shower Screen: Periodically, inspect your group head gasket and shower screen. If the gasket is hardened or cracked, it can lead to leaks and poor pressure. If the shower screen is heavily clogged, remove it and scrub it clean. These parts are usually replaceable.
By incorporating these cleaning and maintenance routines into your home barista practice, you’ll not only extend the life of your valuable equipment but also ensure that every cappuccino you craft is as consistently delicious and clean-tasting as the very first.
Frequently Asked Questions (FAQ)
Q1: Can I make good cappuccino without an expensive espresso machine?
A: While a dedicated espresso machine provides the best results, you can still make a decent cappuccino-like drink with less expensive methods. For the “espresso” component, you could use a Moka pot (stove-top espresso maker) or an AeroPress for a strong, concentrated coffee. For milk, a handheld frother, a French press, or even vigorously shaking milk in a jar can create foam, though it won’t be true microfoam. The texture won’t be identical to cafe quality, but it’s a great way to enjoy the flavor profile without a significant initial investment.
Q2: What’s the best type of milk for cappuccino, especially for latte art?
A: Whole milk is generally considered the best for cappuccino and latte art due to its fat and protein content, which contribute to a stable, creamy microfoam that holds its shape. However, many plant-based milks have come a long way. Barista-edition oat milks (like Oatly Barista Edition or Minor Figures Oat Milk) are excellent alternatives, specifically formulated to steam and texture well. Soy milk can also work, but some brands curdle more easily. Experiment to find a plant-based option you love that steams well with your machine.