

Mastering the AeroPress: Your Complete Guide to Brewing Perfect Coffee
Mastering the AeroPress: Your Complete Guide to Brewing Perfect Coffee
Prepare to embark on a journey that transforms your daily coffee ritual into an art form. We’ll delve deep into the science of extraction, explore various brewing techniques, and share expert tips that will elevate your AeroPress game. By the end of this guide, you’ll not only understand the mechanics of the AeroPress but also develop the confidence to experiment and discover your own signature brew. Let’s unlock the full potential of this remarkable coffee maker together.
The AeroPress Unveiled: A Revolution in Coffee Brewing
At first glance, the AeroPress might seem deceptively simple – a plastic cylinder, a plunger, and a filter cap. Yet, within this minimalist design lies a powerful tool, conceived by Stanford engineering lecturer and inventor Alan Adler. His goal was to create a coffee maker that could produce a superior cup without bitterness or excessive acidity, and he succeeded spectacularly. The AeroPress achieves this through its unique brewing process, which combines immersion brewing with rapid, air-pressure-driven filtration.
The core components of an AeroPress are elegant in their functionality:
- Plunger: A cylindrical component with a silicone seal that creates a vacuum, pushing water through the coffee bed.
- Chamber: The main brewing cylinder where coffee and hot water steep.
- Filter Cap: Holds a small paper filter (or a reusable metal filter) and screws onto the bottom of the chamber.
- Paddle Stirrer: For agitation.
- Scoop: For measuring coffee (though a scale is highly recommended for precision).
What makes the AeroPress so beloved among the specialty coffee community, and why has it spawned an entire World AeroPress Championship?
- Versatility: It can brew everything from a concentrated shot resembling espresso to a full-bodied filter-style coffee, or even cold brew. The ability to control variables like grind size, water temperature, brew time, and coffee-to-water ratio allows for endless customization.
- Speed: A typical AeroPress brew cycle can be completed in under three minutes, making it ideal for busy mornings.
- Consistency: Its sealed brewing environment and controlled plunging minimize variables, making it remarkably consistent once you’ve dialed in a recipe.
- Portability & Durability: Made from robust, BPA-free polypropylene, the AeroPress is lightweight, shatterproof, and perfect for travel, camping, or office use.
- Easy Cleanup: One of its most celebrated features is the effortless cleanup. The compressed coffee puck is ejected as a compact cylinder, making disposal quick and mess-free.
- Clean Cup: The small paper filters effectively trap fines and oils, resulting in a remarkably clean, sediment-free cup that highlights the nuanced flavors of specialty coffee. For those who prefer more body, reusable metal filters are a popular alternative.
Understanding these fundamentals is the first step in truly mastering your AeroPress. Its ingenious design empowers you to extract incredible flavors from your coffee, consistently and conveniently. This aeropress brewing guide will equip you with the knowledge to harness these attributes to their fullest.
Essential Gear for Your AeroPress Journey
While the AeroPress itself is a marvel of simplicity, achieving truly outstanding coffee consistently requires a few additional tools. Think of these not as luxuries, but as investments in your daily ritual, each playing a crucial role in unlocking the full potential of your beans. Precision is paramount in specialty coffee brewing, and the right equipment provides that control.
- The AeroPress Brewer: Naturally, this is your core component. Whether you opt for the original AeroPress or the more compact AeroPress Go (designed for travel with its integrated mug), the brewing principles remain the same. Ensure you have a good supply of paper filters, or consider a reusable metal filter for a different cup profile.
- Freshly Roasted Whole Coffee Beans: This is arguably the most critical ingredient. Even the best brewer cannot compensate for stale or low-quality beans. Source specialty-grade, freshly roasted coffee, ideally within 2-4 weeks of its roast date. Look for roasters who provide roast dates on their packaging.
- High-Quality Burr Grinder: A consistent grind is fundamental to even extraction. Blade grinders “chop” beans unevenly, creating a mix of fine dust and coarse chunks, leading to inconsistent and often bitter or sour results. A conical burr or flat burr grinder, on the other hand, grinds coffee uniformly, ensuring every particle extracts at roughly the same rate. For AeroPress, you’ll often be using a medium-fine grind, similar to table salt.
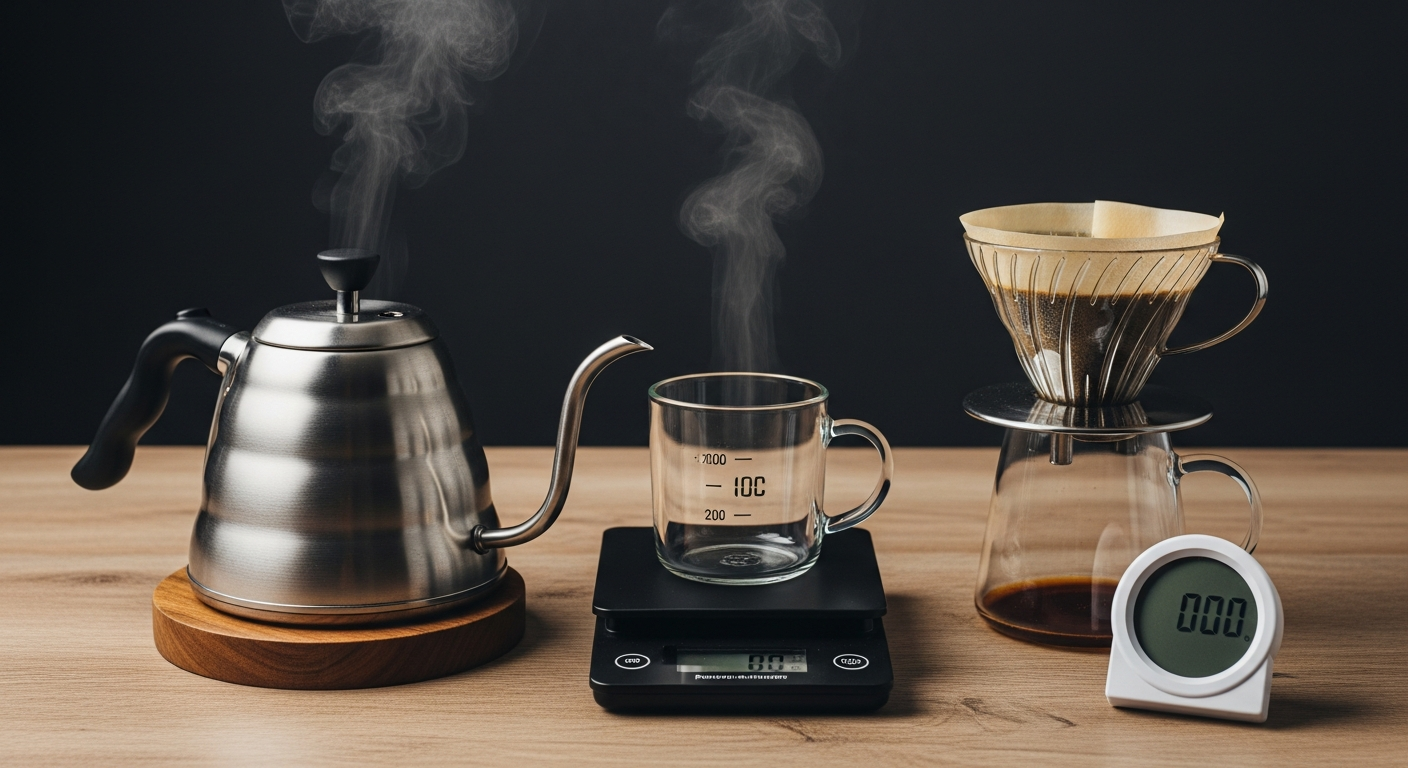
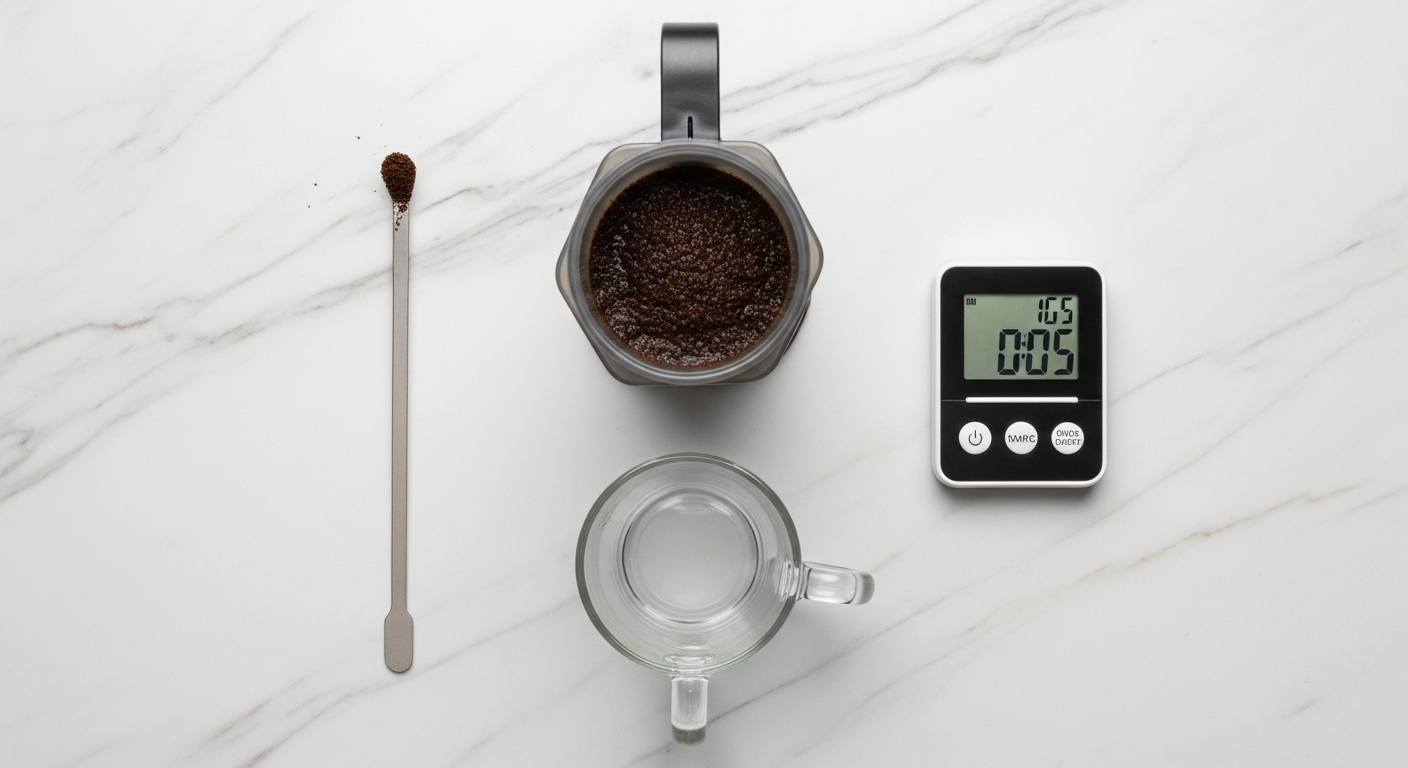
- Precision Scale (with Timer): Measuring coffee by volume (scoops) is notoriously inconsistent due to varying bean densities. A digital kitchen scale that measures in 0.1-gram increments is indispensable. This allows you to precisely measure your coffee dose and water volume, ensuring repeatability. Many scales also come with an integrated timer, which is incredibly useful for tracking brew time.
- Temperature-Controlled Kettle (Gooseneck Recommended): Water temperature significantly impacts extraction. An electric kettle with precise temperature control allows you to hit the sweet spot for your particular coffee (typically between 80-95°C or 175-205°F). A gooseneck spout offers controlled, even pouring, which is vital for saturating the coffee bed uniformly and minimizing channeling.
- Timer: Even if your scale doesn’t have one, a separate timer (on your phone, a dedicated device) is essential for monitoring your brew duration. Over- or under-extraction can drastically alter flavor, and a timer keeps you on track.
- Stirrer: While the AeroPress comes with its own stirrer, any non-abrasive spoon or paddle will do. This is used to ensure all coffee grounds are fully saturated during the bloom and brew phases.
- Mug or Server: A sturdy mug or carafe is needed to receive your freshly brewed coffee. Ensure it’s wide enough and stable enough to accommodate the AeroPress during plunging, especially if you’re using the inverted method.
Investing in these tools will dramatically elevate your AeroPress experience. They provide the control and precision necessary to consistently replicate your favorite recipes and experiment with confidence, pushing the boundaries of what your AeroPress can achieve. Don’t underestimate their impact – even small variations in grind, temperature, or ratio can lead to significant differences in your final cup.
The Science of Perfect AeroPress Extraction: Key Variables
To truly master the AeroPress, it’s crucial to understand the fundamental variables that influence coffee extraction. Each element plays a significant role in developing flavor, body, and aroma. By manipulating these, you gain precise control over your final cup, moving beyond mere brewing to genuine craftsmanship. This section of our aeropress brewing guide will illuminate these critical factors.
Coffee-to-Water Ratio
This ratio dictates the strength of your brew. It’s typically expressed as grams of coffee to milliliters of water (e.g., 1:15). A lower ratio (e.g., 1:10) produces a stronger, more concentrated brew, often requiring dilution, while a higher ratio (e.g., 1:18) yields a lighter, more delicate cup.
- Recommendation: Start with a 1:14 to 1:16 ratio for a balanced, full-bodied cup. For example, 17 grams of coffee to 250 grams (ml) of water is a good starting point. If you prefer a more concentrated brew to be diluted later (common with AeroPress), you might go as low as 1:8 or 1:10.
- Impact: Too little coffee (high ratio) results in a weak, watery, or under-extracted brew. Too much coffee (low ratio) can lead to an overly strong, sometimes bitter, and potentially over-extracted cup, especially if not diluted.
Grind Size
The surface area of your coffee grounds dictates how quickly compounds are extracted. This is arguably the most impactful variable for dialing in your brew.
- Recommendation: For AeroPress, a medium-fine grind, similar to table salt, is a common starting point for the standard method. For the inverted method or espresso-style concentrates, you might go slightly finer, closer to fine sugar.
- Impact:
- Too Coarse: Water passes through too quickly, leading to under-extraction. The coffee will taste sour, thin, and underdeveloped.
- Too Fine: Water struggles to pass through, leading to over-extraction and potential clogging. The coffee will taste bitter, astringent, and can be difficult to plunge.
- Adjustment Tip: If your coffee tastes sour, go finer. If it tastes bitter, go coarser.
Water Temperature
Water temperature significantly impacts extraction. Hotter water extracts more quickly and intensely, while cooler water extracts more slowly and selectively. According to coffee science research, water temperature affects solubility and flavor compound extraction.
- Recommendation: The ideal range is typically 80-95°C (175-205°F).
- Lighter Roasts: Often benefit from higher temperatures (90-95°C / 195-205°F) to fully develop their complex flavors.
- Darker Roasts: May benefit from slightly cooler temperatures (80-88°C / 175-190°F) to mitigate bitterness and harshness.
- Impact:
- Too Hot: Can lead to over-extraction, scorching delicate flavors, and a bitter, hollow taste.
- Too Cool: Results in under-extraction, leading to a sour, weak, and underdeveloped cup.
Brew Time
This is the duration for which your coffee grounds are in contact with hot water.
- Recommendation: AeroPress brew times are generally short, ranging from 1 to 3 minutes, including the plunge.
- Impact:
- Too Short: Leads to under-extraction, resulting in a sour, watery, or acidic taste.
- Too Long: Can lead to over-extraction, resulting in a bitter, astringent, or muddy taste.
- Adjustment Tip: Along with grind size, brew time is your primary lever for fine-tuning extraction. Experiment within the 1-3 minute window, adjusting grind as needed.
Agitation (Stirring)
Stirring ensures even saturation of the coffee grounds, preventing dry spots and promoting uniform extraction.
- Recommendation: A brief, gentle stir (5-10 seconds) after adding water is usually sufficient. This is particularly important during the “bloom” phase, if you choose to do one.
- Impact:
- Insufficient Agitation: Can lead to uneven extraction, where some grounds are under-extracted and others are over-extracted, resulting in a muddled flavor.
- Excessive Agitation: Can accelerate extraction, potentially leading to bitterness, and may also introduce more fines into the brew, increasing sediment.
By understanding and consciously adjusting these variables, you move from simply following a recipe to actively crafting your perfect cup. The AeroPress excels at giving you this precise control, making it an ideal tool for any coffee connoisseur.
AeroPress Brewing Methods: Standard vs. Inverted
One of the AeroPress’s most celebrated attributes is its flexibility, particularly evident in the two primary brewing approaches: the Standard (or Traditional) Method and the Inverted Method. Each offers unique advantages and slight variations in the brewing experience and resulting cup profile. This aeropress brewing guide provides detailed steps for both.
The Standard Method (Traditional)
This is the method recommended in the AeroPress instruction manual and is known for its simplicity and efficiency. It’s an excellent starting point for beginners.
Pros: Simpler setup, less risk of spills, very quick.
Cons: Some minor drip-through can occur before plunging, leading to slightly less control over immersion time.
Step-by-Step Standard Method:
- Prepare Your Water: Heat water to your desired temperature (e.g., 90°C / 195°F for a medium roast).
- Grind Your Coffee: Grind 15-17g of fresh coffee to a medium-fine consistency (like table salt).
- Set Up the AeroPress: Place a paper filter into the filter cap and twist it onto the bottom of the AeroPress chamber. Place the AeroPress directly onto your sturdy mug or serving carafe.
- Rinse Filter (Optional but Recommended): Briefly pour a small amount of hot water through the filter to remove any paper taste and pre-heat your mug. Discard the rinse water.
- Add Coffee Grounds: Pour your ground coffee into the AeroPress chamber.
- Add Hot Water: Start your timer. Pour hot water over the grounds, ensuring they are fully saturated. For a 1:15 ratio, if you used 17g coffee, add about 250ml water.
- Stir: Gently stir the coffee and water for about 10-15 seconds to ensure even saturation.
- Insert Plunger: Insert the plunger into the top of the chamber, creating a slight vacuum. This stops any further dripping and begins the immersion phase.
- Steep: Allow the coffee to steep. Total brew time (from water pour to finished plunge) can range from 1 to 2 minutes. Experiment to find your sweet spot.
- Plunge: After steeping, press the plunger down slowly and steadily. This should take approximately 20-30 seconds. You should feel gentle resistance. Stop pressing when you hear a hissing sound, indicating all liquid has been extracted.
- Enjoy: Your concentrated brew is now ready. You can drink it as is or dilute it with hot water to your preferred strength.
The Inverted Method
The Inverted Method addresses the potential for drip-through by assembling the AeroPress upside down, creating a complete immersion brewing environment from the start. This gives you absolute control over steep time.
Pros: Full immersion brewing, no pre-drip, maximum control over brew time, less messy when adding grounds and water.
Cons: Requires careful handling during the flip, slightly more complex setup, higher risk of spills if not handled properly.
Step-by-Step Inverted Method:
- Prepare Your Water: Heat water to your desired temperature (e.g., 90°C / 195°F).
- Grind Your Coffee: Grind 15-17g of fresh coffee to a medium-fine consistency.
- Set Up the AeroPress Inverted: Insert the plunger into the main chamber, stopping just below the ‘4’ mark (or wherever it provides a stable base). Place the AeroPress upside down on a stable, flat surface.
- Add Coffee Grounds: Pour your ground coffee into the chamber.
- Add Hot Water: Start your timer. Pour hot water over the grounds. For 17g coffee, add about 250ml water. Ensure all grounds are saturated.
- Stir: Gently stir for 10-15 seconds.
- Steep: Allow the coffee to steep for your desired duration (e.g., 1 to 2 minutes). Since there’s no pre-drip, you have complete control over this immersion time.
- Prepare Filter Cap: While steeping, place a paper filter in the filter cap and rinse it with hot water. Twist the filter cap onto the chamber securely.
- Flip onto Mug: This is the trickiest part. Carefully and quickly invert the AeroPress onto your sturdy mug. Hold both the AeroPress and the mug firmly during the flip.
- Plunge: Press the plunger down slowly and steadily, taking about 20-30 seconds. Stop when you hear the hissing sound.
- Enjoy: Your perfectly brewed coffee concentrate is ready. Dilute with hot water if desired.
Choosing Your Method
Both methods yield excellent results. Many prefer the Inverted Method for the perceived control and ability to achieve a slightly fuller body due to complete immersion. The Standard Method is favored for its sheer speed and simplicity. We encourage you to try both and see which one resonates more with your workflow and taste preferences. With practice, both become second nature, allowing you to consistently brew exceptional coffee.
Mastering Advanced AeroPress Techniques & Customization
Once you’re comfortable with the basics of AeroPress brewing, a world of advanced techniques and customization opens up. These methods allow you to fine-tune your extraction, accentuate specific flavor notes, and explore the vast potential of this versatile brewer. This section of our aeropress brewing guide will equip you with the knowledge to push your brewing further.
The Art of the Bloom
Blooming is a crucial pre-infusion step, especially for freshly roasted coffee. When hot water first hits coffee grounds, CO2 gas escapes, creating a “bloom” of bubbles. This degassing process allows the water to more effectively and evenly saturate the grounds, leading to a more consistent and flavorful extraction.
- Technique: After adding your dry coffee grounds to the AeroPress, pour a small amount of hot water – about twice the weight of your coffee – just enough to fully saturate the grounds. For 17g of coffee, use 34ml of water.
- Timing: Allow the coffee to bloom for 30-45 seconds. You’ll see the grounds expand and bubble.
- Benefit: A more even extraction, reducing sourness (under-extraction) and bitterness (over-extraction) caused by uneven wetting.
Plunging Technique and Speed
The speed and pressure with which you plunge can significantly impact your brew, affecting both extraction time and the clarity of your cup.
- Slow and Steady (Recommended): A controlled, consistent plunge over 20-30 seconds is generally recommended. This allows for thorough extraction and minimizes the risk of channeling (water finding paths of least resistance through the coffee bed, leading to uneven extraction). It also helps keep fines out of your cup.
- Faster Plunge: A quicker plunge (10-15 seconds) can result in a slightly lighter body and sometimes less extracted flavor, potentially bordering on under-extraction. It might also push more fines through the filter.
- Too Much Pressure: If you’re struggling to plunge or it feels extremely difficult, your grind might be too fine, or you might be using too much coffee. Forcing it can damage your AeroPress seal or cause blowouts.
Exploring Filter Types: Paper vs. Metal
The standard AeroPress comes with paper filters, but reusable metal filters offer a different experience.
- Paper Filters:
- Pros: Excellent clarity, very clean cup profile, filters out nearly all fines and oils, resulting in a lighter body and brighter flavors. Easy cleanup.
- Cons: Single-use (environmental consideration), can impart a slight paper taste if not rinsed.
- Metal Filters (e.g., Able Disk, Fellow Prismo):
- Pros: Reusable (eco-friendly), allows more oils and micro-fines into the cup for a fuller body and richer mouthfeel, enhances certain flavors.
- Cons: Can result in a slightly cloudier cup with more sediment, requires thorough cleaning after each use.
- Experiment: Try both to see which aligns with your preferred taste and texture. Some even double up paper filters for ultra-cleanliness or use a metal filter with a paper filter on top for a hybrid approach.
Bypass Brewing for Strength and Volume
The AeroPress excels at brewing a concentrated “espresso-style” shot. If you want a full mug of coffee but don’t want to over-extract by adding too much water during the steep, bypass brewing is your friend.
- Technique: Brew a highly concentrated coffee using a lower coffee-to-water ratio (e.g., 1:8 or 1:10). Once plunged, dilute this concentrate with hot water until it reaches your desired strength and volume.
- Benefit: Allows you to create a larger volume of coffee without extending the brew time excessively or making an overly weak cup. It’s also great for creating iced coffee or latte bases.
Experimenting with Recipes and Immersion Times
The AeroPress community thrives on shared recipes. The World AeroPress Championship is a testament to the endless variations. Don’t be afraid to experiment!
- Espresso-Style Concentrate: Use a finer grind, a higher coffee dose (e.g., 20g), less water (e.g., 60ml), and a shorter steep time (e.g., 45-60 seconds) with firm, steady plunge. Dilute with hot water or milk for an Americano or latte.
- Cold Brew Concentrate: Use a coarse grind, room temperature or cold water, and an extended steep time (12-24 hours). Plunge and dilute with water or milk.
- Immersion Focus: For a tea-like immersion, use a coarser grind, fill the AeroPress almost to the top, and steep for 2-3 minutes before a gentle plunge.
The beauty of the AeroPress lies in its forgiving nature, even as it rewards meticulous attention to detail. Embrace the journey of discovery, document your favorite recipes, and continually refine your approach. With these advanced techniques, your AeroPress will become an even more powerful tool in your pursuit of the perfect cup.
Troubleshooting Common AeroPress Brewing Issues
Even with the most comprehensive aeropress brewing guide, sometimes things don’t go perfectly. The AeroPress is remarkably forgiving, but like any precision brewing tool, it can produce less-than-ideal results if certain variables are off. Learning to diagnose and fix common issues is a vital step in becoming a true AeroPress master.
1. Weak or Under-extracted Coffee (Sour, Thin, Hay-like, Lacking Body)
If your coffee tastes watery, overly sour, or lacks depth, it’s likely under-extracted. Not enough flavorful compounds have been dissolved from the grounds.
- Possible Causes:
- Grind size is too coarse.
- Water temperature is too low.
- Brew time is too short.
- Insufficient coffee dose (too high a water-to-coffee ratio).
- Uneven saturation of grounds.
- Solutions:
- Finer Grind: Adjust your grinder to a finer setting. This increases surface area, allowing more efficient extraction.
- Hotter Water: Increase your water temperature within the 80-95°C (175-205°F) range.
- Longer Brew Time: Extend your steeping time by 30-60 seconds.
- More Coffee: Increase your coffee dose, using a lower coffee-to-water ratio (e.g., from 1:16 to 1:14).
- Ensure Even Saturation: Stir thoroughly during the bloom and after adding all water.
2. Bitter or Over-extracted Coffee (Astringent, Hollow, Charred, Dry Finish)
A bitter taste, often accompanied by an unpleasant drying sensation on the tongue, indicates over-extraction. Too many undesirable compounds have been dissolved from the grounds.
- Possible Causes:
- Grind size is too fine.
- Water temperature is too high.
- Brew time is too long.
- Too much agitation/stirring.
- Too much coffee dose (too low a water-to-coffee ratio).
- Solutions:
- Coarser Grind: Adjust your grinder to a coarser setting.
- Cooler Water: Reduce your water temperature, especially for darker roasts, staying within the optimal range.
- Shorter Brew Time: Reduce your steeping time by 30-60 seconds.
- Less Agitation: Reduce stirring, or stir more gently.
- Less Coffee: Decrease your coffee dose, using a higher coffee-to-water ratio (e.g., from 1:14 to 1:16).
3. Sour Coffee (Acrid, Unpleasant Acidity, Underdeveloped Sweetness)
Sourness is a specific type of under-extraction. While bitterness often relates to too many compounds, sourness means the desirable acids haven’t been balanced by sweetness and other compounds that develop later in extraction.
- Possible Causes: Very similar to general under-extraction – grind too coarse, water too cool, brew time too short.
- Solutions: Refer to the “Weak or Under-extracted Coffee” solutions: Finer grind, hotter water, longer brew time, ensure even saturation.
4. Sludgy Coffee / Excessive Sediment
If your cup has noticeable fine particles at the bottom or a muddy mouthfeel, it usually points to grind issues or filter bypass.
- Possible Causes:
- Grind is too fine, producing excessive “fines.”
- Uneven grind (common with blade grinders).
- Filter isn’t properly seated or is damaged.
- Using a metal filter (which inherently allows more fines).
- Plunging too aggressively/quickly.
- Solutions:
- Coarser Grind: Try a slightly coarser grind.
- Quality Grinder: Invest in a good burr grinder if you don’t have one.
- Check Filter: Ensure your paper filter is perfectly flat and centered in the cap, or check your metal filter for damage.
- Gentle Plunge: Plunge slowly and steadily (20-30 seconds).
- Consider Paper: If using a metal filter, try a paper filter for a cleaner cup.
5. Difficult to Plunge / Excessive Resistance
If you find yourself having to exert significant force to plunge, it’s often a sign of restricted flow.
- Possible Causes:
- Grind size is too fine.
- Too much coffee dose.
- Filter is clogged (often by fines).
- Seal on the plunger is old or worn.
- Solutions:
- Coarser Grind: Adjust to a coarser grind.
- Less Coffee: Reduce your coffee dose slightly.
- Check Filter: Ensure the filter is not severely clogged before plunging (a proper grind should prevent this).
- Inspect Seal: Check your AeroPress plunger’s silicone seal for cracks or compression. Replace if necessary.
Remember, brewing specialty coffee is an iterative process. Make small, incremental changes to one variable at a time, taste the results, and adjust again. Keep notes of your recipes and observations. With a systematic approach, you’ll quickly learn how to dial in your AeroPress for consistently perfect results.
Caring for Your AeroPress: Cleaning and Maintenance for Longevity
One of the most appealing features of the AeroPress, beyond its exceptional brewing capabilities, is its incredibly simple cleanup. Proper care ensures not only hygiene but also extends the life of your brewer, particularly the crucial silicone seal. Maintaining your AeroPress is quick, easy, and essential for consistent, delicious coffee.
Immediate Post-Brew Cleaning (Every Use)
This is where the AeroPress truly shines in terms of convenience. The design allows for a remarkably fast and mess-free cleanup after each brew.
- Remove Filter Cap: Once your coffee is plunged, unscrew the filter cap from the bottom of the chamber.
- Eject Coffee Puck: Hold the AeroPress over a compost bin or trash can. Firmly press the plunger all the way through the chamber. The compressed puck of coffee grounds and the used paper filter will pop out as a single, neat disc. This is the magic of the AeroPress cleanup!
- Rinse Components: Quickly rinse the plunger and the chamber under warm running water. Use your fingers or a soft sponge to wipe away any residual coffee oils or grounds. The non-stick plastic typically means minimal scrubbing is required.
- Rinse Filter Cap: Rinse the filter cap. If using a metal filter, give it a quick scrub to remove any clinging fines.
- Air Dry or Wipe: Allow the components to air dry or quickly wipe them with a clean cloth.
Occasional Deep Cleaning (Weekly or Bi-Weekly, or as Needed)
While immediate rinsing is usually sufficient, periodic deeper cleaning helps remove any built-up coffee oils that can become rancid over time and affect the taste of your coffee.
- Disassemble: Fully separate the plunger from the chamber. The silicone seal can be gently pulled off the end of the plunger for thorough cleaning, but it’s not always necessary for routine deep cleans.
- Wash with Mild Soap: Wash all plastic components (chamber, plunger, filter cap, stirrer, scoop) with warm water and a small amount of mild, unscented dish soap. Avoid harsh abrasive cleaners or scrubbers, which can scratch the plastic and harbor bacteria.
- Clean the Seal: Pay special attention to the silicone seal. Ensure no coffee oils are trapped in its crevices. If you removed it, wash it thoroughly before reattaching.
- Rinse Thoroughly: Rinse all components meticulously to ensure no soap residue remains, as this can impart unwanted flavors to your next brew.
- Air Dry: Allow all parts to air dry completely before reassembling or storing.
Storage Tips for Longevity
How you store your AeroPress can also impact the lifespan of its components, particularly the silicone plunger seal.
- Store Disassembled: The most crucial tip is to store your AeroPress with the plunger slightly pulled out of the chamber, not fully inserted or tightly compressed. Storing the plunger fully inserted causes the silicone seal to remain compressed, which can prematurely wear it out and reduce its effectiveness. Over time, a compressed seal may not create a strong enough vacuum, leading to leaks or difficulties in plunging.
- Keep Away from Heat: While the AeroPress is durable, extreme heat can potentially warp the plastic. Store it in a cool, dry place.
- Check for Wear: Periodically inspect your silicone plunger seal for cracks, tears, or excessive flattening. A worn seal is the most common reason for an AeroPress to start leaking or losing pressure. Replacement seals are readily available and inexpensive.
By following these simple cleaning and maintenance practices, your AeroPress will continue to deliver excellent coffee for many years to come, making it a truly long-lasting and worthwhile investment in your coffee journey.
Conclusion: Your Journey to AeroPress Mastery
Congratulations! You’ve navigated this comprehensive aeropress brewing guide and are now equipped with the knowledge to consistently brew exceptional coffee. From understanding the nuanced science of extraction to mastering various brewing methods and troubleshooting common issues, you possess the tools to transform your daily coffee ritual into an art form.
The AeroPress stands as a testament to intelligent design and incredible versatility. Its ability to produce everything from robust, espresso-like concentrates to clean, flavorful pour-over style brews, all with remarkable consistency and minimal fuss, is why it remains a beloved staple for coffee lovers worldwide. Remember, the true magic of the AeroPress lies not just in following recipes, but in the freedom it grants for experimentation.
We encourage you to embark on your own journey of discovery. Play with grind sizes, adjust water temperatures, experiment with different ratios, and explore various steeping times. Each tweak can unlock a new dimension of flavor, allowing you to tailor your brew precisely to your palate and the unique characteristics of your chosen coffee beans. Keep a brewing journal, noting your recipes and tasting notes – this is how true mastery is achieved.
At Cafe Serre, our passion is helping you experience the very best in specialty coffee. Continue to explore, continue to refine, and most importantly, continue to enjoy the incredible coffee you create with your AeroPress. For more expert guides, ethically sourced beans, and top-tier brewing equipment, visit the Cafe Serre blog and store. Your next perfect cup awaits!
FAQ: Mastering Your AeroPress
Q: What’s the best grind size for AeroPress?
A: The ideal grind size for AeroPress is typically medium-fine, similar to table salt. However, this can be adjusted based on your brewing method and desired taste. A finer grind is often used for espresso-style concentrates or the inverted method, while a slightly coarser grind might be preferred for longer immersion times to prevent over-extraction. Experimentation is key!
Q: How much coffee should I use in an AeroPress?
A: A common starting point for a balanced brew is 15-17 grams of coffee. For a more concentrated brew, suitable for dilution or an espresso-like shot, you might use 20-25 grams. The coffee-to-water ratio is crucial; a typical range is 1:10 (very strong) to 1:18 (lighter brew).
Q: Can I make espresso with an AeroPress?
A: While the AeroPress cannot produce true espresso (which requires 9 bars of pressure), it can make a highly concentrated coffee shot that closely resembles espresso in strength and body. Many recipes use a finer grind, a higher coffee-to-water ratio (e.g., 20g coffee to 60ml water), and a quick, firm plunge to achieve this “AeroPress-espresso” concentrate, which can then be used for Americanos or lattes.
Q: How do I clean my AeroPress?
A: Cleaning the AeroPress is remarkably simple. After brewing, unscrew the filter cap, then push the plunger all the way through the chamber to eject the compressed coffee puck and filter directly into a compost bin. Rinse the plunger, chamber, and filter cap under warm water. For a deeper clean, occasionally wash the components with warm, mild dish soap and rinse thoroughly. Always store the AeroPress with the plunger slightly separated from the chamber to prolong the life of the silicone seal.
Q: What’s the difference between the standard and inverted AeroPress methods?
A: The standard method places the AeroPress directly on the mug, allowing for some drip-through during steeping. The inverted method involves assembling the AeroPress upside down with the plunger partially inserted, creating a sealed chamber for full immersion without any drip-through. This gives you complete control over the steep time before you carefully flip and plunge. Both methods yield excellent coffee, but many prefer the inverted method for greater control over extraction.

