
Aeropress Guide
The Ultimate AeroPress Guide 2026: Master Every Brew from Concentrate to Cold Brew
Affiliate disclosure: This article may contain affiliate links. Recommendations are independent and editorially driven.
Welcome, fellow coffee enthusiasts, to the definitive guide to the AeroPress – a brewing marvel that has captured the hearts of coffee lovers worldwide since its humble beginnings. At cafeserre, we believe that exceptional coffee shouldn’t be confined to a café counter. It should be accessible, enjoyable, and an exploration of flavor right in your kitchen, office, or even at the summit of a mountain. The AeroPress, with its ingenious simplicity and remarkable versatility, perfectly embodies this philosophy.
In a world overflowing with complex espresso machines and intricate pour-over setups, the AeroPress stands out as a beacon of straightforward brilliance. Invented by Alan Adler in 2005, a Stanford engineering lecturer and founder of Aerobie (known for their flying discs), the AeroPress wasn’t designed by a barista but by an inventor frustrated with the poor quality and complex cleanup of traditional coffee makers. His goal was simple: to create a device that could produce genuinely excellent coffee quickly, with minimal effort and easy cleaning. He succeeded beyond anyone’s wildest expectations.
This comprehensive AeroPress guide is meticulously crafted to transform you from a novice brewer into an AeroPress aficionado. We’ll delve into everything you need to know, from selecting the right beans and mastering grind sizes to exploring various brewing methods – be it the classic standard, the popular inverted, or even concocting a refreshing cold brew. We’ll cover essential accessories, troubleshooting tips, and even advanced techniques favored by competition champions. Whether you’re chasing that perfect shot of espresso-style concentrate, a robust full-bodied cup, or a bright, clean brew, the AeroPress offers a universe of possibilities. Prepare to unlock the full potential of this unassuming yet incredibly powerful coffee maker and elevate your daily ritual.
The AeroPress Revolution: Understanding Its Design and Enduring Appeal
The AeroPress might look deceptively simple, but its elegant design is a masterclass in functional engineering. Understanding what makes it tick is the first step to truly appreciating its capabilities and unlocking its full potential. Unlike most coffee brewers that rely on gravity or complex pressure systems, the AeroPress uses manual air pressure to extract coffee, leading to unique and consistent results.
What is an AeroPress? A Deceptively Simple Brewing Device
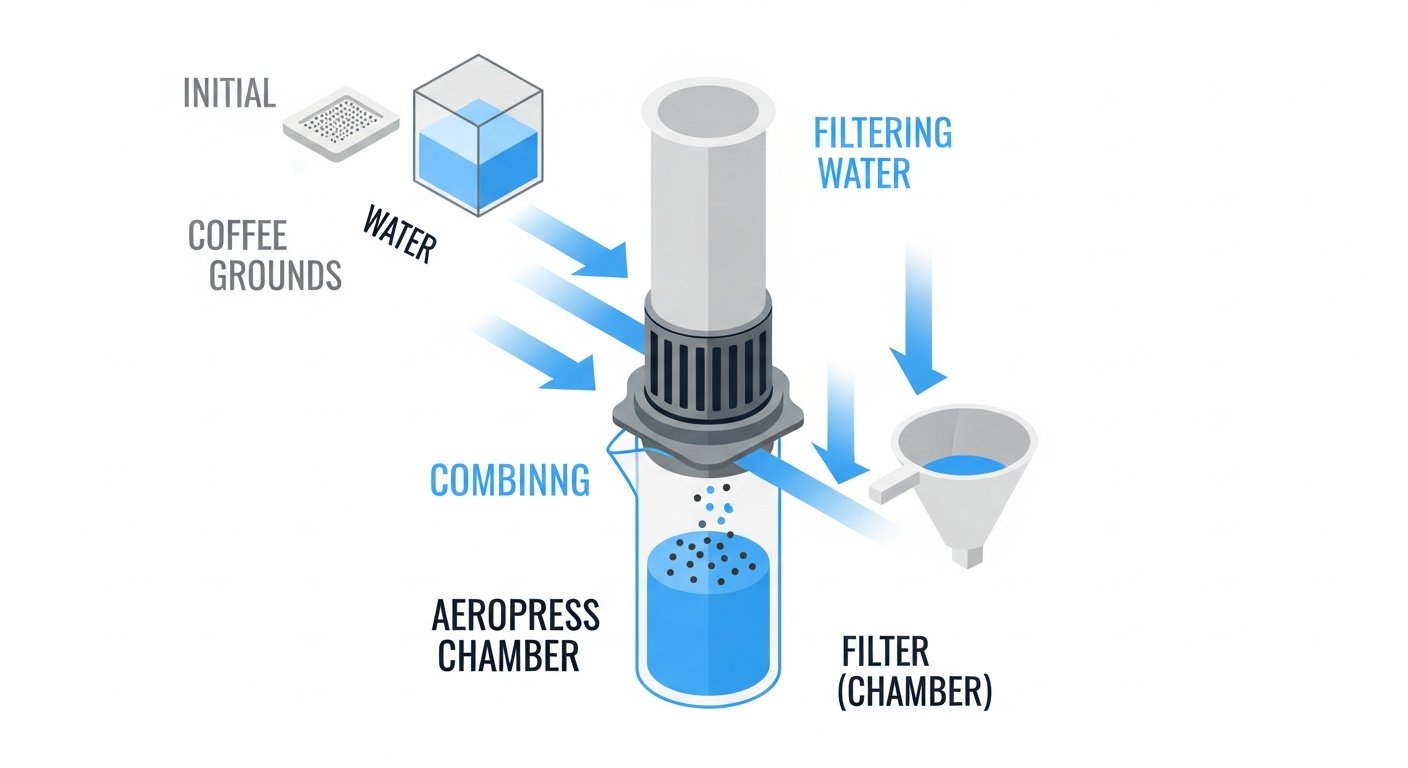
At its core, the AeroPress is a full immersion coffee maker consisting of three primary components:
- The Plunger: A cylindrical component with a rubber seal at one end. This is what you press down to create pressure.
- The Chamber: A larger cylinder where coffee grounds and hot water steep. It has a filter cap at the bottom.
- The Filter Cap: This screws onto the bottom of the chamber and holds a small, round paper filter (or a reusable metal filter).
The magic happens when the plunger is pressed into the chamber, forcing water through the coffee grounds and then through the filter, directly into your mug. This rapid, air-pressure-driven extraction is key to the AeroPress’s unique characteristics: low acidity, rich flavor, and a remarkably clean cup.
A Brief History: From Flying Discs to Coffee Excellence
Alan Adler’s journey into coffee began not out of a love for brewing, but a frustration with it. As an engineer and inventor, he applied his problem-solving prowess to what he perceived as deficiencies in existing coffee makers:
- Long Brewing Times: Leading to over-extraction and bitterness.
- High Acidity: A common complaint from many coffee drinkers.
- Sludgy Sediment: Especially problematic with French presses.
- Difficult Cleanup: Messy grounds and intricate parts.
After extensive experimentation with various prototypes, Adler finally landed on the pressurized immersion design in 2005. His unique approach, using air pressure through a compact, durable device, quickly gained traction, first among outdoor enthusiasts and then throughout the wider coffee community. The AeroPress was an immediate hit, praised for its speed, portability, and most importantly, its exceptional brew quality.
The Core Advantages of AeroPress Brewing
The enduring popularity of the AeroPress isn’t just a trend; it’s a testament to its inherent strengths:
- Speed: A delicious cup of coffee can be brewed in under two minutes, from start to finish.
- Versatility: It can produce everything from a strong, espresso-style concentrate to a full-bodied Americano, cold brew, or even tea.
- Clean Cup: The paper microfilters (or metal filters) effectively block sediment, resulting in a remarkably clean, grit-free cup.
- Low Acidity: The rapid extraction and full immersion brewing tend to produce coffee with significantly lower acidity compared to many other methods.
- Ease of Use: The brewing process is straightforward, and cleanup is incredibly fast and mess-free.
- Portability: Its compact, lightweight, and durable design makes it ideal for travel, camping, or brewing on the go.
- Durability: Made from robust, food-safe polypropylene, it’s built to last.
These advantages combine to create a brewing experience that is both forgiving for beginners and rewarding for seasoned coffee aficionados who love to experiment.
Why the AeroPress Reigns Supreme: Unpacking Its Unique Advantages
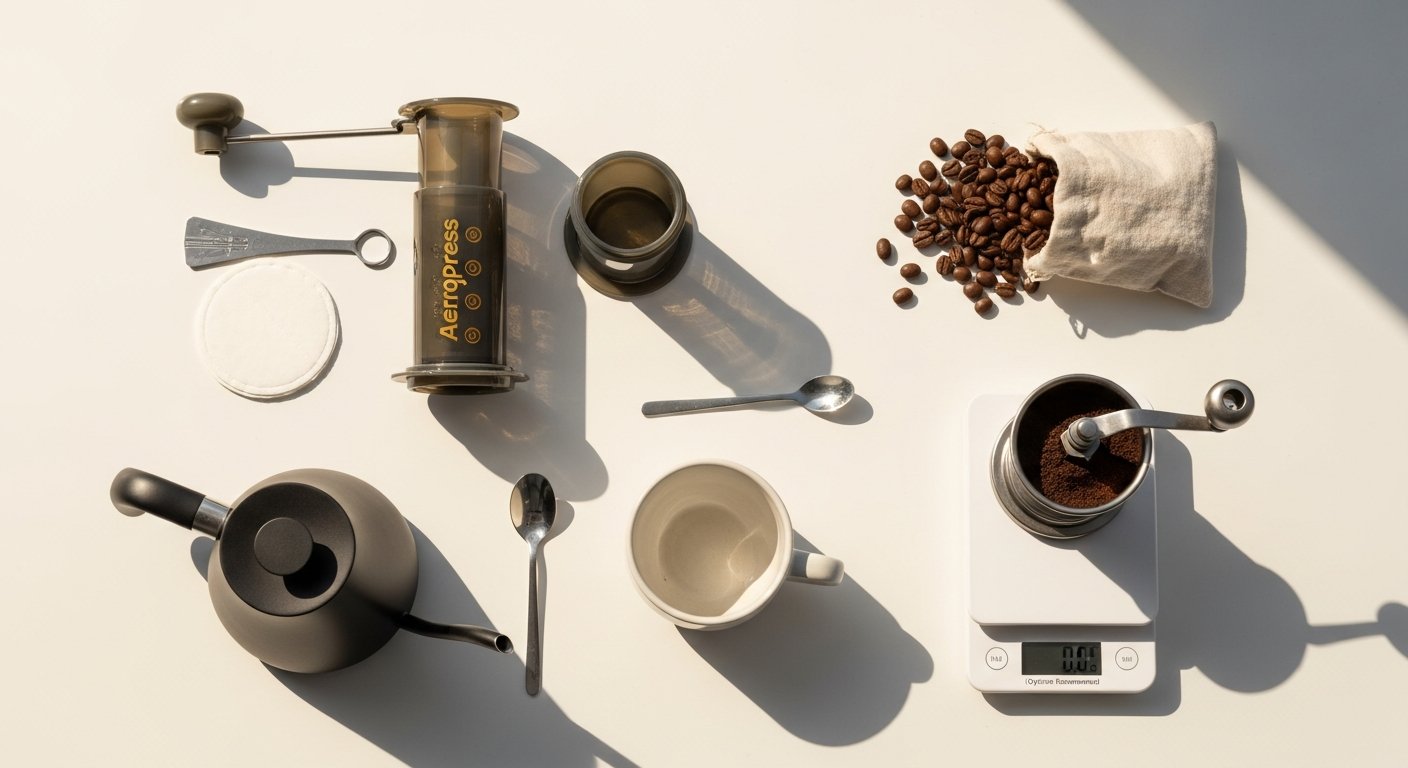
While the initial allure of the AeroPress might be its simplicity and low price point, its true genius lies in its ability to consistently produce high-quality coffee under diverse conditions. It’s a brewer that truly punches above its weight, offering a suite of benefits that make it a favorite for daily use and adventurous excursions alike.
Unmatched Versatility: One Brewer, Endless Possibilities
Perhaps the most compelling argument for the AeroPress is its incredible versatility. Unlike many brewing devices designed for a specific type of coffee (e.g., espresso machines for espresso, pour-overs for light roasts), the AeroPress excels across a broad spectrum of preparations:
- Espresso-Style Concentrate: With a fine grind and strong plunge, you can create a potent concentrate that mimics espresso, perfect for lattes, cappuccinos, or Americanos.
- Full-Bodied Coffee: Using a medium grind and slightly longer steep, it delivers a rich, full-flavored cup reminiscent of a French Press, but without the sediment.
- Clean, Filtered Coffee: Opting for a coarser grind and quicker plunge can yield a bright, clean cup similar to a pour-over, highlighting delicate notes.
- Cold Brew: The full immersion and ability to steep for extended periods make it an excellent (and surprisingly fast) cold brew maker.
- Tea and Other Infusions: Its immersion and filtration capabilities extend beyond coffee, making it suitable for brewing loose-leaf tea.
This adaptability means the AeroPress can cater to nearly any coffee craving, often within minutes.
[INLINE IMAGE 1: place after second H2 | alt=”aeropress guide concept illustration”]
The Clean Cup Experience: No Grit, All Flavor
One of the recurring frustrations with immersion brewers like the French Press is the inevitable fine sediment or “sludge” that makes its way into your cup. The AeroPress elegantly solves this problem. Its design, utilizing small paper microfilters (or reusable metal filters), acts as a highly effective barrier, ensuring that virtually no coffee grounds pass through. The result is a remarkably clean cup – a clarity of flavor that allows the nuances of your coffee beans to shine without the distraction of particulate matter.
Speed and Efficiency: Perfect for the Modern Lifestyle
In our fast-paced world, time is a precious commodity. The AeroPress understands this. From heating water to pressing and enjoying your brew, the entire process can be completed in under three minutes for most recipes. This rapid brewing time makes it an ideal choice for busy mornings, quick pick-me-ups at the office, or when you simply don’t want to wait for your coffee. Moreover, the efficiency of extraction means you get maximum flavor in minimal time.
Portability and Durability: Your Go-Anywhere Coffee Companion
For those who refuse to compromise on their coffee quality while traveling, camping, or commuting, the AeroPress is a revelation. Its lightweight, compact design (fitting easily into a backpack or even a large purse) combined with its robust, shatterproof polypropylene construction makes it virtually indestructible. Forget flimsy glass carafes or bulky machines; the AeroPress is designed for adventure. Many models even come with a convenient travel bag, further enhancing its appeal as the ultimate portable brewing solution.
Effortless Cleanup: A Barista’s Dream
Ask any coffee aficionado about their least favorite part of brewing, and cleanup often tops the list. Here, the AeroPress truly shines. After brewing, simply unscrew the filter cap, press the plunger all the way through, and a neat puck of compressed coffee grounds pops right out into your compost or trash. A quick rinse of the components and you’re done. There are no intricate parts to disassemble, no messy filters to wrestle with, and no stubborn residue to scrub. This unparalleled ease of cleaning makes the AeroPress a joy to use daily.
Lower Acidity, Smoother Taste: A Gentler Brew for Sensitive Stomachs
Many coffee lovers experience stomach discomfort or find traditional brews too acidic. The AeroPress, through its unique brewing process, tends to produce coffee with noticeably lower acidity. The short steep time combined with the efficient filtration helps to extract desirable flavors while leaving behind some of the compounds that contribute to bitterness and acidity. This often results in a smoother, more palatable cup that is gentler on the stomach, opening up the world of delicious coffee to a wider audience.
Assembling Your AeroPress Arsenal: Essential Gear for Optimal Brewing
While the AeroPress itself is wonderfully self-contained, a few complementary tools can significantly elevate your brewing experience, ensuring consistency, precision, and ultimately, a more delicious cup. Think of these as the supporting cast that helps your AeroPress be the star.
Beyond the Brewer: Must-Have AeroPress Accessories
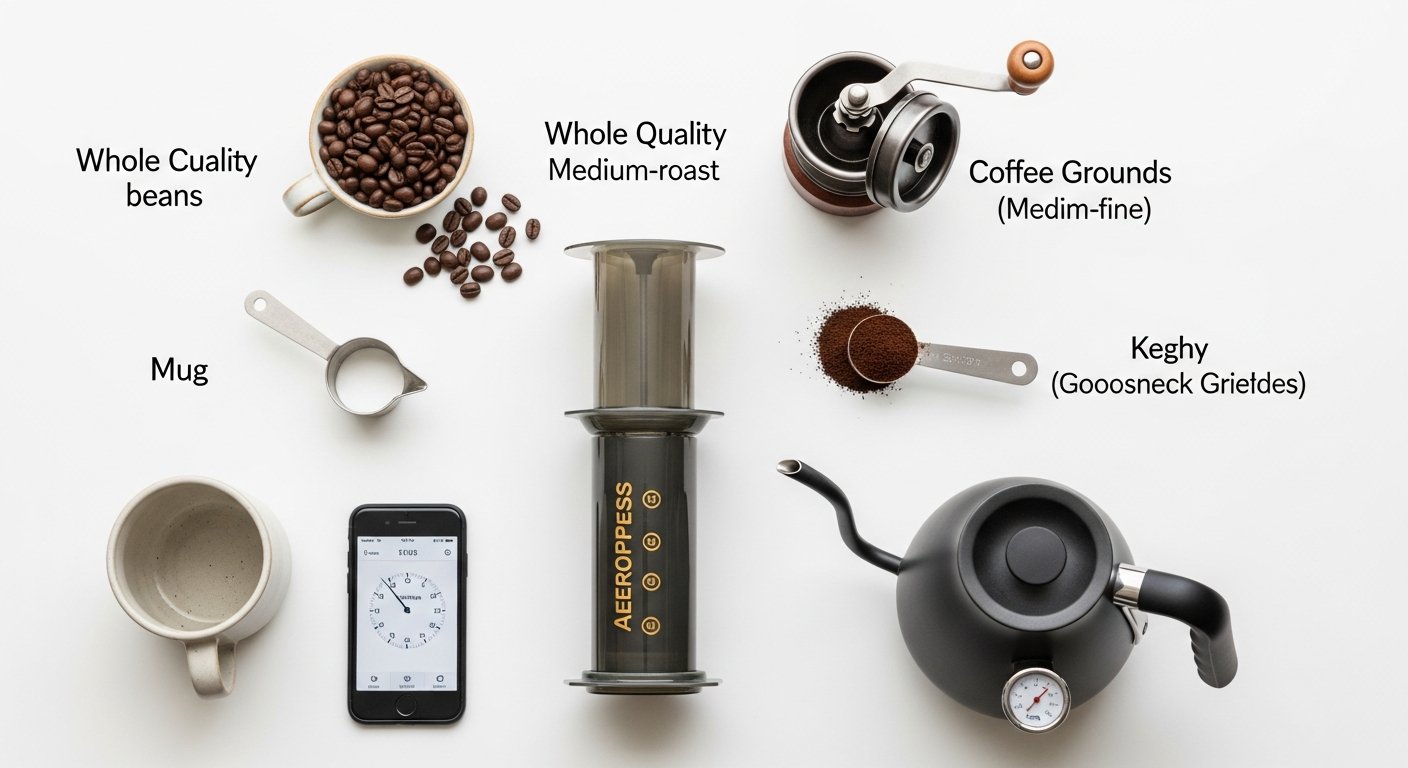
Your AeroPress typically comes with a stirrer, scoop, and a pack of paper filters. These are great to start, but for true mastery, consider these:
- Coffee Grinder: This is arguably the most crucial accessory.
- Burr Grinder (Manual or Electric): Essential for consistent grind size. Blade grinders “chop” beans unevenly, leading to inconsistent extraction and poor flavor. For AeroPress, consistency is key to controlling flavor.
- Recommendations: For manual, the Comandante C40, Timemore C2, or Hario Skerton Pro are excellent. For electric, Baratza Encore or Virtuoso+ offer great value.
- Digital Scale with Timer: Precision matters in coffee.
- Why: Measuring coffee by weight (grams) and water by weight (grams or milliliters, as 1g water ≈ 1ml water) is far more accurate than by volume (scoops). A scale ensures you replicate successful recipes.
- Why a Timer: Critical for controlling steep time, which directly impacts extraction and flavor.
- Gooseneck Kettle: For precise water pouring.
- Why: While not strictly necessary, a gooseneck kettle (electric or stovetop) allows for controlled, even pouring, which helps saturate the grounds uniformly. This is especially useful for methods where you’re blooming the coffee.
- Temperature Control: Electric gooseneck kettles with temperature control are ideal, as water temperature is a critical variable.
- Filters (Paper & Reusable): Experimentation is encouraged.
- Paper Filters: The standard AeroPress paper filters are incredibly effective at producing a clean, sediment-free cup. They are cheap and readily available.
- Reusable Metal Filters: Brands like Able Disk or Fellow Prismo (which includes a filter) offer fine mesh metal filters. These allow some fine sediment to pass through, yielding a fuller-bodied cup with more oils, akin to a French Press but still cleaner. They are also environmentally friendly.
- Mugs & Servers: The vessel matters.
- Sturdy Mug: Choose a mug that comfortably fits under the AeroPress and can withstand the pressure of pressing.
- Decanter/Server: If you’re brewing for more than one or making a concentrate to dilute later, a small server is invaluable.
Optional but Recommended Enhancements
For those looking to push the boundaries of their AeroPress experience, these additions can provide even greater control and new possibilities:
- Fellow Prismo Attachment: This replaces the standard filter cap and features a pressure-actuated valve. It allows you to brew “espresso-style” shots without worrying about drips or using the inverted method for full immersion. It comes with a reusable metal filter.
- Third-Party Filter Caps: Companies like PUCKPUCK offer specialized caps for brewing true cold brew concentrates or even larger batches.
- Air-Tight Coffee Canister: Essential for keeping your freshly roasted beans at their peak freshness. Exposure to oxygen, light, heat, and moisture degrades coffee rapidly.
- Water Filter Pitcher: Investing in a good water filter, such as a Brita or ZeroWater, can dramatically improve the taste of your coffee by removing impurities and chlorine.
Remember, while these tools enhance the experience, the AeroPress itself is designed to be highly functional with just its basic components. Start with the essentials, and gradually add accessories as your passion for AeroPress brewing grows.
Mastering the Fundamentals: Coffee Beans, Grind, and Water Quality
The AeroPress is an incredibly versatile brewer, but its true potential is unleashed when paired with quality ingredients and a keen understanding of the science behind a great cup. The three pillars of exceptional AeroPress coffee are the beans themselves, the precision of your grind, and the purity and temperature of your water.
The Heart of the Brew: Selecting Your Coffee Beans
The journey to a superb AeroPress coffee begins with the beans. No matter how perfectly you brew, bad beans will yield a bad cup.
- Freshness is Paramount: Always opt for freshly roasted whole beans. Look for a roast date, ideally within 2-4 weeks. Avoid pre-ground coffee if possible, as it stales rapidly.
- Roast Level: The AeroPress is incredibly forgiving and performs well with all roast levels, but different roasts will highlight different characteristics:
- Light Roasts: Often fruity, floral, and acidic. The AeroPress can tame some of the acidity while preserving delicate notes.
- Medium Roasts: Balanced, sweet, and nutty. A great starting point for beginners, offering a wide range of approachable flavors.
- Dark Roasts: Bold, chocolatey, and often smoky. The AeroPress can extract these rich flavors without excessive bitterness, especially when brewed quickly.
- Origin and Processing: Explore different origins (Ethiopian, Colombian, Brazilian, etc.) and processing methods (washed, natural, honey). Each offers unique flavor profiles that the AeroPress can beautifully articulate.
- Sustainability: Consider supporting roasters who prioritize ethical sourcing and sustainable practices.
The Crucial Variable: Understanding Grind Size for AeroPress
Grind size is perhaps the most influential variable in AeroPress brewing after the beans themselves. It dictates the contact surface area between water and coffee, directly impacting extraction rate and flavor.
- General Guideline: For most AeroPress recipes, a medium-fine grind is a good starting point – finer than a French Press, but coarser than espresso. It should resemble table salt.
- Standard Method: Often benefits from a slightly finer grind to ensure good extraction during the relatively short steep time.
- Inverted Method: Allows for a slightly coarser grind due to the longer, full immersion steep.
- Espresso-Style Concentrate: Requires a very fine grind, almost like fine sand or slightly coarser than espresso, to build sufficient pressure and resistance.
- Cold Brew: A coarser grind is generally preferred for longer steeping times to prevent over-extraction and bitterness.
Tips for Grind Adjustment:
- If your coffee tastes sour or watery (under-extracted), try a finer grind.
- If your coffee tastes bitter, hollow, or astringent (over-extracted), try a coarser grind.
- Always make small adjustments and note the changes.
[INLINE IMAGE 2: place after fourth H2 | alt=”aeropress guide comparison illustration”]
The Unsung Hero: Water Quality and Temperature
Coffee is over 98% water, so the quality of your water profoundly affects the taste of your brew. Beyond purity, temperature plays a critical role in dissolving desirable compounds from the coffee grounds.
- Water Quality:
- Filtered Water is Best: Tap water often contains chlorine, minerals, or other impurities that can impart off-flavors. Filtered water (using a Brita, charcoal filter, or even bottled spring water) is ideal.
- Avoid Distilled Water: While pure, distilled water lacks the mineral content necessary to properly extract flavors from coffee, often leading to a flat taste.
- Optimal TDS: Specialty coffee standards recommend water with a Total Dissolved Solids (TDS) between 75-250 ppm.
- Water Temperature:
- General Range: The ideal brewing temperature for most coffee is between 195°F (90.5°C) and 205°F (96°C).
- Lower Temperatures (e.g., 175-185°F / 80-85°C): Can be used for darker roasts to reduce bitterness, or for certain light roasts to highlight specific delicate notes. It also results in less perceived acidity.
- Higher Temperatures (e.g., 200-205°F / 93-96°C): Generally preferred for lighter roasts to ensure full extraction of complex flavors.
- Precision is Key: An electric kettle with temperature control is invaluable for hitting your target temperature consistently. If you don’t have one, bring water to a boil and let it sit off the heat for 30-60 seconds to reach the ideal range.
By paying close attention to these fundamentals – selecting fresh, quality beans, dialing in your grind, and using optimal water – you lay the groundwork for consistently exceptional AeroPress coffee.
Decoding AeroPress Brewing Methods: Standard, Inverted, and Beyond
The beauty of the AeroPress lies not just in its consistent results but in its adaptability. There isn’t one “right” way to brew; rather, there are several popular methods, each offering subtle differences in flavor profile, body, and convenience. Let’s explore the primary techniques.
The Standard Method: Quick, Clean, and Classic
The standard method is how the AeroPress was originally intended to be used. It’s straightforward, fast, and produces a remarkably clean cup.
- Setup: Place the AeroPress chamber directly onto your mug.
- Filter: Insert one paper filter into the filter cap and screw it onto the chamber.
- Pre-wet (Optional): Rinse the filter with a little hot water over your mug to remove any paper taste and pre-heat the mug. Discard the rinse water.
- Add Coffee: Add your desired amount of finely ground coffee (e.g., 15-17g for a single serving) into the chamber.
- Add Water: Pour hot water (around 200°F / 93°C) over the grounds, stirring gently to ensure full saturation. Fill to your desired level (e.g., to level 1 for a concentrate, or higher for a longer steep).
- Steep: Allow the coffee to steep for 30-60 seconds. Since the chamber is on the mug, some coffee will drip through slowly.
- Plunge: Insert the plunger and press down slowly and steadily for about 20-30 seconds until you hear a hiss.
- Serve: You now have a concentrated shot. Top with hot water for an Americano, or hot milk for a latte.
Flavor Profile: Generally produces a bright, clean cup with moderate body. The slight drip-through during steeping means the extraction starts immediately.
The Inverted Method: Full Immersion and Control
The inverted method became popular among AeroPress enthusiasts because it eliminates any premature dripping and allows for full immersion brewing, offering more control over steep time. It’s often preferred for longer steep times or when aiming for a richer, more robust brew.
- Setup: Stand the AeroPress upside down, with the plunger inserted just enough to create a stable base.
- Add Coffee: Add your desired amount of medium-fine ground coffee into the inverted chamber.
- Add Water: Pour hot water over the grounds, ensuring full saturation. Stir gently.
- Steep: Let the coffee steep for your desired time (1-3 minutes is common, but experiment!).
- Prepare Filter: While steeping, insert a paper filter into the filter cap and screw it onto the chamber.
- Flip & Plunge: Carefully and quickly flip the AeroPress onto your sturdy mug. Immediately press down slowly and steadily for 20-30 seconds.
- Serve: Enjoy your concentrated brew, diluted as desired.
Flavor Profile: Often yields a fuller-bodied, richer cup with more perceived sweetness. The full immersion ensures uniform extraction.
Note: The inverted method requires careful handling due to hot liquid. Always use a sturdy mug and exercise caution during the flip.
Beyond the Basics: Bypass, Cold Brew, and More
The AeroPress isn’t limited to just two methods. Its design allows for significant experimentation:
- Bypass Brewing (Dilution): This isn’t a separate brewing method, but a technique often used after brewing a concentrate. You brew a very strong, small amount of coffee (high coffee-to-water ratio), then “bypass” some of the grounds by adding hot water directly to the concentrate in your cup. This allows for greater control over perceived bitterness and can create a cleaner flavor than brewing a larger volume directly through the grounds.
- AeroPress Cold Brew: A fantastic application for the AeroPress, offering a faster cold brew than traditional methods.
- Grind: Use a coarse to medium-coarse grind.
- Coffee-to-Water Ratio: High concentrate, e.g., 30-40g coffee to 150-200ml cold water.
- Method: Use the inverted method. Add coffee, then cold water. Stir thoroughly to ensure all grounds are wet.
- Steep: Steep for 8-16 hours at room temperature or in the refrigerator.
- Plunge: After steeping, screw on the filter cap and plunge slowly into a pitcher or jar.
- Dilute: Dilute the resulting concentrate with water, milk, or ice to taste.
- Espresso-Style Concentrate with Prismo/Flow Control Cap: Attachments like the Fellow Prismo or PUCKPUCK’s Flow Control Filter Cap offer specialized valves that create more resistance, allowing you to achieve a higher pressure “espresso-style” shot without needing to use the inverted method. These are excellent for those who love milk-based drinks.
- Larger Batch Brewing: While designed for single servings, you can use the AeroPress to make a potent concentrate, then dilute it with hot water to serve multiple people, or to make larger quantities of cold brew.
Experimentation is the cornerstone of AeroPress mastery. Don’t be afraid to tweak grind size, water temperature, steep time, and coffee-to-water ratios. Each small adjustment can unlock a new facet of your coffee’s flavor profile.
Step-by-Step AeroPress Recipes: From Beginner to Barista Pro
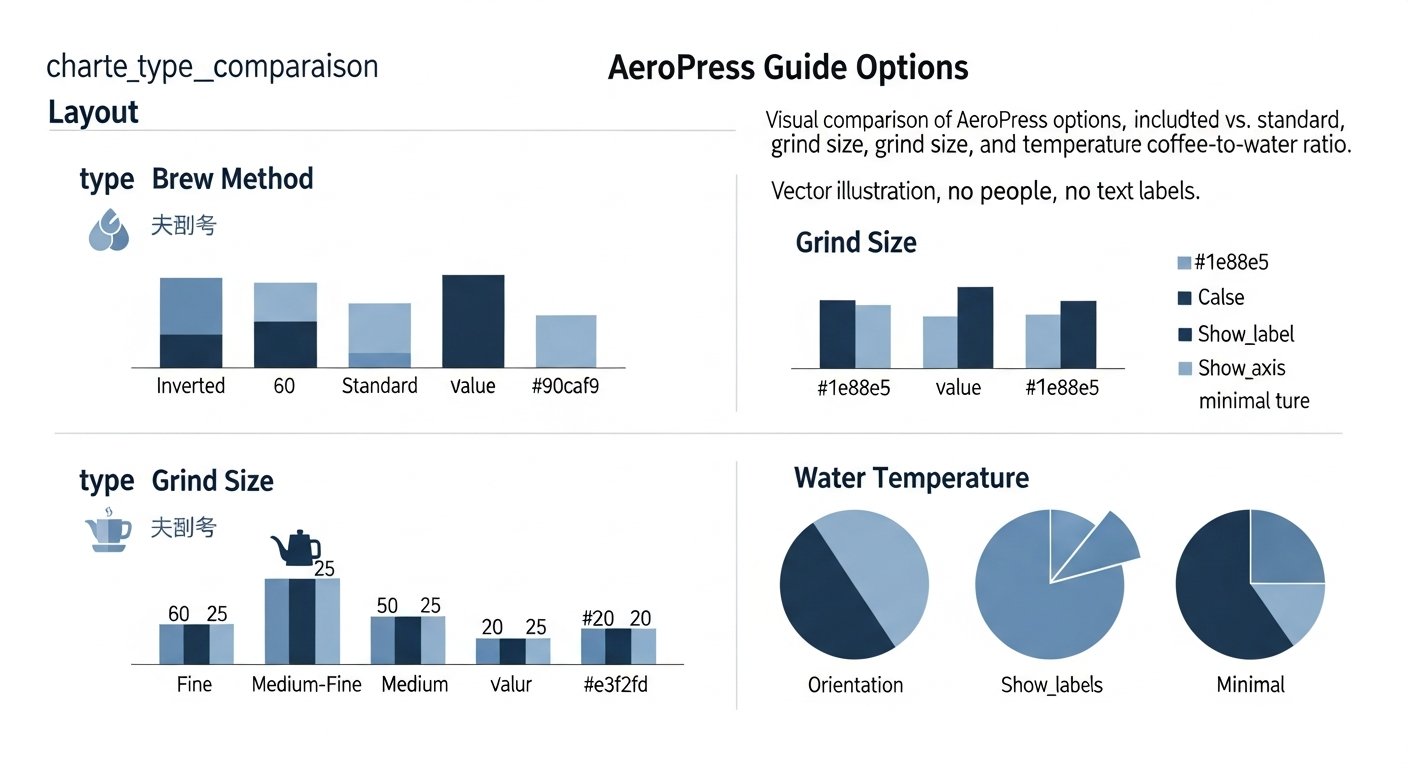
Now that you understand the different brewing methods and essential accessories, let’s dive into some practical recipes. These recipes provide a solid starting point, but remember, the true joy of the AeroPress is customization. Feel free to adjust to your personal taste!
Beginner’s Best: The Classic Americano (Standard Method)
This recipe is ideal for those new to the AeroPress, offering a balanced, clean cup reminiscent of a good drip coffee, with minimal fuss.
Yield: 1 serving (approx. 8 oz / 240ml)
Ingredients & Equipment:
- AeroPress with 1 paper filter
- 15g (approx. 3 AeroPress scoops) fresh whole bean coffee
- 220ml hot water (200°F / 93°C)
- Digital scale with timer
- Grinder (medium-fine, like table salt)
- Mug
Instructions:
- Heat Water: Heat 220ml of water to 200°F (93°C).
- Grind Coffee: Grind 15g of coffee to a medium-fine consistency.
- Set Up AeroPress: Place one paper filter in the filter cap and screw it onto the AeroPress chamber. Place the AeroPress directly onto your mug.
- Rinse Filter (Optional): Pour a small amount of hot water through the filter and into your mug. Discard the rinse water to remove any paper taste and pre-heat the mug.
- Add Coffee: Add the 15g of ground coffee into the AeroPress chamber. Gently tap the chamber to level the grounds.
- Add Water & Stir: Start your timer. Pour 70ml of hot water over the grounds, ensuring they are fully saturated. Stir gently but thoroughly for 10 seconds to ensure even extraction.
- Steep: Allow the coffee to steep for another 20 seconds (total steep time 30 seconds).
- Plunge: Insert the plunger and press down slowly and steadily for 20-30 seconds until you hear a hiss. You’ll have about 50-60ml of concentrate in your mug.
- Dilute & Enjoy: Top off the concentrate in your mug with the remaining 150-160ml of hot water. Stir and enjoy your classic Americano.
The Rich & Robust: Inverted Method Concentrate
This recipe maximizes immersion, producing a richer, fuller-bodied concentrate perfect for lattes, cappuccinos, or a stronger Americano.
Yield: 1 serving (approx. 70ml concentrate)
Ingredients & Equipment:
- AeroPress with 1 paper filter
- 17g fresh whole bean coffee
- 180ml hot water (195°F / 90.5°C)
- Digital scale with timer
- Grinder (medium grind, slightly coarser than table salt)
- Sturdy mug/server
Instructions:
- Heat Water: Heat 180ml of water to 195°F (90.5°C).
- Grind Coffee: Grind 17g of coffee to a medium consistency.
- Set Up Inverted AeroPress: Insert the plunger into the AeroPress chamber, so it’s stable when standing upside down.
- Add Coffee: Add the 17g of ground coffee into the inverted chamber.
- Add Water & Stir: Start your timer. Pour 180ml of hot water over the grounds. Stir gently but thoroughly for 15 seconds to ensure full saturation.
- Steep: Allow the coffee to steep for 1 minute 45 seconds (total steep time 2 minutes).
- Prepare Filter: While steeping, place one paper filter in the filter cap. You can pre-wet it if desired.
- Screw on Filter Cap: After steeping, carefully screw the filter cap onto the AeroPress.
- Flip & Plunge: Place your sturdy mug or server upside down over the AeroPress. Carefully and quickly flip the entire assembly right side up onto your mug. Immediately press down slowly and steadily for 20-30 seconds.
- Serve: You now have a potent concentrate. Enjoy as is, dilute with hot water for an Americano, or add steamed milk for a latte/cappuccino.
The Speedy Cold Brew: Overnight or Quick Method
This recipe provides a delicious cold brew concentrate, perfect for iced coffees or a smooth, low-acid beverage.
Yield: ~100ml concentrate (makes ~2-3 servings after dilution)
Ingredients & Equipment:
- AeroPress with 1 paper filter (or metal filter)
- 30g fresh whole bean coffee
- 150ml cold filtered water
- Digital scale
- Grinder (coarse grind, like coarse sea salt)
- Sturdy jar or server
Instructions (Overnight Method):
- Grind Coffee: Grind 30g of coffee to a coarse consistency.
- Set Up Inverted AeroPress: Insert the plunger into the AeroPress chamber, so it’s stable when standing upside down.
- Add Coffee & Water: Add the coarse grounds to the chamber. Pour 150ml of cold filtered water over the grounds.
- Stir & Steep: Stir thoroughly for 30-60 seconds to ensure all grounds are saturated. Let it steep at room temperature for 12-16 hours, or in the refrigerator for 18-24 hours. Cover loosely to prevent contamination.
- Prepare Filter: After steeping, place one paper filter (or metal filter) in the filter cap and screw it onto the AeroPress.
- Flip & Plunge: Place a sturdy jar or server upside down over the AeroPress. Carefully and quickly flip the entire assembly right side up. Press down very slowly and steadily (this will take longer due to the cold water and coarse grind) until all liquid is extracted.
- Dilute & Store: You’ll have a concentrated cold brew. Dilute with water, milk, or ice to taste (e.g., 1 part concentrate to 1-2 parts water/milk). Store remaining concentrate in an airtight container in the fridge for up to a week.
Instructions (Quick Method – for a stronger, slightly less refined taste):
- Follow steps 1-3 from the Overnight Method.
- Add Water: Use water just below room temperature, around 70-80°F (21-26°C) for slightly faster extraction.
- Stir & Steep: Stir thoroughly. Steep for 3-5 minutes.
- Plunge: Press very slowly and steadily.
- Dilute & Enjoy: Dilute immediately with ice and water/milk. This method results in a quicker, slightly bolder cold brew, but it might not be as smooth as the overnight version.
Discover more advanced barista skills in our comprehensive guide to becoming a home barista.
Elevating Your Brew: Advanced AeroPress Techniques and Customization
Once you’ve mastered the basic recipes, the AeroPress truly shines as a tool for experimentation. Its forgiving nature makes it an ideal platform to explore variables and craft your perfect cup. This section delves into advanced techniques, understanding crucial variables, and embracing the joy of personalizing your brew.
The Art of Variable Control: Unlocking Deeper Flavors
Every element in your brewing process contributes to the final taste. Becoming an AeroPress “pro” means understanding how to manipulate these variables to achieve specific flavor profiles.
- Coffee-to-Water Ratio:
- Higher Ratio (more coffee, less water): Results in a stronger concentrate, often with more body. Ideal for espresso-style drinks or when you want to dilute significantly.
- Lower Ratio (less coffee, more water): Produces a lighter, more delicate cup. Good for highlighting subtle notes in lighter roasts.
- Starting Point: A common starting point is 1:15 to 1:17 (e.g., 15g coffee to 225-255g water).
- Water Temperature:
- Higher Temps (200-205°F / 93-96°C): Extract more soluble compounds, often yielding higher acidity, brighter flavors, and greater sweetness, especially with light roasts.
- Lower Temps (175-190°F / 80-88°C): Reduce bitterness and acidity, making them suitable for dark roasts or those who prefer a smoother, less intense cup. Experiment to find the sweet spot for your specific beans.
- Grind Size:
- Finer Grind: Increases surface area, speeding up extraction. Good for short steep times or intense concentrates. Can lead to over-extraction if steeped too long.
- Coarser Grind: Reduces surface area, slowing down extraction. Best for longer steep times (like cold brew) or when aiming for a lighter body. Can lead to under-extraction if steeped too short.
- Tactile Test: Feel the grounds. Fine powder for espresso; fine sand for AeroPress standard; table salt for AeroPress inverted; coarse sand/sea salt for French press/cold brew.
- Steep Time:
- Shorter Steep (30-60 seconds): Generally produces a brighter, cleaner cup. Often paired with finer grinds and higher temperatures.
- Longer Steep (1-3 minutes+): Increases extraction, leading to a richer, fuller-bodied, and sometimes more bitter cup. Often paired with coarser grinds and lower temperatures.
- No-Steep (Flow-through): Some advocate for a very fast pour-over style extraction with the AeroPress by plunging immediately after adding water. This can yield extremely clean, light-bodied cups.
- Stirring:
- Aggressive Stirring: Promotes faster and more complete saturation and extraction.
- Gentle Stirring or No Stirring: Can lead to slightly slower extraction, potentially highlighting different flavor notes. Uniform saturation is still key.
- Plunge Speed:
- Fast Plunge (10-15 seconds): Minimizes additional extraction during the press, leading to a brighter cup.
- Slow Plunge (30-60 seconds): Adds a little more contact time under pressure, potentially increasing body and intensity. Be careful not to press too slowly, as it can over-extract.
Championship Recipes and Expert Hacks
The World AeroPress Championship is a testament to the brewer’s versatility, with competitors developing incredibly creative recipes. While specific championship recipes are often complex and bean-dependent, they highlight key principles:
- Layered Water Addition: Some recipes involve adding water in stages (e.g., bloom, then main pour) to control extraction.
- Temperature Gradients: Using different water temperatures for different stages of the brew (e.g., lower temp for blooming, higher for main steep).
- Multiple Filters: Using two paper filters can create an
The Ultimate AeroPress Guide 2026: Master Every Brew from Concentrate to Cold Brew
Affiliate disclosure: This article may contain affiliate links. Recommendations are independent and editorially driven.
Welcome, fellow coffee enthusiasts, to the definitive guide to the AeroPress – a brewing marvel that has captured the hearts of coffee lovers worldwide since its humble beginnings. At cafeserre, we believe that exceptional coffee shouldn’t be confined to a café counter. It should be accessible, enjoyable, and an exploration of flavor right in your kitchen, office, or even at the summit of a mountain. The AeroPress, with its ingenious simplicity and remarkable versatility, perfectly embodies this philosophy.
In a world overflowing with complex espresso machines and intricate pour-over setups, the AeroPress stands out as a beacon of straightforward brilliance. Invented by Alan Adler in 2005, a Stanford engineering lecturer and founder of Aerobie (known for their flying discs), the AeroPress wasn’t designed by a barista but by an inventor frustrated with the poor quality and complex cleanup of traditional coffee makers. His goal was simple: to create a device that could produce genuinely excellent coffee quickly, with minimal effort and easy cleaning. He succeeded beyond anyone’s wildest expectations.
This comprehensive AeroPress guide is meticulously crafted to transform you from a novice brewer into an AeroPress aficionado. We’ll delve into everything you need to know, from selecting the right beans and mastering grind sizes to exploring various brewing methods – be it the classic standard, the popular inverted, or even concocting a refreshing cold brew. We’ll cover essential accessories, troubleshooting tips, and even advanced techniques favored by competition champions. Whether you’re chasing that perfect shot of espresso-style concentrate, a robust full-bodied cup, or a bright, clean brew, the AeroPress offers a universe of possibilities. Prepare to unlock the full potential of this unassuming yet incredibly powerful coffee maker and elevate your daily ritual.
The AeroPress Revolution: Understanding Its Design and Enduring Appeal
The AeroPress might look deceptively simple, but its elegant design is a masterclass in functional engineering. Understanding what makes it tick is the first step to truly appreciating its capabilities and unlocking its full potential. Unlike most coffee brewers that rely on gravity or complex pressure systems, the AeroPress uses manual air pressure to extract coffee, leading to unique and consistent results.
What is an AeroPress? A Deceptively Simple Brewing Device
At its core, the AeroPress is a full immersion coffee maker consisting of three primary components:
- The Plunger: A cylindrical component with a rubber seal at one end. This is what you press down to create pressure.
- The Chamber: A larger cylinder where coffee grounds and hot water steep. It has a filter cap at the bottom.
- The Filter Cap: This screws onto the bottom of the chamber and holds a small, round paper filter (or a reusable metal filter).
The magic happens when the plunger is pressed into the chamber, forcing water through the coffee grounds and then through the filter, directly into your mug. This rapid, air-pressure-driven extraction is key to the AeroPress’s unique characteristics: low acidity, rich flavor, and a remarkably clean cup.
A Brief History: From Flying Discs to Coffee Excellence
Alan Adler’s journey into coffee began not out of a love for brewing, but a frustration with it. As an engineer and inventor, he applied his problem-solving prowess to what he perceived as deficiencies in existing coffee makers:
- Long Brewing Times: Leading to over-extraction and bitterness.
- High Acidity: A common complaint from many coffee drinkers.
- Sludgy Sediment: Especially problematic with French presses.
- Difficult Cleanup: Messy grounds and intricate parts.
After extensive experimentation with various prototypes, Adler finally landed on the pressurized immersion design in 2005. His unique approach, using air pressure through a compact, durable device, quickly gained traction, first among outdoor enthusiasts and then throughout the wider coffee community. The AeroPress was an immediate hit, praised for its speed, portability, and most importantly, its exceptional brew quality.
The Core Advantages of AeroPress Brewing
The enduring popularity of the AeroPress isn’t just a trend; it’s a testament to its inherent strengths:
- Speed: A delicious cup of coffee can be brewed in under two minutes, from start to finish.
- Versatility: It can produce everything from a strong, espresso-style concentrate to a full-bodied Americano, cold brew, or even tea.
- Clean Cup: The paper microfilters (or metal filters) effectively block sediment, resulting in a remarkably clean, grit-free cup.
- Low Acidity: The rapid extraction and full immersion brewing tend to produce coffee with significantly lower acidity compared to many other methods.
- Ease of Use: The brewing process is straightforward, and cleanup is incredibly fast and mess-free.
- Portability: Its compact, lightweight, and durable design makes it ideal for travel, camping, or brewing on the go.
- Durability: Made from robust, food-safe polypropylene, it’s built to last.
These advantages combine to create a brewing experience that is both forgiving for beginners and rewarding for seasoned coffee aficionados who love to experiment.
Why the AeroPress Reigns Supreme: Unpacking Its Unique Advantages
While the initial allure of the AeroPress might be its simplicity and low price point, its true genius lies in its ability to consistently produce high-quality coffee under diverse conditions. It’s a brewer that truly punches above its weight, offering a suite of benefits that make it a favorite for daily use and adventurous excursions alike.
Unmatched Versatility: One Brewer, Endless Possibilities
Perhaps the most compelling argument for the AeroPress is its incredible versatility. Unlike many brewing devices designed for a specific type of coffee (e.g., espresso machines for espresso, pour-overs for light roasts), the AeroPress excels across a broad spectrum of preparations:
- Espresso-Style Concentrate: With a fine grind and strong plunge, you can create a potent concentrate that mimics espresso, perfect for lattes, cappuccinos, or Americanos.
- Full-Bodied Coffee: Using a medium grind and slightly longer steep, it delivers a rich, full-flavored cup reminiscent of a French Press, but without the sediment.
- Clean, Filtered Coffee: Opting for a coarser grind and quicker plunge can yield a bright, clean cup similar to a pour-over, highlighting delicate notes.
- Cold Brew: The full immersion and ability to steep for extended periods make it an excellent (and surprisingly fast) cold brew maker.
- Tea and Other Infusions: Its immersion and filtration capabilities extend beyond coffee, making it suitable for brewing loose-leaf tea.
This adaptability means the AeroPress can cater to nearly any coffee craving, often within minutes.
[INLINE IMAGE 1: place after second H2 | alt=”aeropress guide concept illustration”]
The Clean Cup Experience: No Grit, All Flavor
One of the recurring frustrations with immersion brewers like the French Press is the inevitable fine sediment or “sludge” that makes its way into your cup. The AeroPress elegantly solves this problem. Its design, utilizing small paper microfilters (or reusable metal filters), acts as a highly effective barrier, ensuring that virtually no coffee grounds pass through. The result is a remarkably clean cup – a clarity of flavor that allows the nuances of your coffee beans to shine without the distraction of particulate matter.
Speed and Efficiency: Perfect for the Modern Lifestyle
In our fast-paced world, time is a precious commodity. The AeroPress understands this. From heating water to pressing and enjoying your brew, the entire process can be completed in under three minutes for most recipes. This rapid brewing time makes it an ideal choice for busy mornings, quick pick-me-ups at the office, or when you simply don’t want to wait for your coffee. Moreover, the efficiency of extraction means you get maximum flavor in minimal time.
Portability and Durability: Your Go-Anywhere Coffee Companion
For those who refuse to compromise on their coffee quality while traveling, camping, or commuting, the AeroPress is a revelation. Its lightweight, compact design (fitting easily into a backpack or even a large purse) combined with its robust, shatterproof polypropylene construction makes it virtually indestructible. Forget flimsy glass carafes or bulky machines; the AeroPress is designed for adventure. Many models even come with a convenient travel bag, further enhancing its appeal as the ultimate portable brewing solution.
Effortless Cleanup: A Barista’s Dream
Ask any coffee aficionado about their least favorite part of brewing, and cleanup often tops the list. Here, the AeroPress truly shines. After brewing, simply unscrew the filter cap, press the plunger all the way through, and a neat puck of compressed coffee grounds pops right out into your compost or trash. A quick rinse of the components and you’re done. There are no intricate parts to disassemble, no messy filters to wrestle with, and no stubborn residue to scrub. This unparalleled ease of cleaning makes the AeroPress a joy to use daily.
Lower Acidity, Smoother Taste: A Gentler Brew for Sensitive Stomachs
Many coffee lovers experience stomach discomfort or find traditional brews too acidic. The AeroPress, through its unique brewing process, tends to produce coffee with noticeably lower acidity. The short steep time combined with the efficient filtration helps to extract desirable flavors while leaving behind some of the compounds that contribute to bitterness and acidity. This often results in a smoother, more palatable cup that is gentler on the stomach, opening up the world of delicious coffee to a wider audience.
Assembling Your AeroPress Arsenal: Essential Gear for Optimal Brewing
While the AeroPress itself is wonderfully self-contained, a few complementary tools can significantly elevate your brewing experience, ensuring consistency, precision, and ultimately, a more delicious cup. Think of these as the supporting cast that helps your AeroPress be the star.
Beyond the Brewer: Must-Have AeroPress Accessories
Your AeroPress typically comes with a stirrer, scoop, and a pack of paper filters. These are great to start, but for true mastery, consider these:
- Coffee Grinder: This is arguably the most crucial accessory.
- Burr Grinder (Manual or Electric): Essential for consistent grind size. Blade grinders “chop” beans unevenly, leading to inconsistent extraction and poor flavor. For AeroPress, consistency is key to controlling flavor.
- Recommendations: For manual, the Comandante C40, Timemore C2, or Hario Skerton Pro are excellent. For electric, Baratza Encore or Virtuoso+ offer great value.
- Digital Scale with Timer: Precision matters in coffee.
- Why: Measuring coffee by weight (grams) and water by weight (grams or milliliters, as 1g water ≈ 1ml water) is far more accurate than by volume (scoops). A scale ensures you replicate successful recipes.
- Why a Timer: Critical for controlling steep time, which directly impacts extraction and flavor.
- Gooseneck Kettle: For precise water pouring.
- Why: While not strictly necessary, a gooseneck kettle (electric or stovetop) allows for controlled, even pouring, which helps saturate the grounds uniformly. This is especially useful for methods where you’re blooming the coffee.
- Temperature Control: Electric gooseneck kettles with temperature control are ideal, as water temperature is a critical variable.
- Filters (Paper & Reusable): Experimentation is encouraged.
- Paper Filters: The standard AeroPress paper filters are incredibly effective at producing a clean, sediment-free cup. They are cheap and readily available.
- Reusable Metal Filters: Brands like Able Disk or Fellow Prismo (which includes a filter) offer fine mesh metal filters. These allow some fine sediment to pass through, yielding a fuller-bodied cup with more oils, akin to a French Press but still cleaner. They are also environmentally friendly.
- Mugs & Servers: The vessel matters.
- Sturdy Mug: Choose a mug that comfortably fits under the AeroPress and can withstand the pressure of pressing.
- Decanter/Server: If you’re brewing for more than one or making a concentrate to dilute later, a small server is invaluable.
Optional but Recommended Enhancements
For those looking to push the boundaries of their AeroPress experience, these additions can provide even greater control and new possibilities:
- Fellow Prismo Attachment: This replaces the standard filter cap and features a pressure-actuated valve. It allows you to brew “espresso-style” shots without worrying about drips or using the inverted method for full immersion. It comes with a reusable metal filter.
- Third-Party Filter Caps: Companies like PUCKPUCK offer specialized caps for brewing true cold brew concentrates or even larger batches.
- Air-Tight Coffee Canister: Essential for keeping your freshly roasted beans at their peak freshness. Exposure to oxygen, light, heat, and moisture degrades coffee rapidly.
- Water Filter Pitcher: Investing in a good water filter, such as a Brita or ZeroWater, can dramatically improve the taste of your coffee by removing impurities and chlorine.
Remember, while these tools enhance the experience, the AeroPress itself is designed to be highly functional with just its basic components. Start with the essentials, and gradually add accessories as your passion for AeroPress brewing grows.
Mastering the Fundamentals: Coffee Beans, Grind, and Water Quality
The AeroPress is an incredibly versatile brewer, but its true potential is unleashed when paired with quality ingredients and a keen understanding of the science behind a great cup. The three pillars of exceptional AeroPress coffee are the beans themselves, the precision of your grind, and the purity and temperature of your water.
The Heart of the Brew: Selecting Your Coffee Beans
The journey to a superb AeroPress coffee begins with the beans. No matter how perfectly you brew, bad beans will yield a bad cup.
- Freshness is Paramount: Always opt for freshly roasted whole beans. Look for a roast date, ideally within 2-4 weeks. Avoid pre-ground coffee if possible, as it stales rapidly.
- Roast Level: The AeroPress is incredibly forgiving and performs well with all roast levels, but different roasts will highlight different characteristics:
- Light Roasts: Often fruity, floral, and acidic. The AeroPress can tame some of the acidity while preserving delicate notes.
- Medium Roasts: Balanced, sweet, and nutty. A great starting point for beginners, offering a wide range of approachable flavors.
- Dark Roasts: Bold, chocolatey, and often smoky. The AeroPress can extract these rich flavors without excessive bitterness, especially when brewed quickly.
- Origin and Processing: Explore different origins (Ethiopian, Colombian, Brazilian, etc.) and processing methods (washed, natural, honey). Each offers unique flavor profiles that the AeroPress can beautifully articulate.
- Sustainability: Consider supporting roasters who prioritize ethical sourcing and sustainable practices.
The Crucial Variable: Understanding Grind Size for AeroPress
Grind size is perhaps the most influential variable in AeroPress brewing after the beans themselves. It dictates the contact surface area between water and coffee, directly impacting extraction rate and flavor.
- General Guideline: For most AeroPress recipes, a medium-fine grind is a good starting point – finer than a French Press, but coarser than espresso. It should resemble table salt.
- Standard Method: Often benefits from a slightly finer grind to ensure good extraction during the relatively short steep time.
- Inverted Method: Allows for a slightly coarser grind due to the longer, full immersion steep.
- Espresso-Style Concentrate: Requires a very fine grind, almost like fine sand or slightly coarser than espresso, to build sufficient pressure and resistance.
- Cold Brew: A coarser grind is generally preferred for longer steeping times to prevent over-extraction and bitterness.
Tips for Grind Adjustment:
- If your coffee tastes sour or watery (under-extracted), try a finer grind.
- If your coffee tastes bitter, hollow, or astringent (over-extracted), try a coarser grind.
- Always make small adjustments and note the changes.
[INLINE IMAGE 2: place after fourth H2 | alt=”aeropress guide comparison illustration”]
The Unsung Hero: Water Quality and Temperature
Coffee is over 98% water, so the quality of your water profoundly affects the taste of your brew. Beyond purity, temperature plays a critical role in dissolving desirable compounds from the coffee grounds.
- Water Quality:
- Filtered Water is Best: Tap water often contains chlorine, minerals, or other impurities that can impart off-flavors. Filtered water (using a Brita, charcoal filter, or even bottled spring water) is ideal.
- Avoid Distilled Water: While pure, distilled water lacks the mineral content necessary to properly extract flavors from coffee, often leading to a flat taste.
- Optimal TDS: Specialty coffee standards recommend water with a Total Dissolved Solids (TDS) between 75-250 ppm.
- Water Temperature:
- General Range: The ideal brewing temperature for most coffee is between 195°F (90.5°C) and 205°F (96°C).
- Lower Temperatures (e.g., 175-185°F / 80-85°C): Can be used for darker roasts to reduce bitterness, or for certain light roasts to highlight specific delicate notes. It also results in less perceived acidity.
- Higher Temperatures (e.g., 200-205°F / 93-96°C): Generally preferred for lighter roasts to ensure full extraction of complex flavors.
- Precision is Key: An electric kettle with temperature control is invaluable for hitting your target temperature consistently. If you don’t have one, bring water to a boil and let it sit off the heat for 30-60 seconds to reach the ideal range.
By paying close attention to these fundamentals – selecting fresh, quality beans, dialing in your grind, and using optimal water – you lay the groundwork for consistently exceptional AeroPress coffee.
Decoding AeroPress Brewing Methods: Standard, Inverted, and Beyond
The beauty of the AeroPress lies not just in its consistent results but in its adaptability. There isn’t one “right” way to brew; rather, there are several popular methods, each offering subtle differences in flavor profile, body, and convenience. Let’s explore the primary techniques.
The Standard Method: Quick, Clean, and Classic
The standard method is how the AeroPress was originally intended to be used. It’s straightforward, fast, and produces a remarkably clean cup.
- Setup: Place the AeroPress chamber directly onto your mug.
- Filter: Insert one paper filter into the filter cap and screw it onto the chamber.
- Pre-wet (Optional): Rinse the filter with a little hot water over your mug to remove any paper taste and pre-heat the mug. Discard the rinse water.
- Add Coffee: Add your desired amount of finely ground coffee (e.g., 15-17g for a single serving) into the chamber.
- Add Water: Pour hot water (around 200°F / 93°C) over the grounds, stirring gently to ensure full saturation. Fill to your desired level (e.g., to level 1 for a concentrate, or higher for a longer steep).
- Steep: Allow the coffee to steep for 30-60 seconds. Since the chamber is on the mug, some coffee will drip through slowly.
- Plunge: Insert the plunger and press down slowly and steadily for about 20-30 seconds until you hear a hiss.
- Serve: You now have a concentrated shot. Top with hot water for an Americano, or hot milk for a latte.
Flavor Profile: Generally produces a bright, clean cup with moderate body. The slight drip-through during steeping means the extraction starts immediately.
The Inverted Method: Full Immersion and Control
The inverted method became popular among AeroPress enthusiasts because it eliminates any premature dripping and allows for full immersion brewing, offering more control over steep time. It’s often preferred for longer steep times or when aiming for a richer, more robust brew.
- Setup: Stand the AeroPress upside down, with the plunger inserted just enough to create a stable base.
- Add Coffee: Add your desired amount of medium-fine ground coffee into the inverted chamber.
- Add Water: Pour hot water over the grounds, ensuring full saturation. Stir gently.
- Steep: Let the coffee steep for your desired time (1-3 minutes is common, but experiment!).
- Prepare Filter: While steeping, insert a paper filter into the filter cap and screw it onto the chamber.
- Flip & Plunge: Carefully and quickly flip the AeroPress onto your sturdy mug. Immediately press down slowly and steadily for 20-30 seconds.
- Serve: Enjoy your concentrated brew, diluted as desired.
Flavor Profile: Often yields a fuller-bodied, richer cup with more perceived sweetness. The full immersion ensures uniform extraction.
Note: The inverted method requires careful handling due to hot liquid. Always use a sturdy mug and exercise caution during the flip.
Beyond the Basics: Bypass, Cold Brew, and More
The AeroPress isn’t limited to just two methods. Its design allows for significant experimentation:
- Bypass Brewing (Dilution): This isn’t a separate brewing method, but a technique often used after brewing a concentrate. You brew a very strong, small amount of coffee (high coffee-to-water ratio), then “bypass” some of the grounds by adding hot water directly to the concentrate in your cup. This allows for greater control over perceived bitterness and can create a cleaner flavor than brewing a larger volume directly through the grounds.
- AeroPress Cold Brew: A fantastic application for the AeroPress, offering a faster cold brew than traditional methods.
- Grind: Use a coarse to medium-coarse grind.
- Coffee-to-Water Ratio: High concentrate, e.g., 30-40g coffee to 150-200ml cold water.
- Method: Use the inverted method. Add coffee, then cold water. Stir thoroughly to ensure all grounds are wet.
- Steep: Steep for 8-16 hours at room temperature or in the refrigerator.
- Plunge: After steeping, screw on the filter cap and plunge slowly into a pitcher or jar.
- Dilute: Dilute the resulting concentrate with water, milk, or ice to taste.
- Espresso-Style Concentrate with Prismo/Flow Control Cap: Attachments like the Fellow Prismo or PUCKPUCK’s Flow Control Filter Cap offer specialized valves that create more resistance, allowing you to achieve a higher pressure “espresso-style” shot without needing to use the inverted method. These are excellent for those who love milk-based drinks.
- Larger Batch Brewing: While designed for single servings, you can use the AeroPress to make a potent concentrate, then dilute it with hot water to serve multiple people, or to make larger quantities of cold brew.
Experimentation is the cornerstone of AeroPress mastery. Don’t be afraid to tweak grind size, water temperature, steep time, and coffee-to-water ratios. Each small adjustment can unlock a new facet of your coffee’s flavor profile.
Step-by-Step AeroPress Recipes: From Beginner to Barista Pro
Now that you understand the different brewing methods and essential accessories, let’s dive into some practical recipes. These recipes provide a solid starting point, but remember, the true joy of the AeroPress is customization. Feel free to adjust to your personal taste!
Beginner’s Best: The Classic Americano (Standard Method)
This recipe is ideal for those new to the AeroPress, offering a balanced, clean cup reminiscent of a good drip coffee, with minimal fuss.
Yield: 1 serving (approx. 8 oz / 240ml)
Ingredients & Equipment:
- AeroPress with 1 paper filter
- 15g (approx. 3 AeroPress scoops) fresh whole bean coffee
- 220ml hot water (200°F / 93°C)
- Digital scale with timer
- Grinder (medium-fine, like table salt)
- Mug
Instructions:
- Heat Water: Heat 220ml of water to 200°F (93°C).
- Grind Coffee: Grind 15g of coffee to a medium-fine consistency.
- Set Up AeroPress: Place one paper filter in the filter cap and screw it onto the AeroPress chamber. Place the AeroPress directly onto your mug.
- Rinse Filter (Optional): Pour a small amount of hot water through the filter and into your mug. Discard the rinse water to remove any paper taste and pre-heat the mug.
- Add Coffee: Add the 15g of ground coffee into the AeroPress chamber. Gently tap the chamber to level the grounds.
- Add Water & Stir: Start your timer. Pour 70ml of hot water over the grounds, ensuring they are fully saturated. Stir gently but thoroughly for 10 seconds to ensure even extraction.
- Steep: Allow the coffee to steep for another 20 seconds (total steep time 30 seconds).
- Plunge: Insert the plunger and press down slowly and steadily for 20-30 seconds until you hear a hiss. You’ll have about 50-60ml of concentrate in your mug.
- Dilute & Enjoy: Top off the concentrate in your mug with the remaining 150-160ml of hot water. Stir and enjoy your classic Americano.
The Rich & Robust: Inverted Method Concentrate
This recipe maximizes immersion, producing a richer, fuller-bodied concentrate perfect for lattes, cappuccinos, or a stronger Americano.
Yield: 1 serving (approx. 70ml concentrate)
Ingredients & Equipment:
- AeroPress with 1 paper filter
- 17g fresh whole bean coffee
- 180ml hot water (195°F / 90.5°C)
- Digital scale with timer
- Grinder (medium grind, slightly coarser than table salt)
- Sturdy mug/server
Instructions:
- Heat Water: Heat 180ml of water to 195°F (90.5°C).
- Grind Coffee: Grind 17g of coffee to a medium consistency.
- Set Up Inverted AeroPress: Insert the plunger into the AeroPress chamber, so it’s stable when standing upside down.
- Add Coffee: Add the 17g of ground coffee into the inverted chamber.
- Add Water & Stir: Start your timer. Pour 180ml of hot water over the grounds. Stir gently but thoroughly for 15 seconds to ensure full saturation.
- Steep: Allow the coffee to steep for 1 minute 45 seconds (total steep time 2 minutes).
- Prepare Filter: While steeping, place one paper filter in the filter cap. You can pre-wet it if desired.
- Screw on Filter Cap: After steeping, carefully screw the filter cap onto the AeroPress.
- Flip & Plunge: Place your sturdy mug or server upside down over the AeroPress. Carefully and quickly flip the entire assembly right side up onto your mug. Immediately press down slowly and steadily for 20-30 seconds.
- Serve: You now have a potent concentrate. Enjoy as is, dilute with hot water for an Americano, or add steamed milk for a latte/cappuccino.
The Speedy Cold Brew: Overnight or Quick Method
This recipe provides a delicious cold brew concentrate, perfect for iced coffees or a smooth, low-acid beverage.
Yield: ~100ml concentrate (makes ~2-3 servings after dilution)
Ingredients & Equipment:
- AeroPress with 1 paper filter (or metal filter)
- 30g fresh whole bean coffee
- 150ml cold filtered water
- Digital scale
- Grinder (coarse grind, like coarse sea salt)
- Sturdy jar or server
Instructions (Overnight Method):
- Grind Coffee: Grind 30g of coffee to a coarse consistency.
- Set Up Inverted AeroPress: Insert the plunger into the AeroPress chamber, so it’s stable when standing upside down.
- Add Coffee & Water: Add the coarse grounds to the chamber. Pour 150ml of cold filtered water over the grounds.
- Stir & Steep: Stir thoroughly for 30-60 seconds to ensure all grounds are saturated. Let it steep at room temperature for 12-16 hours, or in the refrigerator for 18-24 hours. Cover loosely to prevent contamination.
- Prepare Filter: After steeping, place one paper filter (or metal filter) in the filter cap and screw it onto the AeroPress.
- Flip & Plunge: Place a sturdy jar or server upside down over the AeroPress. Carefully and quickly flip the entire assembly right side up. Press down very slowly and steadily (this will take longer due to the cold water and coarse grind) until all liquid is extracted.
- Dilute & Store: You’ll have a concentrated cold brew. Dilute with water, milk, or ice to taste (e.g., 1 part concentrate to 1-2 parts water/milk). Store remaining concentrate in an airtight container in the fridge for up to a week.
Instructions (Quick Method – for a stronger, slightly less refined taste):
- Follow steps 1-3 from the Overnight Method.
- Add Water: Use water just below room temperature, around 70-80°F (21-26°C) for slightly faster extraction.
- Stir & Steep: Stir thoroughly. Steep for 3-5 minutes.
- Plunge: Press very slowly and steadily.
- Dilute & Enjoy: Dilute immediately with ice and water/milk. This method results in a quicker, slightly bolder cold brew, but it might not be as smooth as the overnight version.
Discover more advanced barista skills in our comprehensive guide to becoming a home barista.
Elevating Your Brew: Advanced AeroPress Techniques and Customization
Once you’ve mastered the basic recipes, the AeroPress truly shines as a tool for experimentation. Its forgiving nature makes it an ideal platform to explore variables and craft your perfect cup. This section delves into advanced techniques, understanding crucial variables, and embracing the joy of personalizing your brew.
The Art of Variable Control: Unlocking Deeper Flavors
Every element in your brewing process contributes to the final taste. Becoming an AeroPress “pro” means understanding how to manipulate these variables to achieve specific flavor profiles.
- Coffee-to-Water Ratio:
- Higher Ratio (more coffee, less water): Results in a stronger concentrate, often with more body. Ideal for espresso-style drinks or when you want to dilute significantly.
- Lower Ratio (less coffee, more water): Produces a lighter, more delicate cup. Good for highlighting subtle notes in lighter roasts.
- Starting Point: A common starting point is 1:15 to 1:17 (e.g., 15g coffee to 225-255g water).
- Water Temperature:
- Higher Temps (200-205°F / 93-96°C): Extract more soluble compounds, often yielding higher acidity, brighter flavors, and greater sweetness, especially with light roasts.
- Lower Temps (175-190°F / 80-88°C): Reduce bitterness and acidity, making them suitable for dark roasts or those who prefer a smoother, less intense cup. Experiment to find the sweet spot for your specific beans.
- Grind Size:
- Finer Grind: Increases surface area, speeding up extraction. Good for short steep times or intense concentrates. Can lead to over-extraction if steeped too long.
- Coarser Grind: Reduces surface area, slowing down extraction. Best for longer steep times (like cold brew) or when aiming for a lighter body. Can lead to under-extraction if steeped too short.
- Tactile Test: Feel the grounds. Fine powder for espresso; fine sand for AeroPress standard; table salt for AeroPress inverted; coarse sand/sea salt for French press/cold brew.
- Steep Time:
- Shorter Steep (30-60 seconds): Generally produces a brighter, cleaner cup. Often paired with finer grinds and higher temperatures.
- Longer Steep (1-3 minutes+): Increases extraction, leading to a richer, fuller-bodied, and sometimes more bitter cup. Often paired with coarser grinds and lower temperatures.
- No-Steep (Flow-through): Some advocate for a very fast pour-over style extraction with the AeroPress by plunging immediately after adding water. This can yield extremely clean, light-bodied cups.
- Stirring:
- Aggressive Stirring: Promotes faster and more complete saturation and extraction.
- Gentle Stirring or No Stirring: Can lead to slightly slower extraction, potentially highlighting different flavor notes. Uniform saturation is still key.
- Plunge Speed:
- Fast Plunge (10-15 seconds): Minimizes additional extraction during the press, leading to a brighter cup.
- Slow Plunge (30-60 seconds): Adds a little more contact time under pressure, potentially increasing body and intensity. Be careful not to press too slowly, as it can over-extract.
Championship Recipes and Expert Hacks
The World AeroPress Championship is a testament to the brewer’s versatility, with competitors developing incredibly creative recipes. While specific championship recipes are often complex and bean-dependent, they highlight key principles:
- Layered Water Addition: Some recipes involve adding water in stages (e.g., bloom, then main pour) to control extraction.
- Temperature Gradients: Using different water temperatures for different stages of the brew (e.g., lower temp for blooming, higher for main steep).
- Multiple Filters: Using two paper filters can create an