

Moka Pot Instructions
Mastering the Moka Pot: A Comprehensive Guide to Perfect Moka Pot Instructions
Affiliate disclosure: This article may contain affiliate links. Recommendations are independent and editorially driven.
The Moka Pot, a timeless icon of Italian design and coffee culture, has graced kitchens worldwide for nearly a century. Its distinctive octagonal shape and the rich, robust coffee it produces have cemented its place in the hearts of coffee lovers. Far more than just a brewing device, the Moka Pot represents a ritual, a connection to a simpler yet profoundly satisfying way of making coffee. While seemingly straightforward, mastering the Moka Pot to consistently brew an exceptional cup requires understanding a few critical steps and nuances. This comprehensive guide will walk you through everything you need to know, from the fundamental moka pot instructions to advanced techniques, ensuring your daily brew is nothing short of perfection.
Whether you’re a seasoned Moka Pot user looking to refine your technique or a newcomer eager to embark on this flavorful journey, you’ve come to the right place. We’ll demystify the process, tackle common challenges, and explore the rich history that makes this brewer so special. Prepare to elevate your home coffee experience and discover why the Moka Pot remains a beloved staple in homes and cafés alike.
The Enduring Appeal of the Moka Pot: A Cultural Icon
The Moka Pot is more than just a coffee maker; it’s a piece of art, a testament to ingenious engineering, and a symbol of daily ritual for millions. Invented in 1933 by Alfonso Bialetti, it quickly became a staple in Italian homes, spreading its influence across Europe and beyond. Its enduring appeal lies in its simplicity, durability, and ability to produce a strong, concentrated coffee that bridges the gap between drip coffee and true espresso.
A Brief History: Bialetti’s Legacy
Alfonso Bialetti’s design for the Moka Express was revolutionary. Inspired by his wife’s old-fashioned laundry machine, which used a central tube to draw water up through boiling suds, he applied the same principle to coffee. The Moka Pot’s patented design leveraged steam pressure to force hot water through ground coffee, extracting a concentrated brew directly into the upper chamber. This innovation democratized coffee culture, bringing café-quality coffee into the home kitchen at an affordable price. The famous “little man with the moustache,” designed by Paul Campani in 1958, became the iconic logo, further solidifying Bialetti’s place in history. Even today, the Moka Pot’s design remains largely unchanged, a testament to its timeless functionality and aesthetic.
Why Choose a Moka Pot? Flavor, Economy, and Tradition
For many, the choice of a Moka Pot is deeply rooted in a desire for a specific kind of coffee experience. It offers a unique flavor profile: bolder and more concentrated than typical filter coffee, yet less intense than a machine-made espresso. This makes it incredibly versatile, suitable for drinking black, with milk, or as a base for various coffee beverages. Economically, Moka Pots are a smart investment. They are relatively inexpensive to purchase, require no electricity (unless an induction model), and are built to last for decades with proper care. Environmentally, they produce minimal waste compared to single-serve pods. Beyond the practicalities, there’s a profound sense of tradition associated with the Moka Pot. It evokes images of bustling Italian kitchens, family gatherings, and the comforting aroma of brewing coffee. For many, it’s not just about the coffee, but about the ritual it represents.
Understanding Moka Pot Coffee: Beyond Espresso
A common misconception is that a Moka Pot makes espresso. While the coffee it produces is strong and concentrated, it is not true espresso. Espresso machines operate at much higher pressures (typically 9 bars), resulting in a distinct crema and body. Moka Pots, on the other hand, operate at much lower pressures (around 1-2 bars). The result is a highly concentrated brew with a rich, full body and an intense flavor, often with a thin layer of “false crema” (a frothy, dark-brown layer caused by dissolved coffee oils and carbon dioxide). This unique brew stands on its own merits, offering a delightful alternative to other brewing methods. It’s often referred to as “stove-top espresso” or “Moka coffee,” acknowledging its distinct identity.
Anatomy of a Moka Pot: Familiarizing Yourself with the Parts
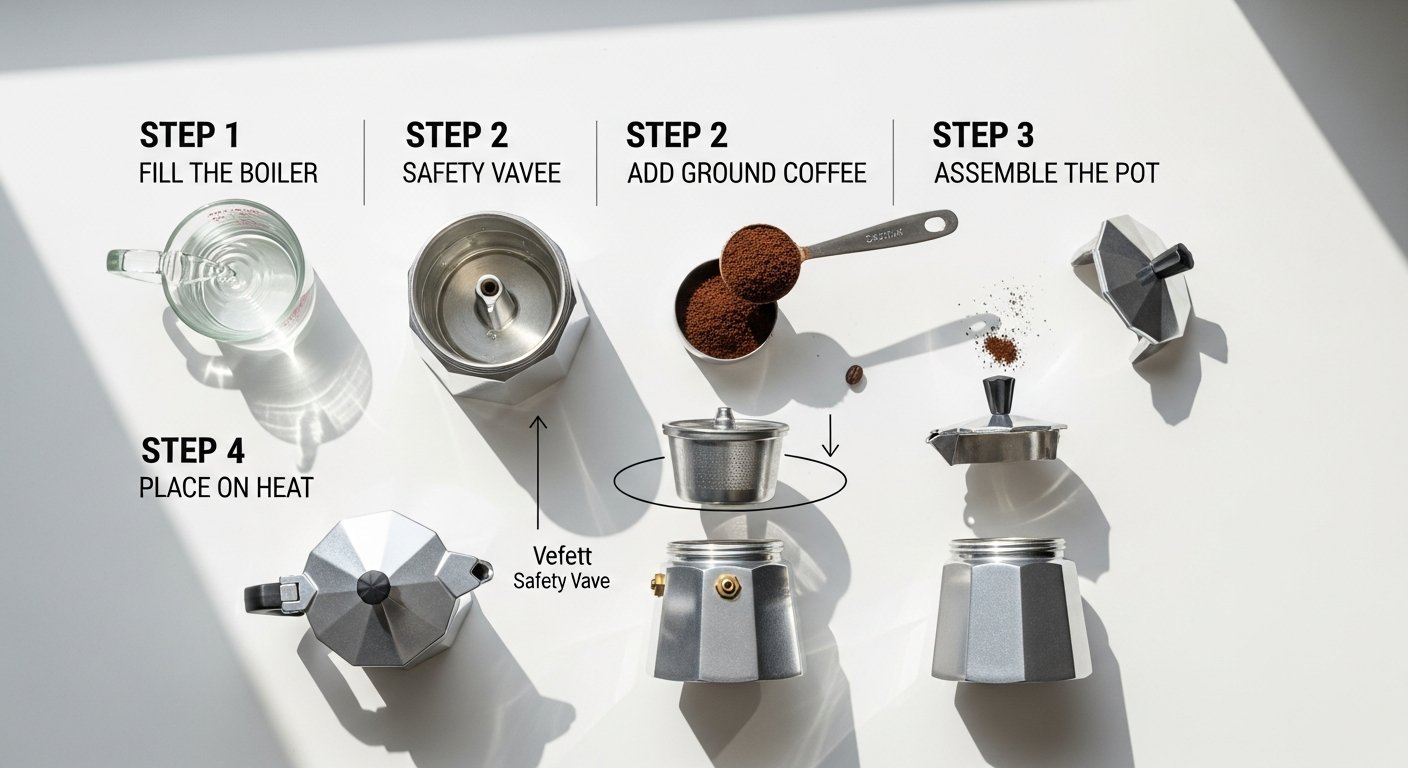
Before diving into the moka pot instructions, it’s essential to understand the individual components of your brewer. While designs may vary slightly between brands and models, the fundamental structure remains consistent across all Moka Pots. Familiarity with each part will aid in proper assembly, brewing, and maintenance.
The Water Chamber (Boiler)
This is the bottom section of the Moka Pot, where water is heated. It typically has a safety valve on the side, a crucial component that releases excess steam pressure, preventing potential explosions. It’s usually octagonal in shape for classic models, but can also be cylindrical, especially for induction-compatible versions. The material is typically aluminum or stainless steel.
The Filter Basket (Funnel)
Also known as the funnel, this metal basket sits inside the water chamber. It holds the ground coffee. The long tube on the bottom extends into the water chamber, allowing hot water and steam to rise through the coffee grounds during brewing. The perforations in the basket allow water to saturate the coffee evenly.
The Gasket and Filter Plate
Positioned just below the upper chamber, the gasket is a rubber or silicone ring that creates a tight, airtight seal between the upper and lower chambers. Above the gasket is the filter plate (or filter screen), a perforated metal disc that holds the coffee grounds firmly in the basket and prevents them from entering the upper chamber with the brewed coffee. Both of these components are critical for proper pressure building and brewing.
The Collection Chamber (Upper Chamber)
This is the top section of the Moka Pot, where the brewed coffee collects. It features a central column (the “chimney” or “spout”) through which the coffee emerges, and a lid for pouring. The design ensures that the hot coffee flows smoothly into the chamber, ready for serving.
The Handle and Safety Valve
The handle, typically made of heat-resistant plastic or wood, is attached to the upper chamber and allows for safe handling and pouring. The safety valve, located on the side of the water chamber, is a non-negotiable safety feature. It releases steam if the internal pressure becomes too high, preventing damage to the pot or injury. Never fill water above this valve.
[INLINE IMAGE 1: place after second H2 | alt=”moka pot instructions concept illustration”]
Essential Ingredients for Moka Pot Perfection
Just as with any culinary endeavor, the quality of your ingredients profoundly impacts the final product. For the Moka Pot, this means paying close attention to your coffee beans, grind size, and even the water you use. Neglecting any of these can lead to a less-than-ideal brew, regardless of how perfectly you follow the moka pot instructions.
Choosing the Right Coffee Beans
The Moka Pot extracts a strong, concentrated brew, which can amplify certain flavor notes while masking others. Generally, medium to dark roasts tend to perform exceptionally well in a Moka Pot. These roasts offer a robust body and often possess chocolatey, nutty, or caramelized notes that shine through the Moka Pot’s unique extraction process. Lighter roasts can sometimes come across as too acidic or thin, but experimentation is always encouraged based on personal preference. Look for freshly roasted beans, ideally within a few weeks of their roast date, for optimal flavor and aroma. Whole beans are always preferable as they allow you to grind them just before brewing, preserving volatile aromatics.
Grind Size Matters: The Moka Pot Sweet Spot
This is arguably one of the most critical aspects of Moka Pot brewing, second only to the heat management during the moka pot instructions. The ideal grind size for a Moka Pot is finer than for drip coffee but coarser than for espresso. Think of it as somewhere between table salt and fine sugar. If the grind is too fine, it will restrict the water flow, leading to over-extraction, bitterness, and potentially clogging the filter. If it’s too coarse, the water will pass through too quickly, resulting in an under-extracted, weak, and sour brew. A burr grinder is highly recommended for achieving a consistent grind, which is crucial for even extraction. Blade grinders produce inconsistent particle sizes, leading to both over and under-extracted coffee in the same brew.
To test your grind, rub a small amount between your fingers. It should feel gritty but not powdery. When you lightly tap the filter basket after filling, the grounds should settle evenly without creating a solid puck.
Water Quality: The Unsung Hero
Coffee is over 98% water, so it stands to reason that the quality of your water will have a significant impact on flavor. Tap water, depending on your region, can contain chlorine, minerals, or other impurities that can negatively affect the taste of your coffee. Filtered water (e.g., from a Brita filter or a home filtration system) or good quality bottled water is highly recommended. Avoid distilled water, as it lacks the essential minerals that contribute to flavor extraction and can lead to a flat-tasting brew. The right mineral content in water actually helps to pull out the complex flavors from the coffee grounds.
Heat Source Considerations
The Moka Pot is incredibly versatile when it comes to heat sources. Traditional models are designed for gas stoves, electric coil stoves, and ceramic hobs. Stainless steel models or specific induction-compatible aluminum models can also be used on induction cooktops. The key is to use a heat source that allows for gentle, consistent heating. Avoiding excessively high heat is one of the most important moka pot instructions for preventing burnt coffee and ensuring proper extraction. The size of your burner should also match the base of your Moka Pot to prevent the handle from getting too hot or melting on gas stoves.
Step-by-Step Moka Pot Instructions: The Classic Method
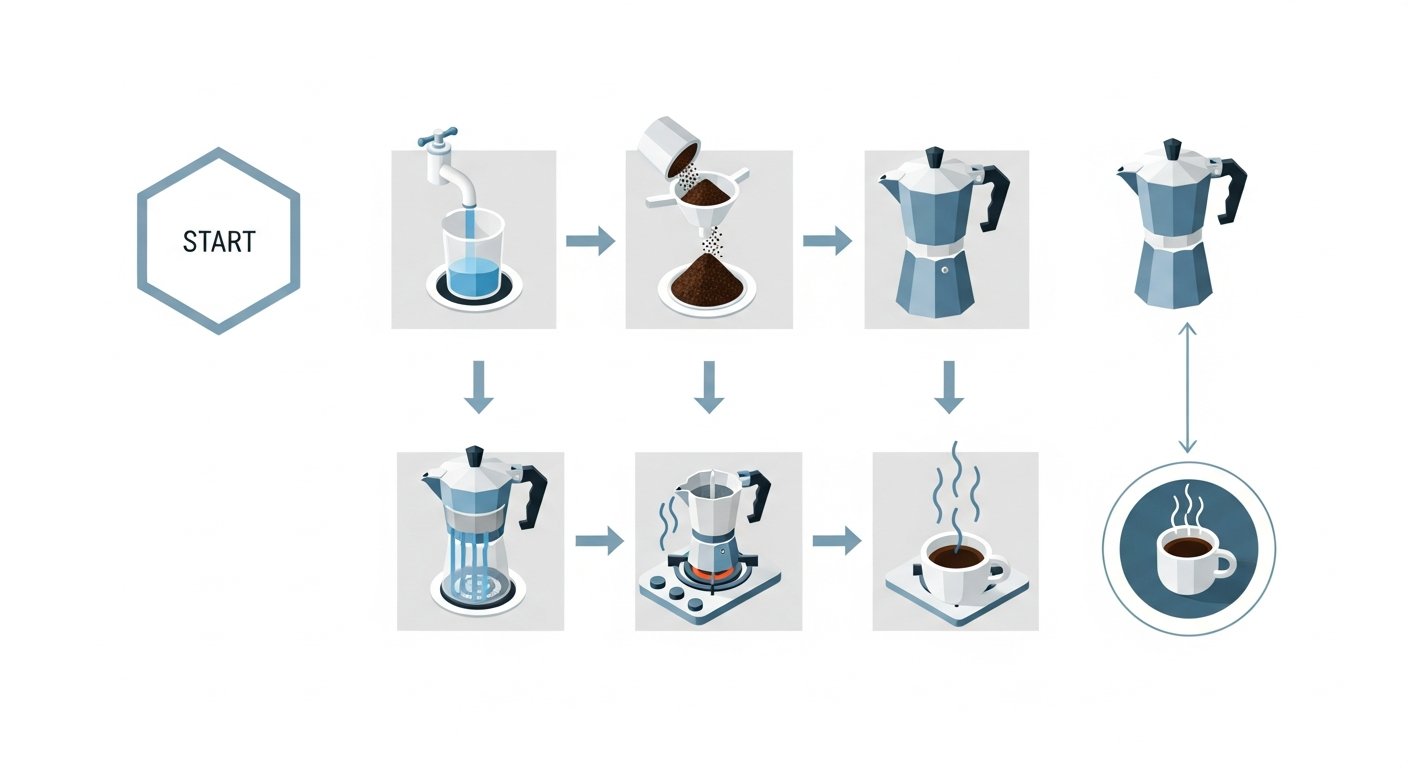
Now that you’re familiar with the Moka Pot’s components and the importance of quality ingredients, let’s dive into the core moka pot instructions. Following these steps carefully will set you on the path to brewing a consistently delicious cup.
Step 1: Preparing Your Moka Pot
Start with a clean Moka Pot. Disassemble the pot by unscrewing the upper and lower chambers. Remove the filter basket and the rubber gasket/filter plate from the upper chamber. Give all parts a quick rinse with warm water, especially if it hasn’t been used in a while, to ensure there are no lingering odors or old coffee residues.
Step 2: Filling the Water Chamber
Pour fresh, filtered water into the bottom water chamber. Crucially, fill the water only up to, but not above, the level of the safety valve. Overfilling can prevent proper pressure buildup and might even compromise the safety valve’s function. For a slightly smoother, less bitter brew, many enthusiasts recommend using pre-heated water. This reduces the time the coffee grounds are exposed to heat before extraction begins, minimizing “cooking” of the grounds.
Learn more about the importance of water quality for brewing.
Step 3: Adding the Coffee Grounds
Place the funnel (filter basket) into the water chamber. Fill the filter basket with your freshly ground coffee. Do not tamp or press the grounds down firmly, as this can restrict water flow and lead to over-extraction and bitterness. Instead, gently level the grounds with your finger or a knife, ensuring the basket is full but not compacted. The goal is an even, loosely packed bed of coffee that the hot water can easily permeate.
Step 4: Assembling Your Moka Pot
Carefully screw the upper chamber onto the base. Ensure it’s tightly sealed but avoid over-tightening, which can damage the gasket. Use a kitchen towel or oven mitts if the base is hot (if you pre-heated the water). A proper seal is vital for pressure to build correctly; a loose seal will result in steam escaping and insufficient pressure for brewing.
Step 5: Heating and Brewing
Place your assembled Moka Pot on your stove over medium-low heat. The key here is gentle heat. High heat can scald the coffee, leading to a burnt and bitter taste, and cause the extraction to happen too quickly and violently. Keep the lid open initially so you can observe the brewing process.
As the water heats, steam pressure will build in the lower chamber, forcing hot water up through the coffee grounds and into the upper chamber. You’ll hear a gurgling sound, and a stream of rich, dark coffee will begin to emerge from the central column. Initially, it will be a steady, dark flow. As the brewing progresses, the color will lighten, becoming more golden or amber, and the flow will become more sporadic and sputtery.
Step 6: The Moment of Extraction and Serving
Once the coffee emerging into the upper chamber turns a light, honey-like color, or when you hear a distinct hissing or sputtering sound, immediately remove the Moka Pot from the heat. This indicates that most of the water has passed through the grounds and you’re nearing the end of the extraction. Allowing it to continue brewing on the heat once it starts sputtering will lead to over-extraction and a bitter taste, as you’ll be extracting undesirable compounds from the coffee. You can also quickly run the base under cold water (taking care not to get water into the upper chamber) to rapidly halt the extraction process.
Close the lid and pour your freshly brewed Moka coffee into pre-warmed cups. Stir the coffee in the upper chamber gently before pouring to ensure an even distribution of flavor, as the first part of the extraction is often stronger than the last. Enjoy it as is, or add milk and sugar to your preference.
Explore delicious Moka Pot coffee recipes for your next brew.
[INLINE IMAGE 2: place after fourth H2 | alt=”moka pot instructions comparison illustration”]
Advanced Moka Pot Techniques for the Connoisseur
While the basic moka pot instructions yield a good cup, there are several advanced techniques that experienced users employ to further refine their brew, minimize bitterness, and maximize flavor. These methods often involve manipulating temperature and extraction speed to achieve a smoother, more balanced result.
The Cold Brew Water Method: Minimizing Bitterness
This method focuses on minimizing the time your coffee grounds spend in contact with excessive heat. Instead of pre-heating the water, you start with cold, filtered water in the lower chamber. The logic here is that by the time the water is hot enough to extract, the coffee grounds themselves haven’t been “cooked” on the hot metal for too long. However, with this method, you must be extremely vigilant with heat management. Use very low heat and remove the pot as soon as the coffee begins to flow, before it starts sputtering. This slow and steady approach can yield a very clean and smooth cup.
Pre-heating Water: Speed and Consistency
Conversely, many Moka Pot aficionados swear by pre-heating the water. Fill the water chamber with water that is already hot, just below boiling. This significantly reduces the time it takes for pressure to build and for extraction to begin, shortening the overall brewing cycle. The benefit is less contact time between the coffee grounds and the hot metal of the Moka Pot before the water actually starts flowing through them. This can reduce the “burnt” taste sometimes associated with Moka Pots. If using pre-heated water, be extra careful when screwing the upper chamber onto the hot base; use oven mitts or a towel.
The Tamping Debate: To Tamp or Not to Tamp?
Traditionally, Moka Pot instructions advise against tamping the coffee grounds. The conventional wisdom is that tamping can restrict water flow too much, leading to excessive pressure, potential blockages, and over-extraction. However, some advanced users lightly tamp their grounds, finding it creates a more even “puck” and leads to a more consistent extraction, similar to espresso. If you choose to experiment with tamping, do so very gently – a light tap rather than a firm press. The goal is to ensure a uniform density, not to create a brick. Monitor your brew carefully; if coffee struggles to emerge or sprays violently, you’ve likely tamped too hard.
Controlling Heat: The Key to a Gentle Brew
Regardless of whether you use cold or pre-heated water, heat control is paramount. Many Moka Pot users make the mistake of brewing on high heat to speed things up. This is a recipe for bitter, burnt coffee. The ideal is a medium-low to low heat. The entire brewing process, from placing on the stove to removing it, should ideally take between 5 to 8 minutes. If it’s much faster, your heat is too high; if it’s much slower, it might be too low, or your grind is too fine. A slower, more gentle extraction allows for a fuller development of flavors without harshness. On a gas stove, ensure the flame doesn’t extend beyond the base of the pot, which can overheat the handle.
The “Lift-Off” Method: Perfecting Extraction
This technique involves closely monitoring the coffee as it flows into the upper chamber. As soon as the coffee starts to emerge, often with a darker, more viscous appearance, you can briefly lift the Moka Pot off the heat for a few seconds, then return it. This momentarily pauses the rapid extraction, allowing for a slightly longer dwell time without over-extracting. It’s an advanced maneuver that requires practice, but can help achieve a more balanced flavor profile. Another variation is to completely remove the pot from heat once the initial steady stream of coffee appears and let the residual heat finish the extraction, removing it completely when sputtering begins.
Achieving Crema (or a close approximation)
As mentioned, true espresso crema is difficult to achieve with a Moka Pot due to lower pressure. However, you can aim for a rich, foamy head that resembles crema. This often comes from fresh, high-quality beans, an optimal grind, and precise heat management. Some Moka Pot designs, particularly those with a “crema valve” or a modified filter plate, are specifically designed to produce a thicker layer of foam. Experimenting with a slightly finer grind than standard (but not espresso fine) and ensuring a very consistent heat can also help.
Troubleshooting Common Moka Pot Issues
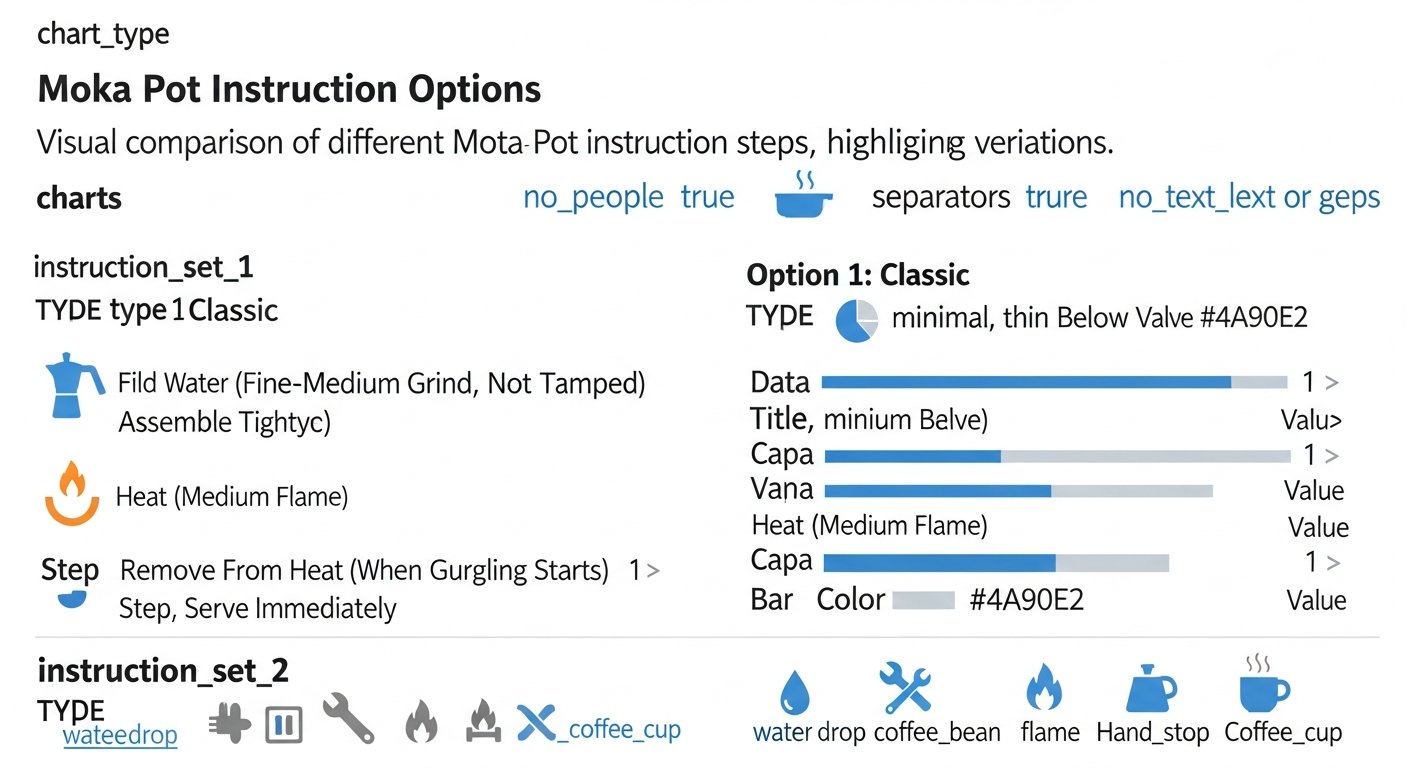
Even with the most precise moka pot instructions, you might encounter issues. Don’t be discouraged! Most problems are easily diagnosable and fixable. Here’s a rundown of common Moka Pot woes and how to solve them.
Weak or Watery Coffee
- Grind too coarse: If the water passes through too quickly, it doesn’t have enough contact time to extract flavor. Adjust your grinder to a finer setting.
- Insufficient coffee: Ensure your filter basket is full and level.
- Low heat/short brew time: If you remove the pot too early or brew on very low heat, not enough extraction may occur. Increase heat slightly or allow more time for brewing until the coffee lightens in color.
- Old/stale beans: Fresh beans are key to rich flavor.
- Poor water quality: Using distilled water or highly chlorinated water can result in flat coffee. Use filtered water with some mineral content.
Bitter or Burnt Taste
- Grind too fine: This leads to over-extraction, forcing the water through too slowly and pulling out bitter compounds. Coarsen your grind slightly.
- Heat too high: This is a very common cause. High heat scorches the coffee grounds. Use a medium-low heat setting.
- Over-extraction: Leaving the Moka Pot on the heat for too long, especially after it starts sputtering violently, will extract bitter notes. Remove it from the heat as soon as the coffee turns light brown/honey-like or starts to sputter significantly.
- Dirty Moka Pot: Residue from old coffee oils can become rancid and impart bitterness. Clean your Moka Pot regularly.
Slow Extraction or No Coffee Flow
- Grind too fine: The most common culprit. A very fine grind creates too much resistance. Coarsen your grind.
- Over-tamping: If you pressed the grounds down, they are too compacted. Level the grounds gently, do not tamp.
- Blocked filter plate: Check the filter plate (underside of the upper chamber) for coffee grounds or scale buildup. Clean it thoroughly.
- Insufficient water: Make sure you’ve filled the water chamber to the correct level.
- Loose seal: If the upper and lower chambers aren’t screwed on tightly, steam will escape, and pressure won’t build.
Leaking Moka Pot
- Loose seal: The most common reason. Ensure the upper and lower chambers are screwed together tightly.
- Worn-out gasket: Over time, the rubber or silicone gasket can harden, crack, or lose its elasticity, preventing a proper seal. Inspect it and replace it if necessary (they typically last 6-12 months with regular use).
- Damaged rim: Check the rims of both the upper and lower chambers for any dents or deformities that might prevent a tight seal.
Grounds in Your Brew
- Grind too fine: If the grounds are too powdery, some can slip through the filter plate. Coarsen your grind slightly.
- Overfilling the basket: If the basket is heaped, grounds can get caught in the threads and fall into the upper chamber. Level the grounds just below the rim.
- Damaged filter plate: Inspect the filter plate for any holes or tears. Replace if damaged.
- Incorrect assembly: Ensure the gasket and filter plate are correctly seated.
Choosing the Best Moka Pot: Size, Material, and Brand
With a deeper understanding of moka pot instructions and brewing techniques, you might be considering a new Moka Pot or your very first one. The market offers a range of options, and choosing the right one depends on your needs, aesthetic preferences, and stove type.
Understanding Moka Pot Sizes (Cup Capacity)
Moka Pots are typically sized by “cups,” which are traditionally small Italian espresso-sized cups (around 2 ounces or 60ml). So, a “3-cup” Moka Pot will yield about 6 ounces of concentrated coffee, not three standard mugs. It’s important to match the Moka Pot size to your typical brewing needs. A pot should always be brewed to its full capacity; attempting to brew a smaller amount of coffee by underfilling the water or coffee basket will lead to poor extraction and bitter results.
- 1-2 cup: Ideal for a single strong shot or a small personal cup.
- 3-4 cup: Good for one larger serving or two smaller ones. Very popular for individual use.
- 6 cup: Standard size for couples or individuals who enjoy a larger amount of coffee.
- 9-12 cup: Suitable for brewing for small groups or for making larger quantities for milk-based drinks.
Aluminum vs. Stainless Steel: Durability and Flavor
The two primary materials for Moka Pots are aluminum and stainless steel, each with distinct advantages:
- Aluminum Moka Pots: The classic choice, exemplified by the original Bialetti Moka Express. Aluminum heats up quickly and evenly, contributing to its iconic brewing performance. They are lightweight and often more affordable. However, aluminum can react with acids in coffee over time, potentially altering flavor (though many argue this contributes to the “classic” Moka Pot taste). They are also not suitable for induction cooktops and require more careful cleaning to prevent pitting or discoloration.
- Stainless Steel Moka Pots: More durable and resistant to corrosion than aluminum. Stainless steel doesn’t react with coffee, ensuring a purer taste profile. Many stainless steel models are induction-compatible, making them a versatile choice for modern kitchens. They tend to be heavier and more expensive than aluminum counterparts but offer superior longevity and ease of maintenance.
Induction-Compatible Moka Pots
If you have an induction cooktop, you must choose a Moka Pot specifically designed for induction. This typically means a stainless steel base or a specialized aluminum base with a ferromagnetic plate. Always check the product specifications for induction compatibility before purchasing.
Top Moka Pot Brands: Bialetti, G.A.T., Cuisinox, and More
While Bialetti remains the most famous name, many other reputable brands produce excellent Moka Pots. Each may offer subtle variations in design, material quality, or features.
- Bialetti: The original and still a benchmark. Offers a range of aluminum (Moka Express, Brikka) and stainless steel (Venus, Musa) models. The Brikka model is designed to produce a thicker crema.
- G.A.T.: Another established Italian brand known for its quality aluminum and stainless steel Moka Pots, often with classic and modern designs.
- Cuisinox: A Canadian brand known for its high-quality stainless steel Moka Pots, often featuring elegant designs and excellent build quality, frequently induction-compatible.
- Alessi: Offers designer Moka Pots, often collaborations with renowned industrial designers, blending functionality with high-end aesthetics. Expect a higher price point.
- Primula: Known for affordable and reliable aluminum Moka Pots.
Here’s a comparison table to help you decide:
| Feature | Aluminum Moka Pot | Stainless Steel Moka Pot | Induction-Compatible Moka Pot |
|---|---|---|---|
| Material | Aluminum | Stainless Steel | Stainless Steel (or aluminum with ferromagnetic base) |
| Heat Conductivity | Excellent, heats quickly | Good, heats slower than aluminum but retains heat well | Varies, depends on base thickness and material |
| Durability | Good, but prone to pitting/staining if not cleaned properly | Excellent, highly resistant to corrosion and wear | Excellent for stainless steel, good for hybrid aluminum |
| Flavor Impact | Can impart a slight metallic taste over time (some consider it part of the “classic” flavor) | Neutral, preserves coffee’s pure flavor profile | Neutral (for stainless steel), potentially slight for hybrid aluminum |
| Cost | Generally more affordable | Mid-range to higher end | Mid-range to higher end |
| Induction Compatible? | No (unless specified with special base) | Often yes, check specifications | Yes, by design |
| Maintenance | Requires careful hand washing, avoid harsh detergents | Easier to clean, often dishwasher safe (check manufacturer) | Easier to clean (for stainless steel) |
Moka Pot Cleaning and Maintenance: Ensuring Longevity
Proper cleaning and maintenance are crucial not only for the longevity of your Moka Pot but also for the consistent quality of your coffee. Residual coffee oils can turn rancid, imparting off-flavors to your fresh brew. Following these simple moka pot instructions for cleaning will keep your pot performing its best for years to come.
Daily Cleaning Rituals
After each use, once the Moka Pot has cooled down enough to handle, disassemble it completely. Discard the spent coffee grounds from the filter basket. Rinse all parts – the water chamber, filter basket, gasket, filter plate, and upper chamber – thoroughly with warm water. Avoid using dish soap or harsh detergents, especially on aluminum Moka Pots, as these can strip away the natural patina (a thin layer of oxidized coffee oils) that many believe contributes to the Moka Pot’s unique flavor. Soap can also leave residues that can affect the taste of your next brew. Instead, a simple rinse and a gentle wipe with a sponge are usually sufficient. Make sure to rinse the inside of the central column in the upper chamber. Allow all parts to air dry completely before reassembling or storing, as trapped moisture can lead to corrosion or mildew.
Deep Cleaning: Tackling Stubborn Stains
Over time, especially with aluminum pots, you might notice some discoloration or mineral buildup. For a deeper clean:
- Vinegar Solution: For mineral scale buildup in the water chamber, brew a cycle (without coffee) using a solution of equal parts water and white vinegar. Follow with one or two plain water cycles to rinse thoroughly.
- Baking Soda Paste: For stubborn coffee stains or discoloration, especially on stainless steel, create a paste with baking soda and a little water. Gently scrub the affected areas with a soft cloth or sponge. Rinse thoroughly.
- Toothbrush for Crevices: Use an old toothbrush to clean hard-to-reach areas like the safety valve or the inside of the filter basket’s stem.
Remember, never put an aluminum Moka Pot in a dishwasher, as the harsh detergents can cause severe discoloration, pitting, and damage to the aluminum’s surface. Some stainless steel models may be dishwasher safe, but always check the manufacturer’s instructions.
Replacing Gaskets and Filters
The rubber or silicone gasket is the most common component that needs replacement. With regular use, gaskets can harden, crack, or lose their elasticity, leading to leaks and poor pressure buildup. It’s generally recommended to replace the gasket and the associated filter plate every 6-12 months, or sooner if you notice any signs of wear or leakage. Replacement kits are readily available and inexpensive. When replacing, ensure you purchase the correct size for your Moka Pot model and brand.
Storage Tips
Once clean and completely dry, store your Moka Pot unassembled, or at least with the upper chamber loosely screwed on. This allows air to circulate, preventing moisture buildup and any stale odors. Keep it in a dry, well-ventilated area. Storing it assembled tightly when wet can trap moisture and promote corrosion or mildew.
Beyond the Basics: Moka Pot Coffee Recipes and Pairings
The Moka Pot’s strong, concentrated brew makes it an incredibly versatile base for a variety of coffee drinks, far beyond just a simple black cup. Its intensity lends itself well to concoctions that would overwhelm lighter filter coffees. Here are some ideas to expand your Moka Pot horizons:
The Moka Pot Americano
A classic. Simply brew your Moka Pot coffee according to the moka pot instructions, then dilute it with an equal part (or to taste) of hot water. This creates a lighter-bodied, yet still flavorful, coffee that’s less intense than a straight Moka Pot shot but more robust than a typical drip coffee. It’s a great way to enjoy the Moka Pot’s flavor without its full concentration.
Moka Pot Latte/Cappuccino Base
The robust nature of Moka Pot coffee makes it an excellent foundation for milk-based drinks. Brew your coffee, then steam or froth your milk of choice. Combine the two, adjusting the ratios to your preference for a latte (more milk) or a cappuccino (less milk, more foam). For an extra treat, add a dash of vanilla syrup or a sprinkle of cinnamon.
Moka Pot Affogato
This Italian classic is incredibly simple and utterly delightful. Place a scoop (or two) of good quality vanilla bean ice cream in a small bowl or cup. Immediately pour a hot shot of freshly brewed Moka Pot coffee over the ice cream. The hot coffee melts the ice cream slightly, creating a luscious, creamy, and bittersweet dessert-drink that’s perfect after a meal.
Moka Pot Mocha
Indulge your sweet tooth! Add a spoonful of unsweetened cocoa powder or your favorite chocolate syrup to your cup before pouring in the Moka Pot coffee. Stir well until dissolved, then add steamed milk and a dollop of whipped cream for a luxurious treat. The Moka Pot’s strong coffee stands up beautifully to the richness of chocolate.
Spiced Moka Pot Coffee
Before brewing, add a pinch of spices to your coffee grounds in the filter basket. Cinnamon, cardamom, nutmeg, or a tiny slice of orange peel can infuse your brew with intriguing aromatic notes. Be mindful not to add too much, as a little goes a long way. This is particularly delightful during colder months.
Food Pairings for Moka Pot Coffee
The strong, bold profile of Moka Pot coffee pairs wonderfully with a variety of foods:
- Italian Pastries: Biscotti, cannoli, or cornetti are natural companions, reflecting the coffee’s heritage.
- Rich Desserts: Chocolate cakes, tiramisu, and anything with caramel or nuts stand up well to the Moka Pot’s intensity.
- Breakfast Items: A Moka Pot can cut through the richness of croissants, pancakes, or a savory breakfast scramble.
- Cheese and Charcuterie: For an unconventional pairing, a strong Moka Pot coffee can complement aged cheeses or savory cured meats, much like a robust red wine.
The Moka Pot in Global Coffee Culture
The Moka Pot’s influence stretches far beyond the Italian peninsula, becoming a beloved fixture in kitchens and cafes across the globe. Its story is one of simple innovation transforming everyday rituals, shaping coffee culture in unique ways wherever it lands.
Italian Coffee Rituals
In Italy, the Moka Pot is synonymous with home coffee. While espresso bars are ubiquitous for a quick morning shot, the Moka Pot reigns supreme for brewing at home, especially for breakfast or after-dinner coffee. The distinct gurgle and rich aroma filling the kitchen are deeply ingrained in the Italian domestic experience. It’s not just about the drink; it’s about the anticipation, the shared moments, and the unhurried start to the day. The moka pot instructions are often passed down through generations, a cherished family tradition rather than a mere recipe. The act of making coffee with a Moka Pot is a small, daily act of self-care and tradition.
Moka Pot’s Influence Worldwide
The Moka Pot’s affordability, durability, and ability to produce a strong, satisfying cup made it an instant hit internationally. In Latin American countries, particularly Cuba and Argentina, it’s a household staple, often brewed with pre-sweetened coffee for a strong, sweet kick. In Portugal, it’s known as a “cafeteira italiana.” Across North Africa and the Middle East, variations of stove-top brewers exist, but the Moka Pot’s design often serves as an inspiration. Even in parts of Asia, where tea traditions are dominant, the Moka Pot has carved out a niche among coffee enthusiasts seeking an authentic, robust brew at home. Its global presence highlights a universal appreciation for its unique coffee profile and the satisfying ritual of its use.
The Future of the Moka Pot
Despite the proliferation of
Mastering the Moka Pot: A Comprehensive Guide to Perfect Moka Pot Instructions
Affiliate disclosure: This article may contain affiliate links. Recommendations are independent and editorially driven.
The Moka Pot, a timeless icon of Italian design and coffee culture, has graced kitchens worldwide for nearly a century. Its distinctive octagonal shape and the rich, robust coffee it produces have cemented its place in the hearts of coffee lovers. Far more than just a brewing device, the Moka Pot represents a ritual, a connection to a simpler yet profoundly satisfying way of making coffee. While seemingly straightforward, mastering the Moka Pot to consistently brew an exceptional cup requires understanding a few critical steps and nuances. This comprehensive guide will walk you through everything you need to know, from the fundamental moka pot instructions to advanced techniques, ensuring your daily brew is nothing short of perfection.
Whether you’re a seasoned Moka Pot user looking to refine your technique or a newcomer eager to embark on this flavorful journey, you’ve come to the right place. We’ll demystify the process, tackle common challenges, and explore the rich history that makes this brewer so special. Prepare to elevate your home coffee experience and discover why the Moka Pot remains a beloved staple in homes and cafés alike.
The Enduring Appeal of the Moka Pot: A Cultural Icon
The Moka Pot is more than just a coffee maker; it’s a piece of art, a testament to ingenious engineering, and a symbol of daily ritual for millions. Invented in 1933 by Alfonso Bialetti, it quickly became a staple in Italian homes, spreading its influence across Europe and beyond. Its enduring appeal lies in its simplicity, durability, and ability to produce a strong, concentrated coffee that bridges the gap between drip coffee and true espresso.
A Brief History: Bialetti’s Legacy
Alfonso Bialetti’s design for the Moka Express was revolutionary. Inspired by his wife’s old-fashioned laundry machine, which used a central tube to draw water up through boiling suds, he applied the same principle to coffee. The Moka Pot’s patented design leveraged steam pressure to force hot water through ground coffee, extracting a concentrated brew directly into the upper chamber. This innovation democratized coffee culture, bringing café-quality coffee into the home kitchen at an affordable price. The famous “little man with the moustache,” designed by Paul Campani in 1958, became the iconic logo, further solidifying Bialetti’s place in history. Even today, the Moka Pot’s design remains largely unchanged, a testament to its timeless functionality and aesthetic.
Why Choose a Moka Pot? Flavor, Economy, and Tradition
For many, the choice of a Moka Pot is deeply rooted in a desire for a specific kind of coffee experience. It offers a unique flavor profile: bolder and more concentrated than typical filter coffee, yet less intense than a machine-made espresso. This makes it incredibly versatile, suitable for drinking black, with milk, or as a base for various coffee beverages. Economically, Moka Pots are a smart investment. They are relatively inexpensive to purchase, require no electricity (unless an induction model), and are built to last for decades with proper care. Environmentally, they produce minimal waste compared to single-serve pods. Beyond the practicalities, there’s a profound sense of tradition associated with the Moka Pot. It evokes images of bustling Italian kitchens, family gatherings, and the comforting aroma of brewing coffee. For many, it’s not just about the coffee, but about the ritual it represents.
Understanding Moka Pot Coffee: Beyond Espresso
A common misconception is that a Moka Pot makes espresso. While the coffee it produces is strong and concentrated, it is not true espresso. Espresso machines operate at much higher pressures (typically 9 bars), resulting in a distinct crema and body. Moka Pots, on the other hand, operate at much lower pressures (around 1-2 bars). The result is a highly concentrated brew with a rich, full body and an intense flavor, often with a thin layer of “false crema” (a frothy, dark-brown layer caused by dissolved coffee oils and carbon dioxide). This unique brew stands on its own merits, offering a delightful alternative to other brewing methods. It’s often referred to as “stove-top espresso” or “Moka coffee,” acknowledging its distinct identity.
Anatomy of a Moka Pot: Familiarizing Yourself with the Parts
Before diving into the moka pot instructions, it’s essential to understand the individual components of your brewer. While designs may vary slightly between brands and models, the fundamental structure remains consistent across all Moka Pots. Familiarity with each part will aid in proper assembly, brewing, and maintenance.
The Water Chamber (Boiler)
This is the bottom section of the Moka Pot, where water is heated. It typically has a safety valve on the side, a crucial component that releases excess steam pressure, preventing potential explosions. It’s usually octagonal in shape for classic models, but can also be cylindrical, especially for induction-compatible versions. The material is typically aluminum or stainless steel.
The Filter Basket (Funnel)
Also known as the funnel, this metal basket sits inside the water chamber. It holds the ground coffee. The long tube on the bottom extends into the water chamber, allowing hot water and steam to rise through the coffee grounds during brewing. The perforations in the basket allow water to saturate the coffee evenly.
The Gasket and Filter Plate
Positioned just below the upper chamber, the gasket is a rubber or silicone ring that creates a tight, airtight seal between the upper and lower chambers. Above the gasket is the filter plate (or filter screen), a perforated metal disc that holds the coffee grounds firmly in the basket and prevents them from entering the upper chamber with the brewed coffee. Both of these components are critical for proper pressure building and brewing.
The Collection Chamber (Upper Chamber)
This is the top section of the Moka Pot, where the brewed coffee collects. It features a central column (the “chimney” or “spout”) through which the coffee emerges, and a lid for pouring. The design ensures that the hot coffee flows smoothly into the chamber, ready for serving.
The Handle and Safety Valve
The handle, typically made of heat-resistant plastic or wood, is attached to the upper chamber and allows for safe handling and pouring. The safety valve, located on the side of the water chamber, is a non-negotiable safety feature. It releases steam if the internal pressure becomes too high, preventing damage to the pot or injury. Never fill water above this valve.
[INLINE IMAGE 1: place after second H2 | alt=”moka pot instructions concept illustration”]
Essential Ingredients for Moka Pot Perfection
Just as with any culinary endeavor, the quality of your ingredients profoundly impacts the final product. For the Moka Pot, this means paying close attention to your coffee beans, grind size, and even the water you use. Neglecting any of these can lead to a less-than-ideal brew, regardless of how perfectly you follow the moka pot instructions.
Choosing the Right Coffee Beans
The Moka Pot extracts a strong, concentrated brew, which can amplify certain flavor notes while masking others. Generally, medium to dark roasts tend to perform exceptionally well in a Moka Pot. These roasts offer a robust body and often possess chocolatey, nutty, or caramelized notes that shine through the Moka Pot’s unique extraction process. Lighter roasts can sometimes come across as too acidic or thin, but experimentation is always encouraged based on personal preference. Look for freshly roasted beans, ideally within a few weeks of their roast date, for optimal flavor and aroma. Whole beans are always preferable as they allow you to grind them just before brewing, preserving volatile aromatics.
Grind Size Matters: The Moka Pot Sweet Spot
This is arguably one of the most critical aspects of Moka Pot brewing, second only to the heat management during the moka pot instructions. The ideal grind size for a Moka Pot is finer than for drip coffee but coarser than for espresso. Think of it as somewhere between table salt and fine sugar. If the grind is too fine, it will restrict the water flow, leading to over-extraction, bitterness, and potentially clogging the filter. If it’s too coarse, the water will pass through too quickly, resulting in an under-extracted, weak, and sour brew. A burr grinder is highly recommended for achieving a consistent grind, which is crucial for even extraction. Blade grinders produce inconsistent particle sizes, leading to both over and under-extracted coffee in the same brew.
To test your grind, rub a small amount between your fingers. It should feel gritty but not powdery. When you lightly tap the filter basket after filling, the grounds should settle evenly without creating a solid puck.
Water Quality: The Unsung Hero
Coffee is over 98% water, so it stands to reason that the quality of your water will have a significant impact on flavor. Tap water, depending on your region, can contain chlorine, minerals, or other impurities that can negatively affect the taste of your coffee. Filtered water (e.g., from a Brita filter or a home filtration system) or good quality bottled water is highly recommended. Avoid distilled water, as it lacks the essential minerals that contribute to flavor extraction and can lead to a flat-tasting brew. The right mineral content in water actually helps to pull out the complex flavors from the coffee grounds.
Heat Source Considerations
The Moka Pot is incredibly versatile when it comes to heat sources. Traditional models are designed for gas stoves, electric coil stoves, and ceramic hobs. Stainless steel models or specific induction-compatible aluminum models can also be used on induction cooktops. The key is to use a heat source that allows for gentle, consistent heating. Avoiding excessively high heat is one of the most important moka pot instructions for preventing burnt coffee and ensuring proper extraction. The size of your burner should also match the base of your Moka Pot to prevent the handle from getting too hot or melting on gas stoves.
Step-by-Step Moka Pot Instructions: The Classic Method
Now that you’re familiar with the Moka Pot’s components and the importance of quality ingredients, let’s dive into the core moka pot instructions. Following these steps carefully will set you on the path to brewing a consistently delicious cup.
Step 1: Preparing Your Moka Pot
Start with a clean Moka Pot. Disassemble the pot by unscrewing the upper and lower chambers. Remove the filter basket and the rubber gasket/filter plate from the upper chamber. Give all parts a quick rinse with warm water, especially if it hasn’t been used in a while, to ensure there are no lingering odors or old coffee residues.
Step 2: Filling the Water Chamber
Pour fresh, filtered water into the bottom water chamber. Crucially, fill the water only up to, but not above, the level of the safety valve. Overfilling can prevent proper pressure buildup and might even compromise the safety valve’s function. For a slightly smoother, less bitter brew, many enthusiasts recommend using pre-heated water. This reduces the time the coffee grounds are exposed to heat before extraction begins, minimizing “cooking” of the grounds.
Learn more about the importance of water quality for brewing.
Step 3: Adding the Coffee Grounds
Place the funnel (filter basket) into the water chamber. Fill the filter basket with your freshly ground coffee. Do not tamp or press the grounds down firmly, as this can restrict water flow and lead to over-extraction and bitterness. Instead, gently level the grounds with your finger or a knife, ensuring the basket is full but not compacted. The goal is an even, loosely packed bed of coffee that the hot water can easily permeate.
Step 4: Assembling Your Moka Pot
Carefully screw the upper chamber onto the base. Ensure it’s tightly sealed but avoid over-tightening, which can damage the gasket. Use a kitchen towel or oven mitts if the base is hot (if you pre-heated the water). A proper seal is vital for pressure to build correctly; a loose seal will result in steam escaping and insufficient pressure for brewing.
Step 5: Heating and Brewing
Place your assembled Moka Pot on your stove over medium-low heat. The key here is gentle heat. High heat can scald the coffee, leading to a burnt and bitter taste, and cause the extraction to happen too quickly and violently. Keep the lid open initially so you can observe the brewing process.
As the water heats, steam pressure will build in the lower chamber, forcing hot water up through the coffee grounds and into the upper chamber. You’ll hear a gurgling sound, and a stream of rich, dark coffee will begin to emerge from the central column. Initially, it will be a steady, dark flow. As the brewing progresses, the color will lighten, becoming more golden or amber, and the flow will become more sporadic and sputtery.
Step 6: The Moment of Extraction and Serving
Once the coffee emerging into the upper chamber turns a light, honey-like color, or when you hear a distinct hissing or sputtering sound, immediately remove the Moka Pot from the heat. This indicates that most of the water has passed through the grounds and you’re nearing the end of the extraction. Allowing it to continue brewing on the heat once it starts sputtering will lead to over-extraction and a bitter taste, as you’ll be extracting undesirable compounds from the coffee. You can also quickly run the base under cold water (taking care not to get water into the upper chamber) to rapidly halt the extraction process.
Close the lid and pour your freshly brewed Moka coffee into pre-warmed cups. Stir the coffee in the upper chamber gently before pouring to ensure an even distribution of flavor, as the first part of the extraction is often stronger than the last. Enjoy it as is, or add milk and sugar to your preference.
Explore delicious Moka Pot coffee recipes for your next brew.
[INLINE IMAGE 2: place after fourth H2 | alt=”moka pot instructions comparison illustration”]
Advanced Moka Pot Techniques for the Connoisseur
While the basic moka pot instructions yield a good cup, there are several advanced techniques that experienced users employ to further refine their brew, minimize bitterness, and maximize flavor. These methods often involve manipulating temperature and extraction speed to achieve a smoother, more balanced result.
The Cold Brew Water Method: Minimizing Bitterness
This method focuses on minimizing the time your coffee grounds spend in contact with excessive heat. Instead of pre-heating the water, you start with cold, filtered water in the lower chamber. The logic here is that by the time the water is hot enough to extract, the coffee grounds themselves haven’t been “cooked” on the hot metal for too long. However, with this method, you must be extremely vigilant with heat management. Use very low heat and remove the pot as soon as the coffee begins to flow, before it starts sputtering. This slow and steady approach can yield a very clean and smooth cup.
Pre-heating Water: Speed and Consistency
Conversely, many Moka Pot aficionados swear by pre-heating the water. Fill the water chamber with water that is already hot, just below boiling. This significantly reduces the time it takes for pressure to build and for extraction to begin, shortening the overall brewing cycle. The benefit is less contact time between the coffee grounds and the hot metal of the Moka Pot before the water actually starts flowing through them. This can reduce the “burnt” taste sometimes associated with Moka Pots. If using pre-heated water, be extra careful when screwing the upper chamber onto the hot base; use oven mitts or a towel.
The Tamping Debate: To Tamp or Not to Tamp?
Traditionally, Moka Pot instructions advise against tamping the coffee grounds. The conventional wisdom is that tamping can restrict water flow too much, leading to excessive pressure, potential blockages, and over-extraction. However, some advanced users lightly tamp their grounds, finding it creates a more even “puck” and leads to a more consistent extraction, similar to espresso. If you choose to experiment with tamping, do so very gently – a light tap rather than a firm press. The goal is to ensure a uniform density, not to create a brick. Monitor your brew carefully; if coffee struggles to emerge or sprays violently, you’ve likely tamped too hard.
Controlling Heat: The Key to a Gentle Brew
Regardless of whether you use cold or pre-heated water, heat control is paramount. Many Moka Pot users make the mistake of brewing on high heat to speed things up. This is a recipe for bitter, burnt coffee. The ideal is a medium-low to low heat. The entire brewing process, from placing on the stove to removing it, should ideally take between 5 to 8 minutes. If it’s much faster, your heat is too high; if it’s much slower, it might be too low, or your grind is too fine. A slower, more gentle extraction allows for a fuller development of flavors without harshness. On a gas stove, ensure the flame doesn’t extend beyond the base of the pot, which can overheat the handle.
The “Lift-Off” Method: Perfecting Extraction
This technique involves closely monitoring the coffee as it flows into the upper chamber. As soon as the coffee starts to emerge, often with a darker, more viscous appearance, you can briefly lift the Moka Pot off the heat for a few seconds, then return it. This momentarily pauses the rapid extraction, allowing for a slightly longer dwell time without over-extracting. It’s an advanced maneuver that requires practice, but can help achieve a more balanced flavor profile. Another variation is to completely remove the pot from heat once the initial steady stream of coffee appears and let the residual heat finish the extraction, removing it completely when sputtering begins.
Achieving Crema (or a close approximation)
As mentioned, true espresso crema is difficult to achieve with a Moka Pot due to lower pressure. However, you can aim for a rich, foamy head that resembles crema. This often comes from fresh, high-quality beans, an optimal grind, and precise heat management. Some Moka Pot designs, particularly those with a “crema valve” or a modified filter plate, are specifically designed to produce a thicker layer of foam. Experimenting with a slightly finer grind than standard (but not espresso fine) and ensuring a very consistent heat can also help.
Troubleshooting Common Moka Pot Issues
Even with the most precise moka pot instructions, you might encounter issues. Don’t be discouraged! Most problems are easily diagnosable and fixable. Here’s a rundown of common Moka Pot woes and how to solve them.
Weak or Watery Coffee
- Grind too coarse: If the water passes through too quickly, it doesn’t have enough contact time to extract flavor. Adjust your grinder to a finer setting.
- Insufficient coffee: Ensure your filter basket is full and level.
- Low heat/short brew time: If you remove the pot too early or brew on very low heat, not enough extraction may occur. Increase heat slightly or allow more time for brewing until the coffee lightens in color.
- Old/stale beans: Fresh beans are key to rich flavor.
- Poor water quality: Using distilled water or highly chlorinated water can result in flat coffee. Use filtered water with some mineral content.
Bitter or Burnt Taste
- Grind too fine: This leads to over-extraction, forcing the water through too slowly and pulling out bitter compounds. Coarsen your grind slightly.
- Heat too high: This is a very common cause. High heat scorches the coffee grounds. Use a medium-low heat setting.
- Over-extraction: Leaving the Moka Pot on the heat for too long, especially after it starts sputtering violently, will extract bitter notes. Remove it from the heat as soon as the coffee turns light brown/honey-like or starts to sputter significantly.
- Dirty Moka Pot: Residue from old coffee oils can become rancid and impart bitterness. Clean your Moka Pot regularly.
Slow Extraction or No Coffee Flow
- Grind too fine: The most common culprit. A very fine grind creates too much resistance. Coarsen your grind.
- Over-tamping: If you pressed the grounds down, they are too compacted. Level the grounds gently, do not tamp.
- Blocked filter plate: Check the filter plate (underside of the upper chamber) for coffee grounds or scale buildup. Clean it thoroughly.
- Insufficient water: Make sure you’ve filled the water chamber to the correct level.
- Loose seal: If the upper and lower chambers aren’t screwed on tightly, steam will escape, and pressure won’t build.
Leaking Moka Pot
- Loose seal: The most common reason. Ensure the upper and lower chambers are screwed together tightly.
- Worn-out gasket: Over time, the rubber or silicone gasket can harden, crack, or lose its elasticity, preventing a proper seal. Inspect it and replace it if necessary (they typically last 6-12 months with regular use).
- Damaged rim: Check the rims of both the upper and lower chambers for any dents or deformities that might prevent a tight seal.
Grounds in Your Brew
- Grind too fine: If the grounds are too powdery, some can slip through the filter plate. Coarsen your grind slightly.
- Overfilling the basket: If the basket is heaped, grounds can get caught in the threads and fall into the upper chamber. Level the grounds just below the rim.
- Damaged filter plate: Inspect the filter plate for any holes or tears. Replace if damaged.
- Incorrect assembly: Ensure the gasket and filter plate are correctly seated.
Choosing the Best Moka Pot: Size, Material, and Brand
With a deeper understanding of moka pot instructions and brewing techniques, you might be considering a new Moka Pot or your very first one. The market offers a range of options, and choosing the right one depends on your needs, aesthetic preferences, and stove type.
Understanding Moka Pot Sizes (Cup Capacity)
Moka Pots are typically sized by “cups,” which are traditionally small Italian espresso-sized cups (around 2 ounces or 60ml). So, a “3-cup” Moka Pot will yield about 6 ounces of concentrated coffee, not three standard mugs. It’s important to match the Moka Pot size to your typical brewing needs. A pot should always be brewed to its full capacity; attempting to brew a smaller amount of coffee by underfilling the water or coffee basket will lead to poor extraction and bitter results.
- 1-2 cup: Ideal for a single strong shot or a small personal cup.
- 3-4 cup: Good for one larger serving or two smaller ones. Very popular for individual use.
- 6 cup: Standard size for couples or individuals who enjoy a larger amount of coffee.
- 9-12 cup: Suitable for brewing for small groups or for making larger quantities for milk-based drinks.
Aluminum vs. Stainless Steel: Durability and Flavor
The two primary materials for Moka Pots are aluminum and stainless steel, each with distinct advantages:
- Aluminum Moka Pots: The classic choice, exemplified by the original Bialetti Moka Express. Aluminum heats up quickly and evenly, contributing to its iconic brewing performance. They are lightweight and often more affordable. However, aluminum can react with acids in coffee over time, potentially altering flavor (though many argue this contributes to the “classic” Moka Pot taste). They are also not suitable for induction cooktops and require more careful cleaning to prevent pitting or discoloration.
- Stainless Steel Moka Pots: More durable and resistant to corrosion than aluminum. Stainless steel doesn’t react with coffee, ensuring a purer taste profile. Many stainless steel models are induction-compatible, making them a versatile choice for modern kitchens. They tend to be heavier and more expensive than aluminum counterparts but offer superior longevity and ease of maintenance.
Induction-Compatible Moka Pots
If you have an induction cooktop, you must choose a Moka Pot specifically designed for induction. This typically means a stainless steel base or a specialized aluminum base with a ferromagnetic plate. Always check the product specifications for induction compatibility before purchasing.
Top Moka Pot Brands: Bialetti, G.A.T., Cuisinox, and More
While Bialetti remains the most famous name, many other reputable brands produce excellent Moka Pots. Each may offer subtle variations in design, material quality, or features.
- Bialetti: The original and still a benchmark. Offers a range of aluminum (Moka Express, Brikka) and stainless steel (Venus, Musa) models. The Brikka model is designed to produce a thicker crema.
- G.A.T.: Another established Italian brand known for its quality aluminum and stainless steel Moka Pots, often with classic and modern designs.
- Cuisinox: A Canadian brand known for its high-quality stainless steel Moka Pots, often featuring elegant designs and excellent build quality, frequently induction-compatible.
- Alessi: Offers designer Moka Pots, often collaborations with renowned industrial designers, blending functionality with high-end aesthetics. Expect a higher price point.
- Primula: Known for affordable and reliable aluminum Moka Pots.
Here’s a comparison table to help you decide:
| Feature | Aluminum Moka Pot | Stainless Steel Moka Pot | Induction-Compatible Moka Pot |
|---|---|---|---|
| Material | Aluminum | Stainless Steel | Stainless Steel (or aluminum with ferromagnetic base) |
| Heat Conductivity | Excellent, heats quickly | Good, heats slower than aluminum but retains heat well | Varies, depends on base thickness and material |
| Durability | Good, but prone to pitting/staining if not cleaned properly | Excellent, highly resistant to corrosion and wear | Excellent for stainless steel, good for hybrid aluminum |
| Flavor Impact | Can impart a slight metallic taste over time (some consider it part of the “classic” flavor) | Neutral, preserves coffee’s pure flavor profile | Neutral (for stainless steel), potentially slight for hybrid aluminum |
| Cost | Generally more affordable | Mid-range to higher end | Mid-range to higher end |
| Induction Compatible? | No (unless specified with special base) | Often yes, check specifications | Yes, by design |
| Maintenance | Requires careful hand washing, avoid harsh detergents | Easier to clean, often dishwasher safe (check manufacturer) | Easier to clean (for stainless steel) |
Moka Pot Cleaning and Maintenance: Ensuring Longevity
Proper cleaning and maintenance are crucial not only for the longevity of your Moka Pot but also for the consistent quality of your coffee. Residual coffee oils can turn rancid, imparting off-flavors to your fresh brew. Following these simple moka pot instructions for cleaning will keep your pot performing its best for years to come.
Daily Cleaning Rituals
After each use, once the Moka Pot has cooled down enough to handle, disassemble it completely. Discard the spent coffee grounds from the filter basket. Rinse all parts – the water chamber, filter basket, gasket, filter plate, and upper chamber – thoroughly with warm water. Avoid using dish soap or harsh detergents, especially on aluminum Moka Pots, as these can strip away the natural patina (a thin layer of oxidized coffee oils) that many believe contributes to the Moka Pot’s unique flavor. Soap can also leave residues that can affect the taste of your next brew. Instead, a simple rinse and a gentle wipe with a sponge are usually sufficient. Make sure to rinse the inside of the central column in the upper chamber. Allow all parts to air dry completely before reassembling or storing, as trapped moisture can lead to corrosion or mildew.
Deep Cleaning: Tackling Stubborn Stains
Over time, especially with aluminum pots, you might notice some discoloration or mineral buildup. For a deeper clean:
- Vinegar Solution: For mineral scale buildup in the water chamber, brew a cycle (without coffee) using a solution of equal parts water and white vinegar. Follow with one or two plain water cycles to rinse thoroughly.
- Baking Soda Paste: For stubborn coffee stains or discoloration, especially on stainless steel, create a paste with baking soda and a little water. Gently scrub the affected areas with a soft cloth or sponge. Rinse thoroughly.
- Toothbrush for Crevices: Use an old toothbrush to clean hard-to-reach areas like the safety valve or the inside of the filter basket’s stem.
Remember, never put an aluminum Moka Pot in a dishwasher, as the harsh detergents can cause severe discoloration, pitting, and damage to the aluminum’s surface. Some stainless steel models may be dishwasher safe, but always check the manufacturer’s instructions.
Replacing Gaskets and Filters
The rubber or silicone gasket is the most common component that needs replacement. With regular use, gaskets can harden, crack, or lose their elasticity, leading to leaks and poor pressure buildup. It’s generally recommended to replace the gasket and the associated filter plate every 6-12 months, or sooner if you notice any signs of wear or leakage. Replacement kits are readily available and inexpensive. When replacing, ensure you purchase the correct size for your Moka Pot model and brand.
Storage Tips
Once clean and completely dry, store your Moka Pot unassembled, or at least with the upper chamber loosely screwed on. This allows air to circulate, preventing moisture buildup and any stale odors. Keep it in a dry, well-ventilated area. Storing it assembled tightly when wet can trap moisture and promote corrosion or mildew.
Beyond the Basics: Moka Pot Coffee Recipes and Pairings
The Moka Pot’s strong, concentrated brew makes it an incredibly versatile base for a variety of coffee drinks, far beyond just a simple black cup. Its intensity lends itself well to concoctions that would overwhelm lighter filter coffees. Here are some ideas to expand your Moka Pot horizons:
The Moka Pot Americano
A classic. Simply brew your Moka Pot coffee according to the moka pot instructions, then dilute it with an equal part (or to taste) of hot water. This creates a lighter-bodied, yet still flavorful, coffee that’s less intense than a straight Moka Pot shot but more robust than a typical drip coffee. It’s a great way to enjoy the Moka Pot’s flavor without its full concentration.
Moka Pot Latte/Cappuccino Base
The robust nature of Moka Pot coffee makes it an excellent foundation for milk-based drinks. Brew your coffee, then steam or froth your milk of choice. Combine the two, adjusting the ratios to your preference for a latte (more milk) or a cappuccino (less milk, more foam). For an extra treat, add a dash of vanilla syrup or a sprinkle of cinnamon.
Moka Pot Affogato
This Italian classic is incredibly simple and utterly delightful. Place a scoop (or two) of good quality vanilla bean ice cream in a small bowl or cup. Immediately pour a hot shot of freshly brewed Moka Pot coffee over the ice cream. The hot coffee melts the ice cream slightly, creating a luscious, creamy, and bittersweet dessert-drink that’s perfect after a meal.
Moka Pot Mocha
Indulge your sweet tooth! Add a spoonful of unsweetened cocoa powder or your favorite chocolate syrup to your cup before pouring in the Moka Pot coffee. Stir well until dissolved, then add steamed milk and a dollop of whipped cream for a luxurious treat. The Moka Pot’s strong coffee stands up beautifully to the richness of chocolate.
Spiced Moka Pot Coffee
Before brewing, add a pinch of spices to your coffee grounds in the filter basket. Cinnamon, cardamom, nutmeg, or a tiny slice of orange peel can infuse your brew with intriguing aromatic notes. Be mindful not to add too much, as a little goes a long way. This is particularly delightful during colder months.
Food Pairings for Moka Pot Coffee
The strong, bold profile of Moka Pot coffee pairs wonderfully with a variety of foods:
- Italian Pastries: Biscotti, cannoli, or cornetti are natural companions, reflecting the coffee’s heritage.
- Rich Desserts: Chocolate cakes, tiramisu, and anything with caramel or nuts stand up well to the Moka Pot’s intensity.
- Breakfast Items: A Moka Pot can cut through the richness of croissants, pancakes, or a savory breakfast scramble.
- Cheese and Charcuterie: For an unconventional pairing, a strong Moka Pot coffee can complement aged cheeses or savory cured meats, much like a robust red wine.
The Moka Pot in Global Coffee Culture
The Moka Pot’s influence stretches far beyond the Italian peninsula, becoming a beloved fixture in kitchens and cafes across the globe. Its story is one of simple innovation transforming everyday rituals, shaping coffee culture in unique ways wherever it lands.
Italian Coffee Rituals
In Italy, the Moka Pot is synonymous with home coffee. While espresso bars are ubiquitous for a quick morning shot, the Moka Pot reigns supreme for brewing at home, especially for breakfast or after-dinner coffee. The distinct gurgle and rich aroma filling the kitchen are deeply ingrained in the Italian domestic experience. It’s not just about the drink; it’s about the anticipation, the shared moments, and the unhurried start to the day. The moka pot instructions are often passed down through generations, a cherished family tradition rather than a mere recipe. The act of making coffee with a Moka Pot is a small, daily act of self-care and tradition.
Moka Pot’s Influence Worldwide
The Moka Pot’s affordability, durability, and ability to produce a strong, satisfying cup made it an instant hit internationally. In Latin American countries, particularly Cuba and Argentina, it’s a household staple, often brewed with pre-sweetened coffee for a strong, sweet kick. In Portugal, it’s known as a “cafeteira italiana.” Across North Africa and the Middle East, variations of stove-top brewers exist, but the Moka Pot’s design often serves as an inspiration. Even in parts of Asia, where tea traditions are dominant, the Moka Pot has carved out a niche among coffee enthusiasts seeking an authentic, robust brew at home. Its global presence highlights a universal appreciation for its unique coffee profile and the satisfying ritual of its use.
The Future of the Moka Pot
Despite the proliferation of