
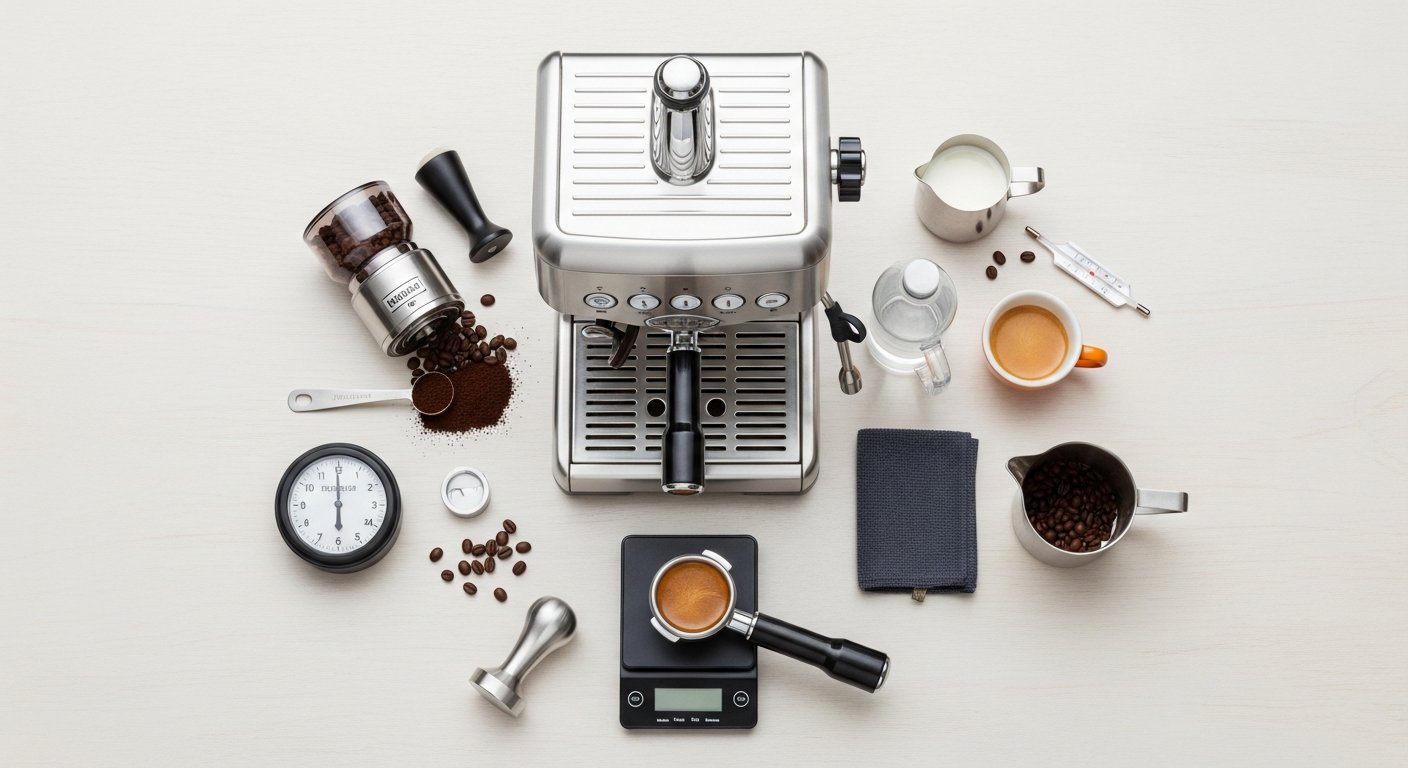
How To Make Espresso At Home
How to Make Espresso at Home: Your Ultimate Guide to Crafting Perfect Shots
Affiliate disclosure: This article may contain affiliate links. Recommendations are independent and editorially driven.
For many, the daily ritual of sipping a perfectly crafted espresso is a highlight – a moment of rich, concentrated flavor and invigorating aroma that signals the start of a productive day or a much-needed afternoon pause. While the allure of your local barista’s expertise is undeniable, imagine replicating that magic in the comfort of your own kitchen. Learning how to make espresso at home isn’t just about saving money; it’s about embarking on a journey of discovery, mastering a craft, and tailoring every sip precisely to your preferences. The world of home espresso brewing is vast and rewarding, offering endless opportunities for experimentation and refinement.
At cafeserre, we believe that exceptional coffee experiences shouldn’t be confined to cafés. Our mission is to empower you with the knowledge and confidence to brew outstanding coffee, and espresso is arguably the pinnacle of that journey. This comprehensive guide is designed to demystify the process, breaking down complex techniques into manageable steps. Whether you’re a complete novice contemplating your first machine or an aspiring home barista looking to refine your technique, we’ll cover everything you need to know, from selecting the right equipment and beans to mastering extraction and even diving into the art of milk steaming and latte art.
Prepare to transform your kitchen into a personal coffee sanctuary. By the end of this guide, you’ll possess the foundational knowledge and practical tips to consistently pull delicious espresso shots, impress your friends and family, and truly elevate your daily coffee ritual. Let’s dive into the fascinating world of home espresso and unlock the secrets to brewing perfection.
Why Make Espresso at Home? Unlocking a World of Flavor and Savings
The decision to learn how to make espresso at home is often driven by a blend of passion, practicality, and the pursuit of perfection. Beyond the immediate gratification of a café-quality beverage, home brewing offers a multitude of advantages that resonate with coffee enthusiasts and budget-conscious individuals alike.
The Allure of Home Brewing: A Personal Coffee Sanctuary
There’s a unique satisfaction that comes from crafting something with your own hands, especially when that something is as complex and nuanced as a shot of espresso. Home brewing transforms your kitchen into a personal coffee laboratory, a space where you can experiment, learn, and develop a deep understanding of the subtle factors that influence flavor. It’s an intimate experience, free from the rush of a café, allowing you to focus purely on the art and science of coffee extraction. This journey fosters a deeper connection to your beverage, making each cup an act of creation rather than just consumption.
Cost-Effectiveness Over Time: Investing in Your Daily Ritual
While the initial investment in espresso equipment can seem significant, the long-term financial benefits of making espresso at home are substantial. Consider the cumulative cost of daily café visits. A $4-$6 espresso drink, five times a week, quickly adds up to hundreds of dollars a month, thousands a year. Owning your equipment, even a high-quality setup, allows you to recoup that investment surprisingly quickly. The cost per cup plummets once your equipment is paid for, making premium coffee an everyday luxury rather than an occasional indulgence. Furthermore, having control over your ingredients means you can buy specialty beans in bulk or on sale, further enhancing your savings.
Unparalleled Customization and Freshness: Tailor-Made Perfection
Perhaps one of the most compelling reasons to make espresso at home is the unparalleled degree of control it affords. From the choice of beans to the precise grind size, water temperature, dose, and extraction time, every variable is yours to command. This level of customization allows you to discover and consistently reproduce your ideal flavor profile. Do you prefer a brighter, more acidic shot from a single-origin Ethiopian, or a bold, chocolatey blend for your latte? At home, you can experiment freely without judgment. Moreover, brewing at home ensures the ultimate freshness. Grinding your beans immediately before extraction preserves volatile aromatics and flavors that begin to dissipate the moment beans are ground. This commitment to freshness is a game-changer, elevating the quality of your espresso far beyond what’s typically achievable with pre-ground coffee.
Essential Equipment for Home Espresso Enthusiasts
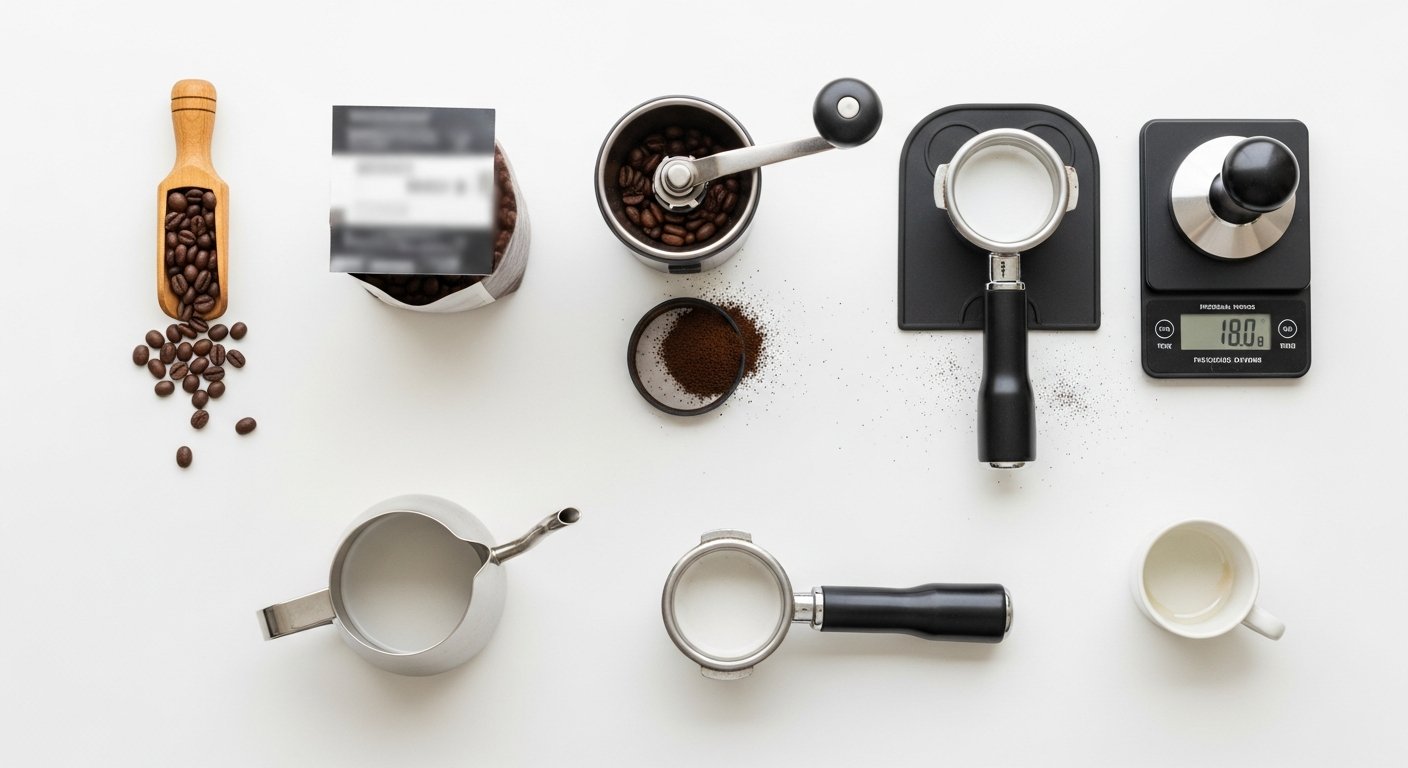
Embarking on your home espresso journey requires more than just enthusiasm; it demands the right tools. While the sheer array of options can seem daunting, understanding the core pieces of equipment and their roles is crucial. Think of your setup as an orchestra, where each instrument plays a vital part in the final symphony of flavor. Investing wisely in these essentials will lay the foundation for consistent, delicious espresso.
The Espresso Machine: A Deep Dive into Your Brewing Heart
The espresso machine is undoubtedly the centerpiece of your home setup. Its primary function is to force hot, pressurized water through a compacted bed of finely ground coffee, extracting the concentrated liquid we know as espresso. Machines vary widely in price, complexity, and capabilities, but generally fall into a few key categories:
- Manual Lever Machines: These are for the purists and hands-on enthusiasts. They require you to physically pull a lever to pressurize the water, offering immense control over pre-infusion pressure and flow.
- Pros: Ultimate control, beautiful aesthetics, quiet operation, rich espresso.
- Cons: Steep learning curve, requires significant technique and strength, less consistent initially.
- Best For: Experienced baristas, hobbyists who enjoy the process, those seeking maximum control.
- Semi-Automatic Machines: The most popular choice for home baristas, these machines use a pump to generate pressure but give you control over grind, dose, and the start/stop of the shot (often via a button). They typically feature a portafilter, a group head, and a steam wand.
- Pros: Excellent balance of control and convenience, wide range of prices and features, allows for skill development.
- Cons: Requires skill in grinding, dosing, and tamping; learning curve for steaming milk.
- Best For: Dedicated enthusiasts ready to learn, those seeking café-quality results.
- Automatic Machines (Volumetric): Similar to semi-automatics, but they automatically stop the shot once a pre-programmed volume of water has passed through the coffee. You still control grind, dose, and tamp.
- Pros: Consistency in shot volume, slightly simpler operation than semi-automatics once programmed.
- Cons: Less control over shot timing (which affects flavor), still requires other barista skills.
- Best For: Those who want consistent volume and minimal intervention after initial setup.
- Super-Automatic Machines: These are the “bean-to-cup” machines, offering ultimate convenience. They grind the beans, tamp, brew, and even steam milk with the press of a single button.
- Pros: Extremely easy to use, minimal effort, fast, great for busy individuals or offices.
- Cons: Significantly less control over variables, cleaning can be complex, often produce a less nuanced shot than manual/semi-automatics. Higher cost for premium models.
- Best For: Convenience-focused users, those new to espresso who prioritize ease over manual control.
When choosing, consider your budget, desired level of involvement, and how much space you have. Entry-level semi-automatics are a fantastic starting point for serious home brewers.
The Grinder: Non-Negotiable for Quality Espresso
If there’s one piece of equipment you absolutely cannot skimp on, it’s the grinder. A high-quality burr grinder is as important, if not more important, than the espresso machine itself. Why? Because espresso requires an extremely fine, consistent, and even grind. Inconsistent particle sizes lead to uneven extraction, resulting in flavors ranging from sour (under-extracted) to bitter (over-extracted) in the same shot. Blade grinders, which chop rather than grind, produce a highly inconsistent “dust and boulders” mixture unsuitable for espresso.
- Burr Grinders: These use two abrasive surfaces (burrs) to crush coffee beans into uniform particles.
- Conical Burr Grinders: Often found in home and prosumer grinders, they use a cone-shaped inner burr and a ring-shaped outer burr. They are generally quieter and produce less heat.
- Flat Burr Grinders: Feature two parallel flat burrs. Commonly found in commercial settings, they can produce a very precise grind and often have more clarity in flavor.
- Micrometric Adjustment: Look for grinders that offer stepless or very fine stepped adjustments. Espresso brewing is incredibly sensitive to grind size; even a tiny adjustment can significantly impact your shot.
- Dosing: Grinders can be on-demand (grind directly into your portafilter) or doser-based (grind into a chamber, then dispense). On-demand is generally preferred for freshness in home settings.
Investing in a good grinder will be the single most impactful upgrade to your home espresso setup. It unlocks the full potential of your coffee beans and allows your espresso machine to perform at its best.
Must-Have Accessories: Enhancing Your Workflow and Consistency
Beyond the machine and grinder, several essential accessories will significantly improve your brewing experience and the quality of your espresso.
- Tamper: Used to compress the ground coffee in the portafilter basket into an even, consistent puck. A good tamper is heavy, fits your basket perfectly, and has a comfortable handle. Ensure it’s the correct diameter for your machine’s portafilter (e.g., 58mm, 54mm).
- Precision Scale: Absolutely crucial for consistency. You need to weigh your dose of ground coffee (in grams) before brewing and the output of your espresso shot (in grams) as it extracts. This allows for precise control over your brew ratio, a fundamental concept in espresso. Look for a scale with 0.1g accuracy and a timer function.
- Knock Box: A container designed to easily “knock out” spent coffee pucks from your portafilter. It keeps your brewing area clean and protects your portafilter.
- Milk Pitcher (Steaming Pitcher): If you plan on making milk-based drinks, a stainless steel milk pitcher is essential for steaming milk. Sizes vary (12oz, 20oz); choose one appropriate for the volume of milk you typically steam.
- Thermometer (for milk): While not strictly essential once you develop a feel for it, a clip-on thermometer for your milk pitcher can help ensure you hit the ideal milk temperature (140-155°F / 60-68°C) without scalding.
- Cleaning Tools:
- Group Head Brush: To scrub residual coffee grounds from your machine’s group head.
- Blind Portafilter Basket & Cleaning Detergent: For backflushing (a crucial cleaning process for semi-automatic machines).
- Descaling Solution: To remove mineral buildup in your machine’s boiler and internal plumbing.
- Microfiber Cloths: For wiping down your machine, steam wand, and general cleanliness.
- Dosing Funnel: Sits on top of your portafilter basket to prevent ground coffee from spilling when grinding or distributing, particularly useful for single dose grinders.
- Distribution Tool (WDT Tool): A tool with fine needles used to break up clumps and evenly distribute coffee grounds in the portafilter before tamping. This significantly improves extraction consistency by reducing channeling.
While the initial cost for all these items might seem high, remember that they are investments in your daily coffee ritual. With proper care, they will serve you for many years, paying dividends in delicious espresso and immense satisfaction.
[INLINE IMAGE 1: place after second H2 | alt=”how to make espresso at home concept illustration”]
Choosing the Right Beans: The Foundation of Flavor
The journey to a perfect home espresso shot begins long before you even touch your machine. It starts with the coffee beans themselves. No matter how sophisticated your equipment or how refined your technique, subpar beans will always result in a subpar espresso. Understanding how to select, store, and prepare your beans is fundamental to unlocking their full flavor potential.
Roast Levels and Their Impact: From Bright to Bold
Coffee beans are seeds, and roasting is the process that transforms them into the aromatic, flavorful product we recognize. Different roast levels bring out distinct characteristics:
- Light Roasts: These beans are roasted for a shorter duration and to a lower internal temperature. They retain more of their original fruity, floral, and acidic notes, often described as bright and complex. Light roasts are dense and can be more challenging to grind and extract properly for espresso, but when done right, they yield incredibly vibrant shots.
- Medium Roasts: The most versatile and popular roast level, medium roasts strike a balance between the bean’s inherent characteristics and the flavors developed during roasting. They often feature notes of caramel, chocolate, nuts, and a balanced acidity. Medium roasts are generally easier to work with for espresso, offering a harmonious blend of sweetness and body.
- Dark Roasts: Roasted to higher temperatures and longer durations, dark roasts develop pronounced smoky, bittersweet, and chocolatey notes. The original bean characteristics are often overshadowed by roast-derived flavors. While traditional for espresso in some regions, extremely dark roasts can sometimes be oily, leading to issues with grinders and a burnt taste. They tend to produce a thicker crema.
For espresso, many home baristas prefer medium to medium-dark roasts as they offer a good balance of flavor, body, and ease of extraction. However, don’t be afraid to experiment with lighter roasts once you’ve gained confidence in your technique.
Single Origin vs. Blends: Exploring Diverse Terroirs
The origin of your coffee beans plays a significant role in their flavor profile:
- Single Origin Coffees: These beans come from a single specific geographical location – a particular farm, region, or country. They showcase the unique characteristics of that terroir, offering distinct flavor notes specific to their growing conditions. For example, an Ethiopian Yirgacheffe might be known for its delicate floral and citrus notes, while a Colombian Supremo might offer chocolate and nutty undertones. Single origins are great for exploring and appreciating the nuances of coffee.
- Espresso Blends: These are meticulously crafted combinations of two or more different single-origin coffees. Roasters blend beans to achieve a specific flavor profile that is balanced, complex, and performs consistently well as espresso. Blends often aim for a rounder body, balanced acidity, and flavors like chocolate, nuts, and caramel, which are highly desirable in espresso and milk-based drinks. Many blends are designed to shine as an espresso base for lattes and cappuccinos.
For beginners, starting with a well-regarded espresso blend can provide a more forgiving and consistent experience. As you gain expertise, delving into single origins will open up a new dimension of flavor exploration.
Freshness is Key: Roasting Dates and Storage Practices
This is perhaps the most critical factor for excellent espresso. Coffee is an agricultural product, and like fresh produce, it has a peak freshness window. For espresso, this window is particularly narrow:
- Roasting Date, Not “Best By” Date: Always look for a “roasted on” date on your coffee bag. Avoid beans that only list an expiry or “best by” date, as these offer no indication of actual freshness.
- Optimal Window: For espresso, coffee is generally best used between 7 to 21 days post-roast. This allows the beans to “degas” (release CO2 trapped during roasting), which can otherwise interfere with extraction and create too much crema. Beyond 3-4 weeks, much of the delicate aroma and flavor begins to degrade.
- Storage: Store your whole bean coffee in an airtight container, away from light, heat, and moisture. A cool, dark pantry is ideal. Avoid refrigerating or freezing coffee for daily use, as it can absorb odors and moisture. Only freeze if you plan to store larger quantities for several months, and only do so in vacuum-sealed, portioned bags.
Always buy whole beans and grind them just before brewing. Pre-ground coffee, even if bought recently, loses most of its volatile aromatics within minutes of grinding, resulting in a flat, lifeless espresso. This is why a good grinder is indispensable.
Grinding Your Beans: The Critical Step to Perfect Extraction
The grind size for espresso is paramount. It must be very fine, resembling powdered sugar or flour, but not so fine that it clogs the machine. Crucially, it must also be consistent. The ideal grind allows the hot, pressurized water to extract flavor compounds evenly and efficiently within a specific timeframe (typically 25-30 seconds for a double shot).
- The Dial-In Process: Grinding for espresso is not a one-time setting. It’s a continuous “dial-in” process because grind size needs to be adjusted based on the beans’ age, roast level, humidity, and even the specific dose you’re using.
- Too Coarse: If your espresso extracts too quickly (e.g., under 20 seconds), the grind is likely too coarse. The water flows through too easily, resulting in under-extraction, characterized by sour, weak, and watery shots with little crema. Adjust your grinder to a finer setting.
- Too Fine: If your espresso extracts too slowly (e.g., over 35 seconds), or chokes the machine, the grind is too fine. The water struggles to pass through, leading to over-extraction, characterized by bitter, burnt, and harsh flavors, often with very dark, thin crema. Adjust your grinder to a coarser setting.
- Single Dosing: Many home baristas prefer to weigh out their whole beans for each shot (e.g., 18g for a double shot) and then grind only that amount. This ensures consistency and minimizes wasted coffee.
- Distribution: After grinding into the portafilter, it’s vital to distribute the grounds evenly. Gently tapping the portafilter on the counter or using a WDT (Weiss Distribution Technique) tool helps break up clumps and settle the grounds uniformly, preventing “channeling” (where water finds paths of least resistance, leading to uneven extraction).
- Tamping: Once distributed, the grounds must be tamped firmly and level. The goal is to create a perfectly flat, dense puck that offers uniform resistance to the pressurized water. Inconsistent tamping can lead to channeling and poor extraction.
Mastering the grind is perhaps the most challenging, yet rewarding, aspect of learning how to make espresso at home. Patience, practice, and careful observation of your shots will lead to consistent improvements.
Mastering the Art of Espresso Extraction: The Core Process
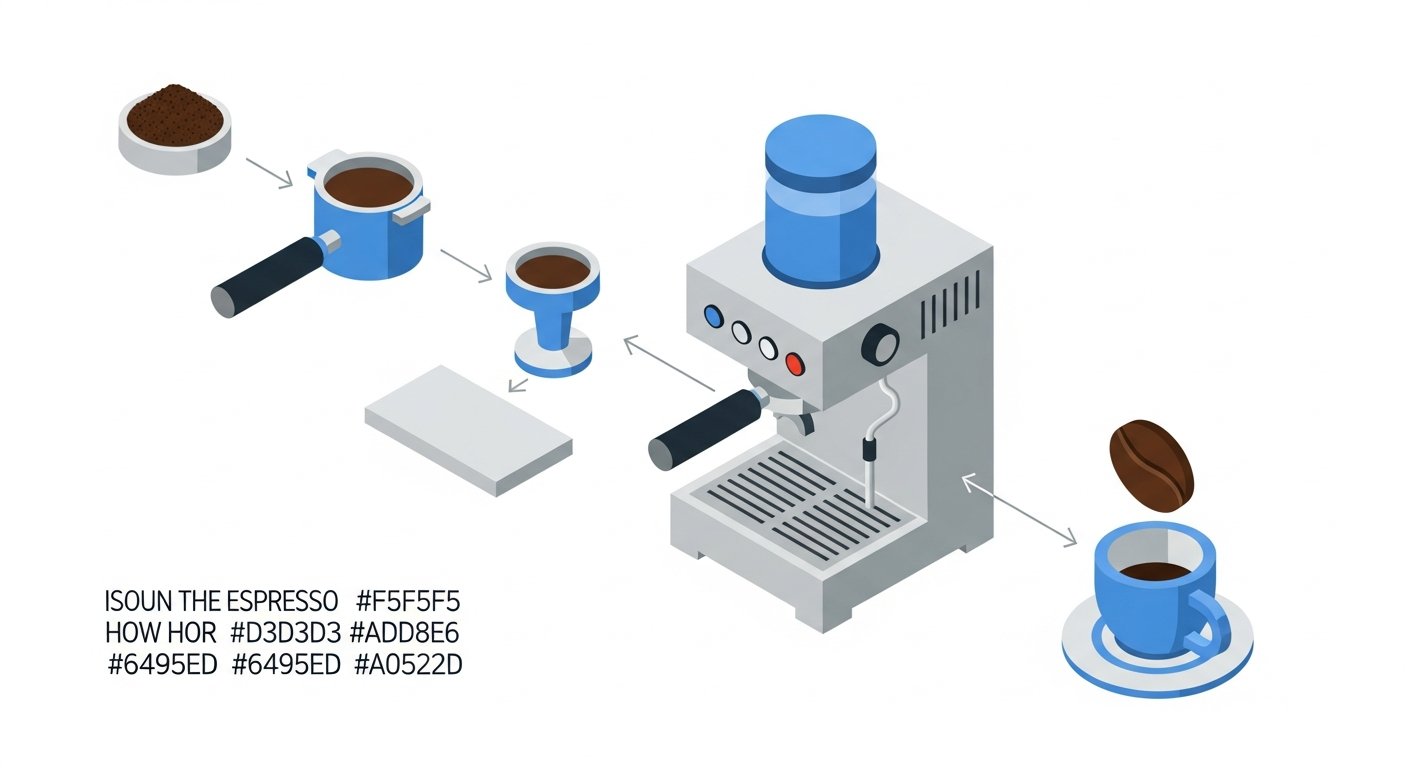
With your equipment chosen, beans selected, and grind dialed in, you’re ready for the main event: pulling an espresso shot. This is where the magic truly happens, transforming finely ground coffee into that concentrated elixir. Understanding the key stages and visual cues of extraction is paramount to achieving a “god shot” – that elusive, perfectly balanced espresso.
Pre-Infusion: What It Is and Why It Matters
Pre-infusion is the initial stage of extraction where a small amount of low-pressure water is applied to the coffee puck before the full brewing pressure kicks in. This gently wets the coffee grounds, allowing them to expand and become saturated uniformly. While not all machines offer explicit control over pre-infusion, many semi-automatics and even some automatics incorporate a brief, low-pressure phase.
- Purpose:
- Even Saturation: Helps to prevent dry spots and encourages a more even flow of water through the entire puck once full pressure is applied.
- Reduced Channeling: By gently pre-wetting, it minimizes the chances of water finding preferential pathways (channels) through the coffee, which leads to under-extraction in some parts and over-extraction in others.
- Enhanced Flavor: Promotes a more complete and balanced extraction, often leading to a richer, more nuanced flavor profile.
- How it Works: On many semi-automatic machines, pre-infusion occurs naturally as the pump slowly ramps up to full pressure or as water first enters the group head before the pressure builds. Some advanced machines allow you to program the duration and even the pressure of the pre-infusion phase.
While not every machine allows for extensive pre-infusion control, recognizing its importance highlights the value of careful puck preparation (grind, distribution, tamp) which serves a similar goal of promoting even water flow.
The “God Shot”: Understanding Flow Rate, Crema, and Taste
The “god shot” is the mythical perfect espresso – a harmonious balance of flavor, body, and aroma. Achieving it consistently is the goal of every home barista. Here’s what to look for during extraction:
- Flow Rate and Appearance:
- After a few seconds of pre-infusion, streams of dark, thick liquid should begin to emerge from the portafilter spouts.
- These streams should gradually lighten in color, eventually resembling warm honey or tiger stripes.
- The flow should be steady and consistent, ideally like two thin mouse tails, merging into one.
- A “normal” double shot (typically 36g-40g output from 18g-20g input) should extract in approximately 25-30 seconds from the moment the pump is activated.
- Crema:
- Crema is the reddish-brown, foamy layer that sits atop your espresso. It’s formed by CO2 gases trapped in the coffee oils during extraction.
- A good crema is uniform, thick, and resilient, with a fine, dense texture, often displaying “tiger striping” or mottling.
- Too dark/thin/bubbly crema can indicate over-extraction; too light/sparse/quick-dissipating crema suggests under-extraction. However, crema alone isn’t a definitive indicator of taste; it’s a visual cue.
- Taste: Ultimately, taste is king. A balanced espresso will have:
- Sweetness: A natural sweetness that balances bitterness and acidity.
- Acidity: A pleasant, often fruity or citrusy brightness, not sourness.
- Bitterness: A pleasant, dark chocolate-like bitterness, not acrid or burnt.
- Body: A rich, viscous mouthfeel.
- Balance: All these elements should be in harmony, creating a complex and enjoyable flavor.
Learning how to make espresso at home is an iterative process. You’ll make adjustments to grind, dose, and temperature, then taste, and adjust again. Keep notes! This helps you identify what works best for different beans and your preferences.
Troubleshooting Common Espresso Problems: Diagnosing Your Shot
Even with the best equipment, you’ll inevitably encounter shots that aren’t quite right. Learning to diagnose and correct these issues is a hallmark of an experienced home barista.
- Under-extraction:
- Symptoms: Shot pulls too fast (e.g., <20 seconds); watery, thin body; sour, acidic, or salty taste; light, thin, quickly dissipating crema.
- Causes: Grind too coarse; underdosing; insufficient tamping pressure; channeling.
- Solutions: Grind finer; increase dose; ensure consistent, firm tamp; use WDT tool for even distribution.
- Over-extraction:
- Symptoms: Shot pulls too slow (e.g., >35 seconds) or chokes the machine; very bitter, burnt, acrid taste; dark, mottled, often small crema; thick, syrupy flow that barely drips.
- Causes: Grind too fine; overdosing; excessive tamping pressure (less common with proper technique); too high brew temperature.
- Solutions: Grind coarser; decrease dose; ensure consistent, firm tamp (not overly hard); consider flushing group head to lower temperature if applicable.
Always adjust one variable at a time (usually grind size first) to isolate the cause and effect. Patience and meticulous observation are your best allies in troubleshooting.
[INLINE IMAGE 2: place after fourth H2 | alt=”how to make espresso at home comparison illustration”]
Comparison of Home Espresso Machine Types
To help you decide which machine best suits your needs, here’s a comparison of the primary types available for home use:
| Feature | Manual Lever Machine | Semi-Automatic Machine | Super-Automatic Machine |
|---|---|---|---|
| Price Range (Typical) | $$$ – $$$$ | $$ – $$$ | $$$ – $$$$$ |
| Control Over Variables | Highest (pressure, pre-infusion) | High (grind, dose, tamp, time) | Low (preset programs) |
| Learning Curve | Very High | Medium to High | Very Low |
| Consistency Potential | High (with skill) | High (with skill) | Moderate (machine-dependent) |
| Maintenance & Cleaning | Moderate (manual descaling) | Moderate (backflushing, descaling) | Moderate to High (complex internal systems) |
| User Profile | Enthusiast, purist, enjoys the craft | Dedicated home barista, seeks quality & control | Convenience-seeker, busy, values ease of use |
| Typical Espresso Quality | Exceptional (in skilled hands) | Excellent (with proper technique) | Good to Very Good (varies by model) |
Beyond the Shot: Milk Steaming and Latte Art
While a perfectly extracted espresso shot is a triumph in itself, for many, the full café experience includes a beautifully crafted milk-based beverage. Mastering milk steaming is an art form that elevates your home espresso game from impressive to extraordinary. It’s about transforming cold milk into a silky, sweet microfoam that complements and enhances the espresso, rather than merely diluting it.
The Science of Steaming Milk: Temperature, Texture, and Microfoam
Steaming milk isn’t just about making it hot; it’s about introducing air while simultaneously heating it to create a specific texture. This texture is known as microfoam – milk that has been aerated to create tiny, uniform bubbles, giving it a velvety, paint-like consistency. The key principles are:
- Aeration (Stretching): This is the initial phase where you introduce air into the milk. The steam wand tip is positioned just below the surface, creating a gentle “kissing” or “tearing paper” sound. This incorporates air and expands the milk volume, forming the foam. You want to aim for 1-2 seconds of aeration for lattes and cappuccinos, or a bit more for a dryer cappuccino foam.
- Texturing (Integrating/Rolling): After sufficient aeration, the steam wand is submerged deeper into the milk. The powerful steam jet then creates a swirling vortex, breaking down larger air bubbles and integrating the foam evenly throughout the milk. This is crucial for achieving that glossy, uniform microfoam. The pitcher should feel cool to the touch at first, then gradually warm up.
- Temperature: The ideal temperature for steamed milk is between 140-155°F (60-68°C). Below this, the milk isn’t fully sweet; above this, the milk proteins scorch, resulting in a burnt, less palatable taste and a loss of sweetness. Use the heat of the pitcher as your guide – stop steaming when the pitcher becomes too hot to comfortably hold for more than a second or two. A thermometer can be helpful for consistency initially.
- Fresh, Cold Milk: Always start with fresh, very cold milk. This gives you more time to work with the milk before it reaches the target temperature, allowing for better aeration and texturing. Whole milk is generally preferred for its fat content, which contributes to a creamier texture, but many alternative milks (oat, almond, soy) are now specifically formulated for baristas and steam well.
Discover the best milk alternatives for steaming in our comprehensive guide.
Techniques for Perfect Milk: Pitcher Angle and Wand Position
Achieving perfect microfoam requires specific techniques:
- The Setup:
- Fill your cold milk pitcher about one-third to halfway full. Starting with too much milk will result in overflow; too little, and you won’t have enough to work with.
- Purge your steam wand briefly before steaming to clear any condensation.
- Aeration (Stretching):
- Submerge the steam wand tip just below the surface of the milk, slightly off-center, with the wand angled into the pitcher.
- Open the steam valve fully. You should hear a soft, consistent “sucking” or “tearing paper” sound. Avoid loud screaming or screeching, which indicates too much air or improper positioning.
- Maintain this position, keeping the tip just at the surface, allowing air to be incorporated. The milk volume will visibly increase. For a latte, aim for a small amount of stretch (like 1-2 seconds); for a cappuccino, a bit more.
- Texturing (Rolling/Integrating):
- Once you’ve introduced enough air, lower the pitcher slightly, submerging the steam wand tip deeper into the milk.
- Maintain the off-center, angled position. The steam should create a powerful vortex, spinning the milk in a circular motion. This “rolls” the milk, breaking down large bubbles and integrating the foam, creating that smooth, glossy microfoam.
- Continue until the pitcher is too hot to touch.
- Finishing:
- Turn off the steam valve, then remove the pitcher.
- Wipe the steam wand immediately with a damp cloth to prevent milk from drying and hardening.
- Purge the steam wand again to clear any residual milk from inside.
- Swirl the milk gently in the pitcher to eliminate any remaining large bubbles and ensure a uniform texture. Tap the pitcher gently on the counter if you see any large bubbles.
Basic Latte Art Designs: Adding a Flourish to Your Creations
Once you’ve mastered microfoam, the next step is latte art – pouring patterns into your drink. While it takes practice, even basic designs significantly elevate the presentation of your homemade beverages. The key is fluid, controlled motion and perfectly textured milk.
- The Pour:
- The Base: Start with the cup tilted towards you. Pour a steady stream of milk into the center of the espresso shot from a slight height. This sinks the initial milk below the crema, creating a canvas.
- The Canvas: As the cup fills and the liquid level rises, bring the pitcher closer to the surface of the espresso. Once the pitcher spout is almost touching the surface, you should see white milk beginning to appear.
- The Design: This is where you manipulate the flow and tilt to create patterns.
- The Heart:
- After establishing the canvas, keep the pitcher close to the surface and maintain a steady, continuous pour into the center.
- A white circle will begin to form. Once it’s about the desired size, slightly lift the pitcher and draw a thin line through the center of the circle to create the pointed bottom of the heart.
- The Rosetta (Basic):
- Establish your white canvas.
- Instead of a continuous pour, gently rock the pitcher from side to side while maintaining a close distance to the surface and moving the pitcher slowly backward. This creates a series of layered ripples.
- Once you’ve poured most of the milk, lift the pitcher slightly and draw a straight line through the center, cutting through the ripples to form the “leaf” pattern.
Don’t be discouraged if your first attempts at latte art don’t resemble perfect hearts or rosettas. It’s a skill that develops with repetition and a good understanding of milk texture. Focus on getting the milk right first, and the art will follow.
Advanced Techniques and Customization for the Enthusiast
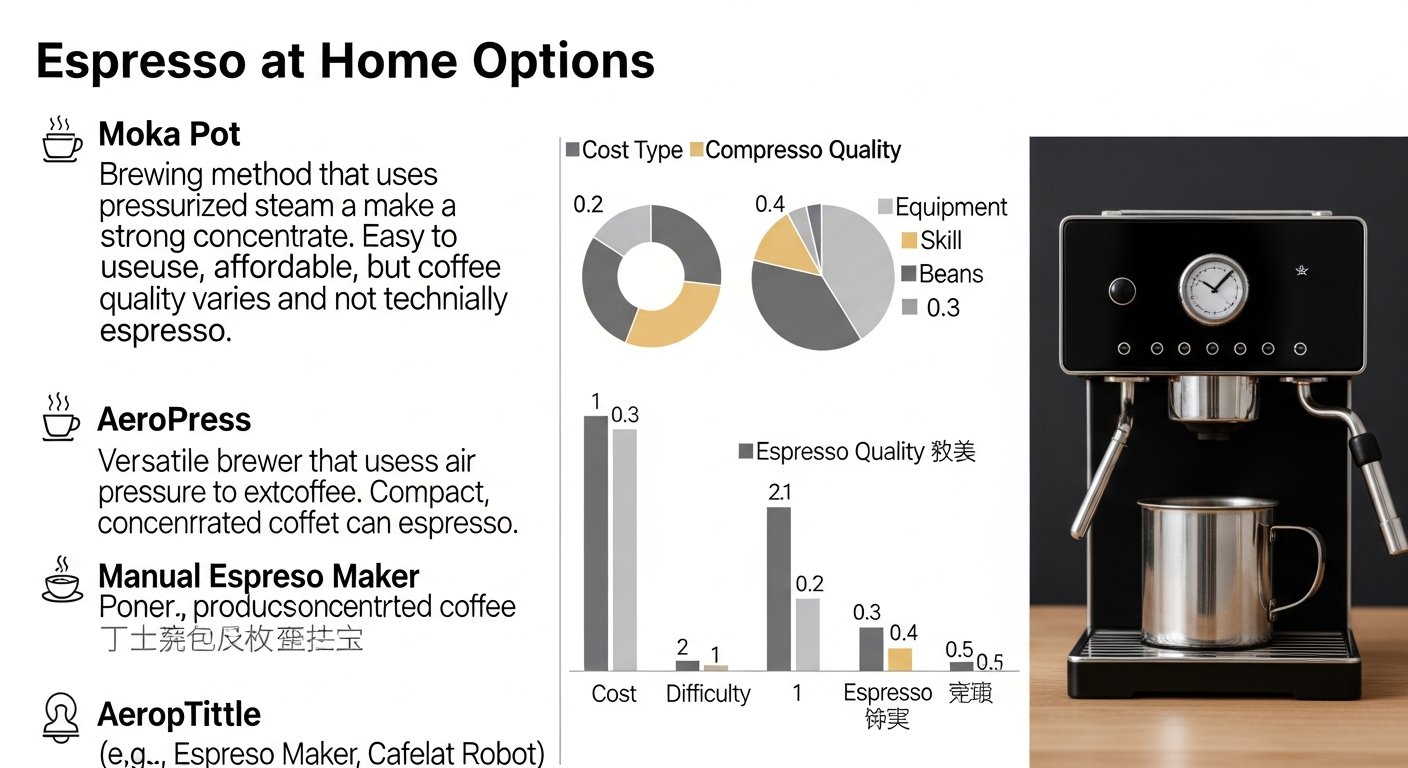
Once you’ve mastered the fundamentals of how to make espresso at home, a world of advanced techniques opens up, allowing you to fine-tune your shots even further and explore the outer limits of flavor. These steps move beyond mere competence to truly obsessive pursuit of perfection.
Dialing In Your Shot: The Iterative Process of Precision
Dialing in a shot refers to the continuous adjustment of variables to achieve optimal taste for a specific coffee bean. This is a dynamic process, not a static setting, as coffee beans change over time (degassing, ambient humidity, etc.).
- The Recipe Approach: Instead of just aiming for a certain time, focus on a “recipe” or brew ratio. For a classic double espresso, a common starting point is a 1:2 ratio, meaning if you use 18 grams of ground coffee (dry dose), you aim for 36 grams of extracted liquid espresso (wet yield).
- Variables to Adjust:
- Grind Size: The primary adjustment. Finer for slower shots, coarser for faster shots. Always adjust in small increments.
- Dose (Input Weight): How much coffee you put into the portafilter. Changing the dose affects the resistance and thus the flow.
- Yield (Output Weight): How much espresso you extract. Changing this affects concentration and flavor balance. A shorter yield (e.g., 1:1.5) can be more intense; a longer yield (e.g., 1:2.5) can be softer.
- Time: The duration of the extraction. This is usually a *result* of your other adjustments, not something you directly control in most semi-automatics beyond starting and stopping. Aim for 25-30 seconds for a 1:2 ratio.
- Systematic Approach:
- Weigh your dry dose precisely (e.g., 18g).
- Grind, distribute, and tamp.
- Place a scale under your cup on the drip tray.
- Start the shot and timer simultaneously.
- Stop the shot when you reach your target yield (e.g., 36g).
- Note the time. Taste the shot.
- Based on taste and time, make one adjustment (e.g., if sour and fast, grind finer; if bitter and slow, grind coarser).
- Repeat.
This systematic experimentation, combined with meticulous note-taking, is how you truly master a specific coffee and consistently pull exceptional shots. It’s a journey of discovery for each new bag of beans.
Water Quality: An Overlooked Factor for Flavor and Machine Longevity
The water you use for your espresso is just as important as the beans, yet it’s often overlooked. Coffee is 98% water, so the water’s composition profoundly impacts taste, and its mineral content affects your machine’s health.
How to Make Espresso at Home: Your Ultimate Guide to Crafting Perfect Shots
Affiliate disclosure: This article may contain affiliate links. Recommendations are independent and editorially driven.
For many, the daily ritual of sipping a perfectly crafted espresso is a highlight – a moment of rich, concentrated flavor and invigorating aroma that signals the start of a productive day or a much-needed afternoon pause. While the allure of your local barista’s expertise is undeniable, imagine replicating that magic in the comfort of your own kitchen. Learning how to make espresso at home isn’t just about saving money; it’s about embarking on a journey of discovery, mastering a craft, and tailoring every sip precisely to your preferences. The world of home espresso brewing is vast and rewarding, offering endless opportunities for experimentation and refinement.
At cafeserre, we believe that exceptional coffee experiences shouldn’t be confined to cafés. Our mission is to empower you with the knowledge and confidence to brew outstanding coffee, and espresso is arguably the pinnacle of that journey. This comprehensive guide is designed to demystify the process, breaking down complex techniques into manageable steps. Whether you’re a complete novice contemplating your first machine or an aspiring home barista looking to refine your technique, we’ll cover everything you need to know, from selecting the right equipment and beans to mastering extraction and even diving into the art of milk steaming and latte art.
Prepare to transform your kitchen into a personal coffee sanctuary. By the end of this guide, you’ll possess the foundational knowledge and practical tips to consistently pull delicious espresso shots, impress your friends and family, and truly elevate your daily coffee ritual. Let’s dive into the fascinating world of home espresso and unlock the secrets to brewing perfection.
Why Make Espresso at Home? Unlocking a World of Flavor and Savings
The decision to learn how to make espresso at home is often driven by a blend of passion, practicality, and the pursuit of perfection. Beyond the immediate gratification of a café-quality beverage, home brewing offers a multitude of advantages that resonate with coffee enthusiasts and budget-conscious individuals alike.
The Allure of Home Brewing: A Personal Coffee Sanctuary
There’s a unique satisfaction that comes from crafting something with your own hands, especially when that something is as complex and nuanced as a shot of espresso. Home brewing transforms your kitchen into a personal coffee laboratory, a space where you can experiment, learn, and develop a deep understanding of the subtle factors that influence flavor. It’s an intimate experience, free from the rush of a café, allowing you to focus purely on the art and science of coffee extraction. This journey fosters a deeper connection to your beverage, making each cup an act of creation rather than just consumption.
Cost-Effectiveness Over Time: Investing in Your Daily Ritual
While the initial investment in espresso equipment can seem significant, the long-term financial benefits of making espresso at home are substantial. Consider the cumulative cost of daily café visits. A $4-$6 espresso drink, five times a week, quickly adds up to hundreds of dollars a month, thousands a year. Owning your equipment, even a high-quality setup, allows you to recoup that investment surprisingly quickly. The cost per cup plummets once your equipment is paid for, making premium coffee an everyday luxury rather than an occasional indulgence. Furthermore, having control over your ingredients means you can buy specialty beans in bulk or on sale, further enhancing your savings.
Unparalleled Customization and Freshness: Tailor-Made Perfection
Perhaps one of the most compelling reasons to make espresso at home is the unparalleled degree of control it affords. From the choice of beans to the precise grind size, water temperature, dose, and extraction time, every variable is yours to command. This level of customization allows you to discover and consistently reproduce your ideal flavor profile. Do you prefer a brighter, more acidic shot from a single-origin Ethiopian, or a bold, chocolatey blend for your latte? At home, you can experiment freely without judgment. Moreover, brewing at home ensures the ultimate freshness. Grinding your beans immediately before extraction preserves volatile aromatics and flavors that begin to dissipate the moment beans are ground. This commitment to freshness is a game-changer, elevating the quality of your espresso far beyond what’s typically achievable with pre-ground coffee.
Essential Equipment for Home Espresso Enthusiasts
Embarking on your home espresso journey requires more than just enthusiasm; it demands the right tools. While the sheer array of options can seem daunting, understanding the core pieces of equipment and their roles is crucial. Think of your setup as an orchestra, where each instrument plays a vital part in the final symphony of flavor. Investing wisely in these essentials will lay the foundation for consistent, delicious espresso.
The Espresso Machine: A Deep Dive into Your Brewing Heart
The espresso machine is undoubtedly the centerpiece of your home setup. Its primary function is to force hot, pressurized water through a compacted bed of finely ground coffee, extracting the concentrated liquid we know as espresso. Machines vary widely in price, complexity, and capabilities, but generally fall into a few key categories:
- Manual Lever Machines: These are for the purists and hands-on enthusiasts. They require you to physically pull a lever to pressurize the water, offering immense control over pre-infusion pressure and flow.
- Pros: Ultimate control, beautiful aesthetics, quiet operation, rich espresso.
- Cons: Steep learning curve, requires significant technique and strength, less consistent initially.
- Best For: Experienced baristas, hobbyists who enjoy the process, those seeking maximum control.
- Semi-Automatic Machines: The most popular choice for home baristas, these machines use a pump to generate pressure but give you control over grind, dose, and the start/stop of the shot (often via a button). They typically feature a portafilter, a group head, and a steam wand.
- Pros: Excellent balance of control and convenience, wide range of prices and features, allows for skill development.
- Cons: Requires skill in grinding, dosing, and tamping; learning curve for steaming milk.
- Best For: Dedicated enthusiasts ready to learn, those seeking café-quality results.
- Automatic Machines (Volumetric): Similar to semi-automatics, but they automatically stop the shot once a pre-programmed volume of water has passed through the coffee. You still control grind, dose, and tamp.
- Pros: Consistency in shot volume, slightly simpler operation than semi-automatics once programmed.
- Cons: Less control over shot timing (which affects flavor), still requires other barista skills.
- Best For: Those who want consistent volume and minimal intervention after initial setup.
- Super-Automatic Machines: These are the “bean-to-cup” machines, offering ultimate convenience. They grind the beans, tamp, brew, and even steam milk with the press of a single button.
- Pros: Extremely easy to use, minimal effort, fast, great for busy individuals or offices.
- Cons: Significantly less control over variables, cleaning can be complex, often produce a less nuanced shot than manual/semi-automatics. Higher cost for premium models.
- Best For: Convenience-focused users, those new to espresso who prioritize ease over manual control.
When choosing, consider your budget, desired level of involvement, and how much space you have. Entry-level semi-automatics are a fantastic starting point for serious home brewers.
The Grinder: Non-Negotiable for Quality Espresso
If there’s one piece of equipment you absolutely cannot skimp on, it’s the grinder. A high-quality burr grinder is as important, if not more important, than the espresso machine itself. Why? Because espresso requires an extremely fine, consistent, and even grind. Inconsistent particle sizes lead to uneven extraction, resulting in flavors ranging from sour (under-extracted) to bitter (over-extracted) in the same shot. Blade grinders, which chop rather than grind, produce a highly inconsistent “dust and boulders” mixture unsuitable for espresso.
- Burr Grinders: These use two abrasive surfaces (burrs) to crush coffee beans into uniform particles.
- Conical Burr Grinders: Often found in home and prosumer grinders, they use a cone-shaped inner burr and a ring-shaped outer burr. They are generally quieter and produce less heat.
- Flat Burr Grinders: Feature two parallel flat burrs. Commonly found in commercial settings, they can produce a very precise grind and often have more clarity in flavor.
- Micrometric Adjustment: Look for grinders that offer stepless or very fine stepped adjustments. Espresso brewing is incredibly sensitive to grind size; even a tiny adjustment can significantly impact your shot.
- Dosing: Grinders can be on-demand (grind directly into your portafilter) or doser-based (grind into a chamber, then dispense). On-demand is generally preferred for freshness in home settings.
Investing in a good grinder will be the single most impactful upgrade to your home espresso setup. It unlocks the full potential of your coffee beans and allows your espresso machine to perform at its best.
Must-Have Accessories: Enhancing Your Workflow and Consistency
Beyond the machine and grinder, several essential accessories will significantly improve your brewing experience and the quality of your espresso.
- Tamper: Used to compress the ground coffee in the portafilter basket into an even, consistent puck. A good tamper is heavy, fits your basket perfectly, and has a comfortable handle. Ensure it’s the correct diameter for your machine’s portafilter (e.g., 58mm, 54mm).
- Precision Scale: Absolutely crucial for consistency. You need to weigh your dose of ground coffee (in grams) before brewing and the output of your espresso shot (in grams) as it extracts. This allows for precise control over your brew ratio, a fundamental concept in espresso. Look for a scale with 0.1g accuracy and a timer function.
- Knock Box: A container designed to easily “knock out” spent coffee pucks from your portafilter. It keeps your brewing area clean and protects your portafilter.
- Milk Pitcher (Steaming Pitcher): If you plan on making milk-based drinks, a stainless steel milk pitcher is essential for steaming milk. Sizes vary (12oz, 20oz); choose one appropriate for the volume of milk you typically steam.
- Thermometer (for milk): While not strictly essential once you develop a feel for it, a clip-on thermometer for your milk pitcher can help ensure you hit the ideal milk temperature (140-155°F / 60-68°C) without scalding.
- Cleaning Tools:
- Group Head Brush: To scrub residual coffee grounds from your machine’s group head.
- Blind Portafilter Basket & Cleaning Detergent: For backflushing (a crucial cleaning process for semi-automatic machines).
- Descaling Solution: To remove mineral buildup in your machine’s boiler and internal plumbing.
- Microfiber Cloths: For wiping down your machine, steam wand, and general cleanliness.
- Dosing Funnel: Sits on top of your portafilter basket to prevent ground coffee from spilling when grinding or distributing, particularly useful for single dose grinders.
- Distribution Tool (WDT Tool): A tool with fine needles used to break up clumps and evenly distribute coffee grounds in the portafilter before tamping. This significantly improves extraction consistency by reducing channeling.
While the initial cost for all these items might seem high, remember that they are investments in your daily coffee ritual. With proper care, they will serve you for many years, paying dividends in delicious espresso and immense satisfaction.
[INLINE IMAGE 1: place after second H2 | alt=”how to make espresso at home concept illustration”]
Choosing the Right Beans: The Foundation of Flavor
The journey to a perfect home espresso shot begins long before you even touch your machine. It starts with the coffee beans themselves. No matter how sophisticated your equipment or how refined your technique, subpar beans will always result in a subpar espresso. Understanding how to select, store, and prepare your beans is fundamental to unlocking their full flavor potential.
Roast Levels and Their Impact: From Bright to Bold
Coffee beans are seeds, and roasting is the process that transforms them into the aromatic, flavorful product we recognize. Different roast levels bring out distinct characteristics:
- Light Roasts: These beans are roasted for a shorter duration and to a lower internal temperature. They retain more of their original fruity, floral, and acidic notes, often described as bright and complex. Light roasts are dense and can be more challenging to grind and extract properly for espresso, but when done right, they yield incredibly vibrant shots.
- Medium Roasts: The most versatile and popular roast level, medium roasts strike a balance between the bean’s inherent characteristics and the flavors developed during roasting. They often feature notes of caramel, chocolate, nuts, and a balanced acidity. Medium roasts are generally easier to work with for espresso, offering a harmonious blend of sweetness and body.
- Dark Roasts: Roasted to higher temperatures and longer durations, dark roasts develop pronounced smoky, bittersweet, and chocolatey notes. The original bean characteristics are often overshadowed by roast-derived flavors. While traditional for espresso in some regions, extremely dark roasts can sometimes be oily, leading to issues with grinders and a burnt taste. They tend to produce a thicker crema.
For espresso, many home baristas prefer medium to medium-dark roasts as they offer a good balance of flavor, body, and ease of extraction. However, don’t be afraid to experiment with lighter roasts once you’ve gained confidence in your technique.
Single Origin vs. Blends: Exploring Diverse Terroirs
The origin of your coffee beans plays a significant role in their flavor profile:
- Single Origin Coffees: These beans come from a single specific geographical location – a particular farm, region, or country. They showcase the unique characteristics of that terroir, offering distinct flavor notes specific to their growing conditions. For example, an Ethiopian Yirgacheffe might be known for its delicate floral and citrus notes, while a Colombian Supremo might offer chocolate and nutty undertones. Single origins are great for exploring and appreciating the nuances of coffee.
- Espresso Blends: These are meticulously crafted combinations of two or more different single-origin coffees. Roasters blend beans to achieve a specific flavor profile that is balanced, complex, and performs consistently well as espresso. Blends often aim for a rounder body, balanced acidity, and flavors like chocolate, nuts, and caramel, which are highly desirable in espresso and milk-based drinks. Many blends are designed to shine as an espresso base for lattes and cappuccinos.
For beginners, starting with a well-regarded espresso blend can provide a more forgiving and consistent experience. As you gain expertise, delving into single origins will open up a new dimension of flavor exploration.
Freshness is Key: Roasting Dates and Storage Practices
This is perhaps the most critical factor for excellent espresso. Coffee is an agricultural product, and like fresh produce, it has a peak freshness window. For espresso, this window is particularly narrow:
- Roasting Date, Not “Best By” Date: Always look for a “roasted on” date on your coffee bag. Avoid beans that only list an expiry or “best by” date, as these offer no indication of actual freshness.
- Optimal Window: For espresso, coffee is generally best used between 7 to 21 days post-roast. This allows the beans to “degas” (release CO2 trapped during roasting), which can otherwise interfere with extraction and create too much crema. Beyond 3-4 weeks, much of the delicate aroma and flavor begins to degrade.
- Storage: Store your whole bean coffee in an airtight container, away from light, heat, and moisture. A cool, dark pantry is ideal. Avoid refrigerating or freezing coffee for daily use, as it can absorb odors and moisture. Only freeze if you plan to store larger quantities for several months, and only do so in vacuum-sealed, portioned bags.
Always buy whole beans and grind them just before brewing. Pre-ground coffee, even if bought recently, loses most of its volatile aromatics within minutes of grinding, resulting in a flat, lifeless espresso. This is why a good grinder is indispensable.
Grinding Your Beans: The Critical Step to Perfect Extraction
The grind size for espresso is paramount. It must be very fine, resembling powdered sugar or flour, but not so fine that it clogs the machine. Crucially, it must also be consistent. The ideal grind allows the hot, pressurized water to extract flavor compounds evenly and efficiently within a specific timeframe (typically 25-30 seconds for a double shot).
- The Dial-In Process: Grinding for espresso is not a one-time setting. It’s a continuous “dial-in” process because grind size needs to be adjusted based on the beans’ age, roast level, humidity, and even the specific dose you’re using.
- Too Coarse: If your espresso extracts too quickly (e.g., under 20 seconds), the grind is likely too coarse. The water flows through too easily, resulting in under-extraction, characterized by sour, weak, and watery shots with little crema. Adjust your grinder to a finer setting.
- Too Fine: If your espresso extracts too slowly (e.g., over 35 seconds), or chokes the machine, the grind is too fine. The water struggles to pass through, leading to over-extraction, characterized by bitter, burnt, and harsh flavors, often with very dark, thin crema. Adjust your grinder to a coarser setting.
- Single Dosing: Many home baristas prefer to weigh out their whole beans for each shot (e.g., 18g for a double shot) and then grind only that amount. This ensures consistency and minimizes wasted coffee.
- Distribution: After grinding into the portafilter, it’s vital to distribute the grounds evenly. Gently tapping the portafilter on the counter or using a WDT (Weiss Distribution Technique) tool helps break up clumps and settle the grounds uniformly, preventing “channeling” (where water finds paths of least resistance, leading to uneven extraction).
- Tamping: Once distributed, the grounds must be tamped firmly and level. The goal is to create a perfectly flat, dense puck that offers uniform resistance to the pressurized water. Inconsistent tamping can lead to channeling and poor extraction.
Mastering the grind is perhaps the most challenging, yet rewarding, aspect of learning how to make espresso at home. Patience, practice, and careful observation of your shots will lead to consistent improvements.
Mastering the Art of Espresso Extraction: The Core Process
With your equipment chosen, beans selected, and grind dialed in, you’re ready for the main event: pulling an espresso shot. This is where the magic truly happens, transforming finely ground coffee into that concentrated elixir. Understanding the key stages and visual cues of extraction is paramount to achieving a “god shot” – that elusive, perfectly balanced espresso.
Pre-Infusion: What It Is and Why It Matters
Pre-infusion is the initial stage of extraction where a small amount of low-pressure water is applied to the coffee puck before the full brewing pressure kicks in. This gently wets the coffee grounds, allowing them to expand and become saturated uniformly. While not all machines offer explicit control over pre-infusion, many semi-automatics and even some automatics incorporate a brief, low-pressure phase.
- Purpose:
- Even Saturation: Helps to prevent dry spots and encourages a more even flow of water through the entire puck once full pressure is applied.
- Reduced Channeling: By gently pre-wetting, it minimizes the chances of water finding preferential pathways (channels) through the coffee, which leads to under-extraction in some parts and over-extraction in others.
- Enhanced Flavor: Promotes a more complete and balanced extraction, often leading to a richer, more nuanced flavor profile.
- How it Works: On many semi-automatic machines, pre-infusion occurs naturally as the pump slowly ramps up to full pressure or as water first enters the group head before the pressure builds. Some advanced machines allow you to program the duration and even the pressure of the pre-infusion phase.
While not every machine allows for extensive pre-infusion control, recognizing its importance highlights the value of careful puck preparation (grind, distribution, tamp) which serves a similar goal of promoting even water flow.
The “God Shot”: Understanding Flow Rate, Crema, and Taste
The “god shot” is the mythical perfect espresso – a harmonious balance of flavor, body, and aroma. Achieving it consistently is the goal of every home barista. Here’s what to look for during extraction:
- Flow Rate and Appearance:
- After a few seconds of pre-infusion, streams of dark, thick liquid should begin to emerge from the portafilter spouts.
- These streams should gradually lighten in color, eventually resembling warm honey or tiger stripes.
- The flow should be steady and consistent, ideally like two thin mouse tails, merging into one.
- A “normal” double shot (typically 36g-40g output from 18g-20g input) should extract in approximately 25-30 seconds from the moment the pump is activated.
- Crema:
- Crema is the reddish-brown, foamy layer that sits atop your espresso. It’s formed by CO2 gases trapped in the coffee oils during extraction.
- A good crema is uniform, thick, and resilient, with a fine, dense texture, often displaying “tiger striping” or mottling.
- Too dark/thin/bubbly crema can indicate over-extraction; too light/sparse/quick-dissipating crema suggests under-extraction. However, crema alone isn’t a definitive indicator of taste; it’s a visual cue.
- Taste: Ultimately, taste is king. A balanced espresso will have:
- Sweetness: A natural sweetness that balances bitterness and acidity.
- Acidity: A pleasant, often fruity or citrusy brightness, not sourness.
- Bitterness: A pleasant, dark chocolate-like bitterness, not acrid or burnt.
- Body: A rich, viscous mouthfeel.
- Balance: All these elements should be in harmony, creating a complex and enjoyable flavor.
Learning how to make espresso at home is an iterative process. You’ll make adjustments to grind, dose, and temperature, then taste, and adjust again. Keep notes! This helps you identify what works best for different beans and your preferences.
Troubleshooting Common Espresso Problems: Diagnosing Your Shot
Even with the best equipment, you’ll inevitably encounter shots that aren’t quite right. Learning to diagnose and correct these issues is a hallmark of an experienced home barista.
- Under-extraction:
- Symptoms: Shot pulls too fast (e.g., <20 seconds); watery, thin body; sour, acidic, or salty taste; light, thin, quickly dissipating crema.
- Causes: Grind too coarse; underdosing; insufficient tamping pressure; channeling.
- Solutions: Grind finer; increase dose; ensure consistent, firm tamp; use WDT tool for even distribution.
- Over-extraction:
- Symptoms: Shot pulls too slow (e.g., >35 seconds) or chokes the machine; very bitter, burnt, acrid taste; dark, mottled, often small crema; thick, syrupy flow that barely drips.
- Causes: Grind too fine; overdosing; excessive tamping pressure (less common with proper technique); too high brew temperature.
- Solutions: Grind coarser; decrease dose; ensure consistent, firm tamp (not overly hard); consider flushing group head to lower temperature if applicable.
Always adjust one variable at a time (usually grind size first) to isolate the cause and effect. Patience and meticulous observation are your best allies in troubleshooting.
[INLINE IMAGE 2: place after fourth H2 | alt=”how to make espresso at home comparison illustration”]
Comparison of Home Espresso Machine Types
To help you decide which machine best suits your needs, here’s a comparison of the primary types available for home use:
Feature Manual Lever Machine Semi-Automatic Machine Super-Automatic Machine Price Range (Typical) $$$ – $$$$ $$ – $$$ $$$ – $$$$$ Control Over Variables Highest (pressure, pre-infusion) High (grind, dose, tamp, time) Low (preset programs) Learning Curve Very High Medium to High Very Low Consistency Potential High (with skill) High (with skill) Moderate (machine-dependent) Maintenance & Cleaning Moderate (manual descaling) Moderate (backflushing, descaling) Moderate to High (complex internal systems) User Profile Enthusiast, purist, enjoys the craft Dedicated home barista, seeks quality & control Convenience-seeker, busy, values ease of use Typical Espresso Quality Exceptional (in skilled hands) Excellent (with proper technique) Good to Very Good (varies by model) Beyond the Shot: Milk Steaming and Latte Art
While a perfectly extracted espresso shot is a triumph in itself, for many, the full café experience includes a beautifully crafted milk-based beverage. Mastering milk steaming is an art form that elevates your home espresso game from impressive to extraordinary. It’s about transforming cold milk into a silky, sweet microfoam that complements and enhances the espresso, rather than merely diluting it.
The Science of Steaming Milk: Temperature, Texture, and Microfoam
Steaming milk isn’t just about making it hot; it’s about introducing air while simultaneously heating it to create a specific texture. This texture is known as microfoam – milk that has been aerated to create tiny, uniform bubbles, giving it a velvety, paint-like consistency. The key principles are:
- Aeration (Stretching): This is the initial phase where you introduce air into the milk. The steam wand tip is positioned just below the surface, creating a gentle “kissing” or “tearing paper” sound. This incorporates air and expands the milk volume, forming the foam. You want to aim for 1-2 seconds of aeration for lattes and cappuccinos, or a bit more for a dryer cappuccino foam.
- Texturing (Integrating/Rolling): After sufficient aeration, the steam wand is submerged deeper into the milk. The powerful steam jet then creates a swirling vortex, breaking down larger air bubbles and integrating the foam evenly throughout the milk. This is crucial for achieving that glossy, uniform microfoam. The pitcher should feel cool to the touch at first, then gradually warm up.
- Temperature: The ideal temperature for steamed milk is between 140-155°F (60-68°C). Below this, the milk isn’t fully sweet; above this, the milk proteins scorch, resulting in a burnt, less palatable taste and a loss of sweetness. Use the heat of the pitcher as your guide – stop steaming when the pitcher becomes too hot to comfortably hold for more than a second or two. A thermometer can be helpful for consistency initially.
- Fresh, Cold Milk: Always start with fresh, very cold milk. This gives you more time to work with the milk before it reaches the target temperature, allowing for better aeration and texturing. Whole milk is generally preferred for its fat content, which contributes to a creamier texture, but many alternative milks (oat, almond, soy) are now specifically formulated for baristas and steam well.
Discover the best milk alternatives for steaming in our comprehensive guide.
Techniques for Perfect Milk: Pitcher Angle and Wand Position
Achieving perfect microfoam requires specific techniques:
- The Setup:
- Fill your cold milk pitcher about one-third to halfway full. Starting with too much milk will result in overflow; too little, and you won’t have enough to work with.
- Purge your steam wand briefly before steaming to clear any condensation.
- Aeration (Stretching):
- Submerge the steam wand tip just below the surface of the milk, slightly off-center, with the wand angled into the pitcher.
- Open the steam valve fully. You should hear a soft, consistent “sucking” or “tearing paper” sound. Avoid loud screaming or screeching, which indicates too much air or improper positioning.
- Maintain this position, keeping the tip just at the surface, allowing air to be incorporated. The milk volume will visibly increase. For a latte, aim for a small amount of stretch (like 1-2 seconds); for a cappuccino, a bit more.
- Texturing (Rolling/Integrating):
- Once you’ve introduced enough air, lower the pitcher slightly, submerging the steam wand tip deeper into the milk.
- Maintain the off-center, angled position. The steam should create a powerful vortex, spinning the milk in a circular motion. This “rolls” the milk, breaking down large bubbles and integrating the foam, creating that smooth, glossy microfoam.
- Continue until the pitcher is too hot to touch.
- Finishing:
- Turn off the steam valve, then remove the pitcher.
- Wipe the steam wand immediately with a damp cloth to prevent milk from drying and hardening.
- Purge the steam wand again to clear any residual milk from inside.
- Swirl the milk gently in the pitcher to eliminate any remaining large bubbles and ensure a uniform texture. Tap the pitcher gently on the counter if you see any large bubbles.
Basic Latte Art Designs: Adding a Flourish to Your Creations
Once you’ve mastered microfoam, the next step is latte art – pouring patterns into your drink. While it takes practice, even basic designs significantly elevate the presentation of your homemade beverages. The key is fluid, controlled motion and perfectly textured milk.
- The Pour:
- The Base: Start with the cup tilted towards you. Pour a steady stream of milk into the center of the espresso shot from a slight height. This sinks the initial milk below the crema, creating a canvas.
- The Canvas: As the cup fills and the liquid level rises, bring the pitcher closer to the surface of the espresso. Once the pitcher spout is almost touching the surface, you should see white milk beginning to appear.
- The Design: This is where you manipulate the flow and tilt to create patterns.
- The Heart:
- After establishing the canvas, keep the pitcher close to the surface and maintain a steady, continuous pour into the center.
- A white circle will begin to form. Once it’s about the desired size, slightly lift the pitcher and draw a thin line through the center of the circle to create the pointed bottom of the heart.
- The Rosetta (Basic):
- Establish your white canvas.
- Instead of a continuous pour, gently rock the pitcher from side to side while maintaining a close distance to the surface and moving the pitcher slowly backward. This creates a series of layered ripples.
- Once you’ve poured most of the milk, lift the pitcher slightly and draw a straight line through the center, cutting through the ripples to form the “leaf” pattern.
Don’t be discouraged if your first attempts at latte art don’t resemble perfect hearts or rosettas. It’s a skill that develops with repetition and a good understanding of milk texture. Focus on getting the milk right first, and the art will follow.
Advanced Techniques and Customization for the Enthusiast
Once you’ve mastered the fundamentals of how to make espresso at home, a world of advanced techniques opens up, allowing you to fine-tune your shots even further and explore the outer limits of flavor. These steps move beyond mere competence to truly obsessive pursuit of perfection.
Dialing In Your Shot: The Iterative Process of Precision
Dialing in a shot refers to the continuous adjustment of variables to achieve optimal taste for a specific coffee bean. This is a dynamic process, not a static setting, as coffee beans change over time (degassing, ambient humidity, etc.).
- The Recipe Approach: Instead of just aiming for a certain time, focus on a “recipe” or brew ratio. For a classic double espresso, a common starting point is a 1:2 ratio, meaning if you use 18 grams of ground coffee (dry dose), you aim for 36 grams of extracted liquid espresso (wet yield).
- Variables to Adjust:
- Grind Size: The primary adjustment. Finer for slower shots, coarser for faster shots. Always adjust in small increments.
- Dose (Input Weight): How much coffee you put into the portafilter. Changing the dose affects the resistance and thus the flow.
- Yield (Output Weight): How much espresso you extract. Changing this affects concentration and flavor balance. A shorter yield (e.g., 1:1.5) can be more intense; a longer yield (e.g., 1:2.5) can be softer.
- Time: The duration of the extraction. This is usually a *result* of your other adjustments, not something you directly control in most semi-automatics beyond starting and stopping. Aim for 25-30 seconds for a 1:2 ratio.
- Systematic Approach:
- Weigh your dry dose precisely (e.g., 18g).
- Grind, distribute, and tamp.
- Place a scale under your cup on the drip tray.
- Start the shot and timer simultaneously.
- Stop the shot when you reach your target yield (e.g., 36g).
- Note the time. Taste the shot.
- Based on taste and time, make one adjustment (e.g., if sour and fast, grind finer; if bitter and slow, grind coarser).
- Repeat.
This systematic experimentation, combined with meticulous note-taking, is how you truly master a specific coffee and consistently pull exceptional shots. It’s a journey of discovery for each new bag of beans.
Water Quality: An Overlooked Factor for Flavor and Machine Longevity
The water you use for your espresso is just as important as the beans, yet it’s often overlooked. Coffee is 98% water, so the water’s composition profoundly impacts taste, and its mineral content affects your machine’s health.
- Manual Lever Machines: These are for the purists and hands-on enthusiasts. They require you to physically pull a lever to pressurize the water, offering immense control over pre-infusion pressure and flow.