Espresso Ratio
Espresso Ratio Explained: The Definitive Guide to Unlocking Perfect Flavor
Affiliate disclosure: This article may contain affiliate links. Recommendations are independent and editorially driven.
For many, the morning ritual of brewing espresso is a sacred act. The hiss of the machine, the rich aroma filling the kitchen, and that first invigorating sip. But what separates a merely good espresso from one that is truly exceptional? The answer, more often than not, lies in understanding and mastering the espresso ratio.
The espresso ratio is the fundamental equation that dictates the relationship between the weight of your dry coffee grounds (dose) and the weight of the liquid espresso extracted (yield). It’s a simple concept with profound implications for flavor, body, and overall shot quality. Ignoring it is akin to baking without measuring ingredients – you might get something palatable, but consistency and perfection will remain elusive.
In the vibrant world of specialty coffee, where precision and palate meet, the espresso ratio is not just a guideline; it’s the bedrock upon which all other variables are built. From the nuanced sweetness of a perfectly pulled shot to the bold intensity of a ristretto, the ratio guides your hand and refines your brew. This comprehensive guide from cafeserre will demystify the espresso ratio, helping you navigate its complexities and empower you to consistently pull shots that not only meet but exceed your expectations. Prepare to transform your home barista skills and elevate your daily coffee experience to new heights.
Understanding the Fundamentals: What Exactly is Espresso Ratio?
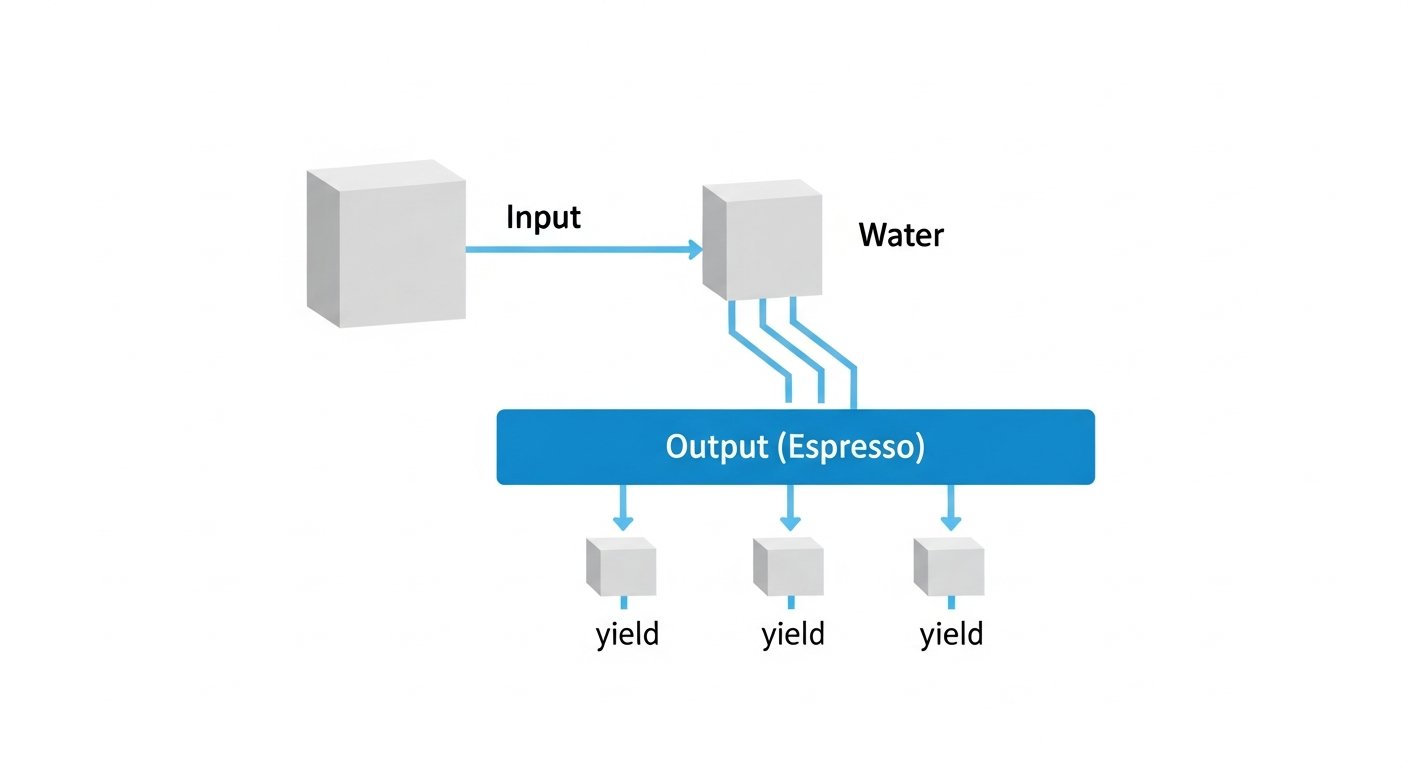
At its heart, espresso ratio is an elegant simplification of a complex process. It’s a mathematical representation of how much coffee you put into your machine and how much liquid you get out. This ratio, typically expressed as “coffee in:espresso out” by weight, is the primary driver of extraction and, consequently, the taste profile of your shot.
The Core Definition: Coffee In vs. Espresso Out
Let’s break down the core components. “Coffee in” refers to the weight of your dry, ground coffee dose, measured in grams. This is the starting point, the raw material for your espresso. “Espresso out” refers to the weight of the liquid espresso that flows into your cup, also measured in grams. By comparing these two figures, we derive the ratio.
For example, if you use 18 grams of ground coffee (coffee in) and extract 36 grams of liquid espresso (espresso out), your ratio is 1:2. This means for every 1 gram of coffee, you extracted 2 grams of espresso. This simple calculation provides a consistent benchmark for reproducibility and adjustment.
The beauty of using weight, rather than volume, is its inherent accuracy. Coffee density can vary, and crema volume can be misleading. Weight offers an undeniable, precise measurement that ensures consistency across different beans, grind settings, and even different days.
Why Ratio Matters: Unlocking Flavor Profiles
The espresso ratio is a powerful lever for influencing the flavor, body, and aroma of your espresso. Think of it as a spectrum of extraction:
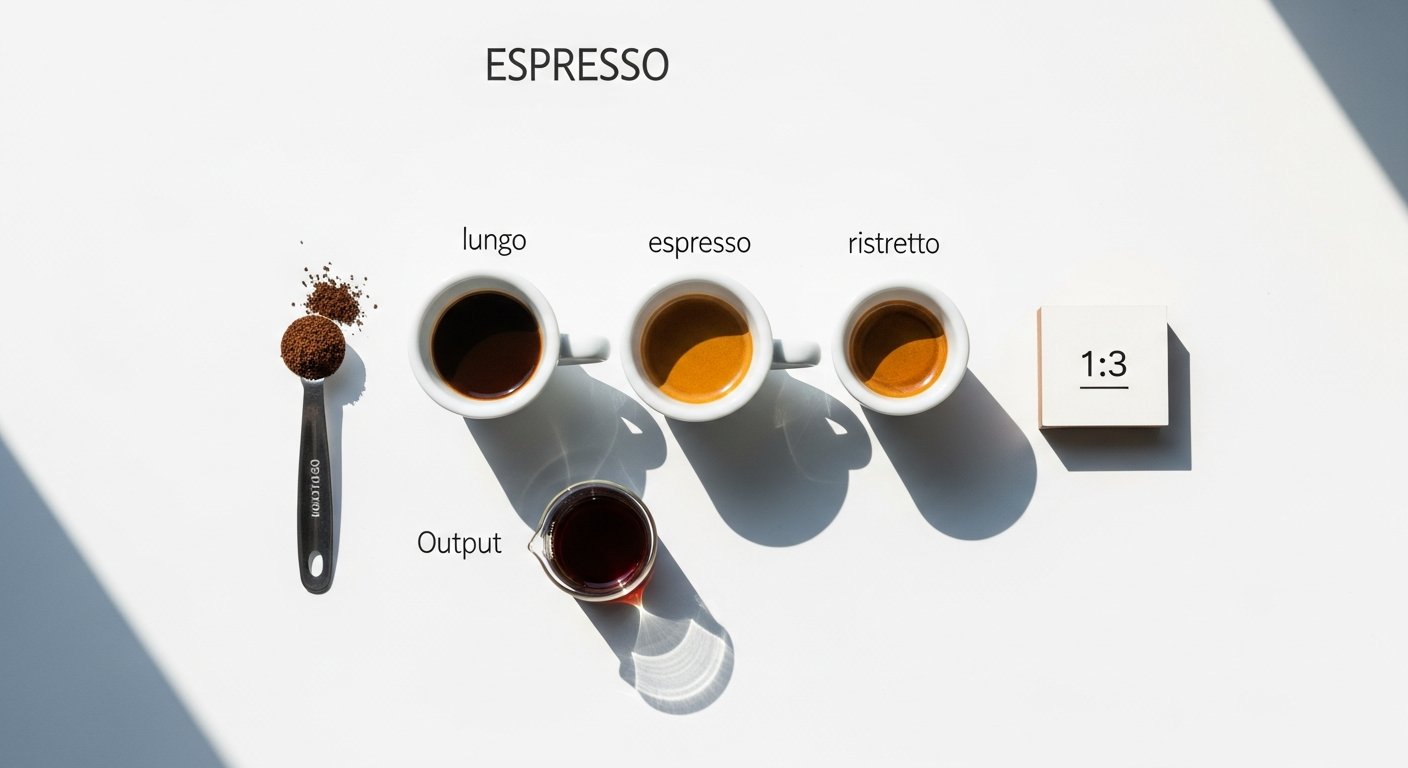
- Shorter Ratios (e.g., 1:1, 1:1.5 – Ristretto): These produce a highly concentrated, often sweeter, and more viscous shot. Less water has passed through the coffee bed, meaning fewer solids are dissolved, but those that are tend to be the richer, more soluble compounds extracted early in the process. Expect intense flavors, sometimes syrupy body, and pronounced acidity or sweetness depending on the bean.
- Medium Ratios (e.g., 1:2, 1:2.5 – Normale): This range is often considered the “sweet spot” for many espresso blends and single origins. It offers a balance of sweetness, acidity, and bitterness, with a pleasant body and aromatic complexity. It’s the classic espresso shot that many café patrons are familiar with.
- Longer Ratios (e.g., 1:3, 1:4+ – Lungo): As you increase the amount of water passing through the coffee, more solids are extracted. This can lead to a thinner body, less intensity, and potentially more bitterness if extraction goes too far. While some beans shine in a lungo, revealing delicate notes, others might become watery or astringent. It’s about finding the balance where desirable flavors are amplified without over-extracting undesirable ones.
By understanding and manipulating the espresso ratio, you gain direct control over these flavor outcomes, allowing you to tailor your espresso to specific beans, roast profiles, and personal preferences.
Common Notations: 1:2, 1:3, and Beyond
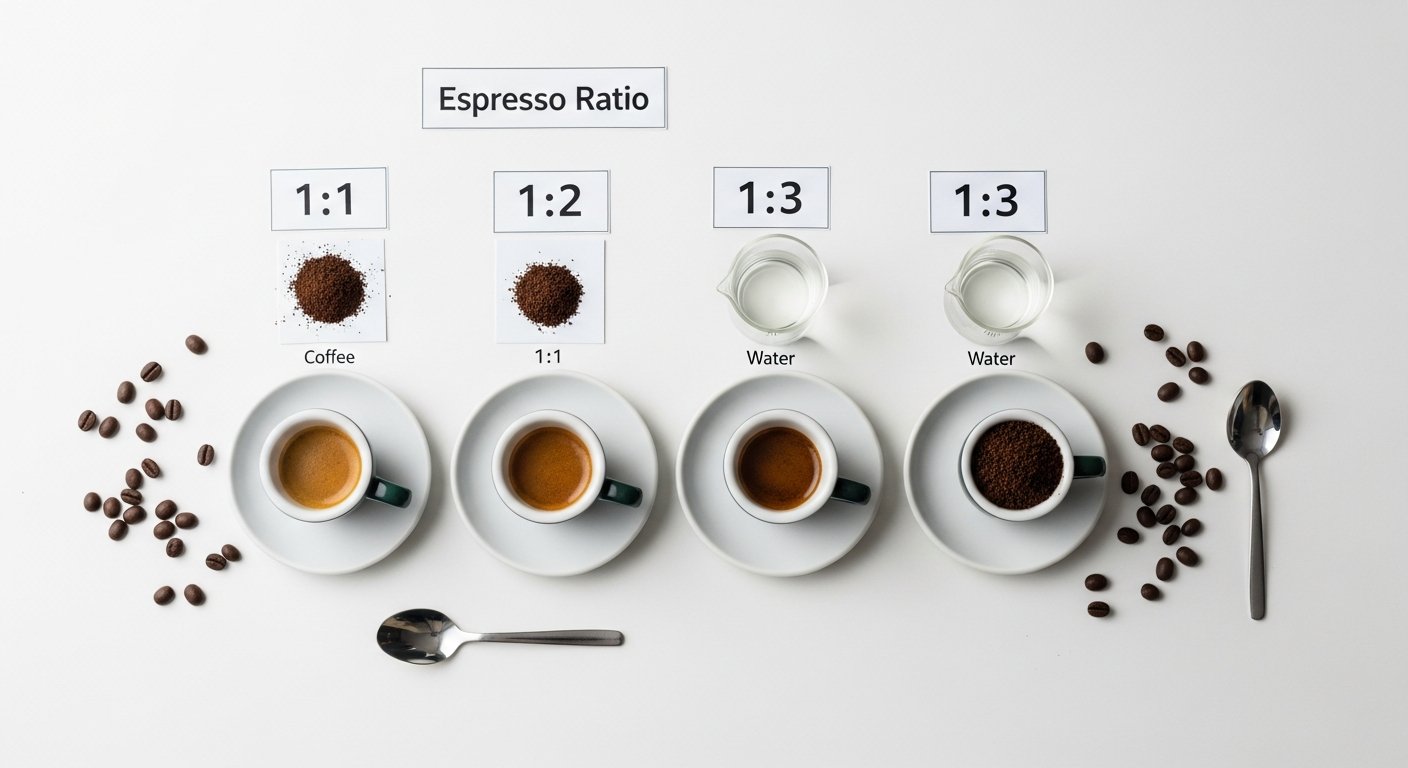
The most common way to express espresso ratio is a simple X:Y format, where X represents the weight of the dry coffee dose and Y represents the weight of the liquid espresso yield. For instance:
- 1:1 (Ristretto): For every 1 gram of coffee in, you aim for 1 gram of espresso out. (e.g., 18g in, 18g out)
- 1:2 (Normale/Classic Espresso): For every 1 gram of coffee in, you aim for 2 grams of espresso out. (e.g., 18g in, 36g out) This is a widely adopted starting point for many baristas.
- 1:2.5: A slightly longer classic espresso. (e.g., 18g in, 45g out)
- 1:3 (Lungo): For every 1 gram of coffee in, you aim for 3 grams of espresso out. (e.g., 18g in, 54g out)
- 1:4+ (Extended Lungo or Cafe Crème): Even longer extractions for specific profiles. (e.g., 18g in, 72g+ out)
These notations provide a universal language for baristas and coffee enthusiasts, allowing for precise communication and consistency across different machines and settings. Mastering this language is your first step towards becoming a true espresso aficionado.
[INLINE IMAGE 1: place after second H2 | alt=”espresso ratio concept illustration”]
The Holy Trinity of Espresso: Ratio, Grind, and Time
While espresso ratio is paramount, it doesn’t exist in a vacuum. It’s one leg of a three-legged stool, inextricably linked with grind size and brew time. To truly master espresso, you must understand the dynamic interplay between these three variables. Adjusting one inevitably impacts the others, creating a delicate balance that requires continuous calibration.
The Interplay: Adjusting One Affects All
Imagine espresso extraction as water flowing through a bed of coffee grounds. The espresso ratio defines your target “how much liquid for how much coffee.” Brew time is “how long it takes.” Grind size is “how easily the water flows.”
- If your grind is too coarse: Water flows too quickly (short brew time), resulting in an under-extracted shot. To compensate, you might try a longer ratio, but the flavors will likely still be weak and sour.
- If your grind is too fine: Water flows too slowly (long brew time), leading to an over-extracted shot. You might hit your target ratio, but the flavors could be bitter and astringent.
- Adjusting the ratio itself: If you pull a 1:2 ratio in 15 seconds (too fast), you would typically fine your grind to slow it down. If it takes 45 seconds (too slow), you would coarsen your grind. Sometimes, however, you might deliberately adjust the ratio to achieve a different flavor profile, then re-tune the grind to hit your desired brew time for that new ratio.
This constant dance between ratio, grind, and time is what makes espresso brewing both challenging and incredibly rewarding. There’s no single “correct” setting, but rather an optimal balance found through experimentation and tasting.
Grind Size: Surface Area and Extraction Speed
Grind size is arguably the most critical variable after the ratio itself. It dictates the surface area of the coffee particles exposed to hot water and, consequently, the resistance to water flow and the speed of extraction.
- Finer Grind: Increases surface area, creating more resistance. This slows down the water flow, allowing for more contact time between water and coffee, leading to greater extraction. Too fine, and the shot will choke (very slow or no flow) and become over-extracted and bitter.
- Coarser Grind: Decreases surface area, reducing resistance. Water flows more quickly, leading to less contact time and less extraction. Too coarse, and the shot will gush (very fast flow) and be under-extracted, sour, and weak.
The ideal espresso grind is extremely fine, almost like powdered sugar, but with enough texture to avoid clumping and allow for even water distribution. Small adjustments to your grinder are often necessary daily, as factors like humidity, bean age, and even ambient temperature can influence how coffee grinds and extracts.
Brew Time: Contact and Flavor Development
Brew time, or shot time, is the duration from when the pump engages until you reach your target espresso yield. For a classic espresso, this typically falls within a range of 25-30 seconds, but this is a guideline, not an unbreakable rule. The “correct” brew time is the one that produces the best taste for your chosen ratio and dose.
- Shorter Brew Time (e.g., 15-20 seconds): Often indicates an under-extracted shot, possibly due to a grind that’s too coarse or too low a dose. Flavors will be thin, sour, and lacking complexity.
- Longer Brew Time (e.g., 35-40+ seconds): Can indicate an over-extracted shot, likely due to a grind that’s too fine or too high a dose. Flavors might be bitter, astringent, and muted.
While the 25-30 second window is a common starting point for a 1:2 ratio, remember that different ratios will naturally have different ideal brew times. A ristretto (1:1) might finish in 15-20 seconds, while a lungo (1:3) might extend to 35-40 seconds or even longer, all while being perfectly balanced if the grind is appropriately adjusted. Always prioritize taste over a rigid adherence to a specific time, using time as a diagnostic tool rather than an absolute target.
Understanding your grinder and its settings is crucial for managing brew time effectively.
Exploring Popular Espresso Ratios and Their Flavor Signatures
The beauty of espresso lies in its versatility. By simply adjusting the ratio, you can dramatically alter the beverage in your cup. Each ratio has a distinct character, appealing to different palates and serving different purposes. Let’s delve into the most popular ratios and what makes them unique.
The Ristretto (1:1 to 1:1.5): Concentrated Intensity
The word “ristretto” is Italian for “restricted,” and it perfectly describes this short, intense shot. Pulled with a tight ratio, typically 1:1 to 1:1.5 (e.g., 18g in, 18-27g out), the ristretto extracts only the earliest and often sweetest compounds from the coffee bed. Because less water passes through, it tends to leave behind the more bitter components that are extracted later in the process.
- Flavor Profile: Expect a rich, concentrated flavor, often with pronounced sweetness, syrupy body, and a vibrant aroma. The acidity can be bright, and the bitterness is typically minimal. It showcases the primary characteristics of the bean in a powerful, undiluted form.
- When to Use It: Ideal for specific single-origin coffees that shine with concentrated sweetness, or for blends intended to be very intense. It’s also a fantastic base for small, strong milk drinks like a Gibraltar or a very small cappuccino, as its intensity cuts through the milk without getting lost.
- Brewing Tips: Because it’s a shorter extraction, you might need a slightly finer grind than for a normale to achieve proper resistance and extraction in the typical 15-20 second window.
The Normale/Espresso (1:2 to 1:2.5): The Balanced Classic
This is what most people picture when they think of an espresso. The “normale” (normal) or simply “espresso” is the workhorse of the coffee world, offering a beautifully balanced profile that showcases the full spectrum of a coffee’s flavor potential. The ratio typically falls between 1:2 and 1:2.5 (e.g., 18g in, 36-45g out).
- Flavor Profile: A well-pulled normale is a symphony of sweetness, acidity, and bitterness, all in harmony. It has a medium body, a creamy texture, and a complex aroma that evolves as you sip. This ratio aims for optimal extraction, bringing out the best of the coffee without over- or under-doing it.
- When to Use It: This is the go-to for most espresso blends and single-origin coffees. It’s perfect for drinking straight, as a base for standard lattes and cappuccinos, or in an Americano. It’s the benchmark by which many baristas judge their skills.
- Brewing Tips: Aim for a grind size that allows for a brew time of 25-30 seconds to hit your target yield. This is usually the starting point for dialing in any new bean.
The Lungo (1:3 to 1:4+): Extended Extraction, Milder Body
Meaning “long” in Italian, a lungo is an espresso shot where more water is passed through the coffee bed, resulting in a larger volume. The ratio typically ranges from 1:3 to 1:4 or even longer (e.g., 18g in, 54-72g+ out).
- Flavor Profile: Compared to a normale, a lungo will have a lighter body, often a more diluted flavor, and can emphasize different notes of the coffee. If pulled correctly, it can reveal delicate, subtle flavors that might be masked by the intensity of a ristretto or normale. However, there’s a higher risk of extracting undesirable bitter or astringent compounds if the grind isn’t adjusted appropriately.
- When to Use It: Some specific coffee beans, particularly certain lighter roasts or floral single origins, can shine as a lungo, offering a different, sometimes fruitier or tea-like experience. It’s also popular with those who prefer a larger, less intense “coffee-like” drink without adding extra water like an Americano.
- Brewing Tips: For a lungo, you will typically need a slightly coarser grind than a normale to prevent over-extraction and maintain a reasonable brew time (often 30-40+ seconds). The key is to avoid excessive bitterness.
The Americano/Long Black: Not a Ratio, But a Related Concept
While often discussed alongside ratios, the Americano and Long Black are distinct beverages, not ratios themselves. They involve diluting an espresso shot with hot water, typically after the shot is pulled. This is crucial: the dilution happens *post-extraction*, meaning the espresso itself is pulled to a standard ratio (usually 1:2 or 1:2.5).
- Americano: Espresso shot(s) added to hot water. This can result in the crema dissipating more quickly.
- Long Black: Hot water added to espresso shot(s). This method helps preserve the crema and often results in a visually more appealing and texturally richer drink.
Both offer a larger volume coffee drink with the characteristic espresso flavor profile, but without the potential bitterness that can arise from over-extracting a lungo. They allow you to enjoy the intensity of a well-pulled espresso in a more relaxed, extended format, making them excellent alternatives if a lungo isn’t yielding the desired results for your beans.
[INLINE IMAGE 2: place after fourth H2 | alt=”espresso ratio comparison illustration”]
How to Dial In Your Perfect Espresso Ratio: A Step-by-Step Guide
Dialing in an espresso shot is an iterative process of adjustment and tasting. It’s less about finding a single “correct” setting and more about discovering the optimal balance for your specific coffee, equipment, and palate. This systematic approach will guide you towards consistently delicious results.
Step 1: Start with a Baseline Ratio (e.g., 1:2)
For most coffee beans and espresso machines, a 1:2 ratio is an excellent starting point. This means for every 1 gram of ground coffee you put in, you aim for 2 grams of liquid espresso out. For example, if you’re using an 18-gram dose (a common double shot dose), your target yield would be 36 grams of espresso.
- Why 1:2? It’s a widely accepted ratio that typically produces a balanced, flavorful shot for a broad range of beans, serving as a reliable foundation before you start experimenting with ristrettos or lungos.
Step 2: Measure Your Input (Dose) Accurately
Consistency starts with your dose. Use a precision digital scale to measure your ground coffee. For a double shot, a dose between 17-20 grams is common, depending on your portafilter basket size and desired strength. Once you’ve chosen your dose, stick with it throughout the dialing-in process to eliminate one variable.
- Tips for Dosing:
- Weigh your portafilter basket empty, then grind directly into it.
- Use a dosing funnel to minimize mess and ensure all grounds make it into the basket.
- Distribute the grounds evenly before tamping to prevent channeling.
Step 3: Measure Your Output (Yield) Precisely
Place your espresso cup (or a separate small vessel) on a digital scale before you start brewing. Tare the scale to zero. Begin your shot, and stop the extraction when your scale reaches your target yield (e.g., 36 grams for an 18-gram dose at a 1:2 ratio). The scale is your best friend here, as volume measurements are unreliable due to crema.
- Integrated Scales: Some high-end machines have built-in scales, but an external scale is perfectly adequate for most home setups.
Step 4: Time Your Shot
While the scale is measuring yield, keep an eye on the clock. Start timing from the moment you engage the pump (or when the first drop hits the cup, depending on your preference for consistency). For a 1:2 ratio, you’re generally aiming for a brew time between 25-30 seconds. Record this time alongside your dose and yield.
- Importance of Time: Brew time is a diagnostic indicator. If your shot runs too fast or too slow, it signals a need to adjust your grind size.
Step 5: Taste and Evaluate
This is the most crucial step! Don’t just look at the numbers; taste the espresso. What are its characteristics? Is it:
- Sour, thin, weak, lacking body? Likely under-extracted.
- Bitter, astringent, harsh, burnt? Likely over-extracted.
- Sweet, balanced, complex, with a pleasant body and finish? You’re getting close!
Pay attention to the aroma, the crema, the texture, and the aftertaste. Take notes if you can; it helps in tracking your progress.
Learn more about developing your palate for espresso tasting in our advanced guide.
Step 6: Adjust Grind, Dose, or Ratio Systematically
Based on your taste evaluation and brew time, make one adjustment at a time:
- If Under-extracted (sour, fast shot):
- Finier Grind: This is usually the first adjustment. A finer grind increases resistance, slows the shot, and allows for more extraction.
- Increase Dose (slightly): More coffee grounds can also increase resistance and extraction.
- Decrease Ratio (e.g., 1:1.8): A shorter ratio might concentrate flavors, but this should be done after grind adjustments.
- If Over-extracted (bitter, slow shot):
- Coarser Grind: Reduces resistance, speeds up the shot, and decreases extraction.
- Decrease Dose (slightly): Less coffee can reduce resistance.
- Increase Ratio (e.g., 1:2.2): A longer ratio might dilute bitterness, but again, after grind adjustments.
Repeat steps 2-6 until you achieve a shot that is balanced and delicious according to your preference. Remember, the goal is not just to hit the numbers, but to hit the numbers *and* love the taste.
The Importance of Consistency: Repeatability for Perfection
Once you’ve found your ideal ratio, grind, and time for a particular coffee, strive for consistency in every step. This means:
- Using the same measured dose every time.
- Tamping with consistent pressure and technique.
- Stopping the shot at the exact target yield.
- Keeping your equipment clean and well-maintained.
Consistency allows you to identify subtle changes in your coffee (e.g., aging beans) or equipment and make targeted adjustments. It’s the secret sauce for replicating that perfect shot day after day.
Equipment Essentials for Precision Espresso Ratio Management
Achieving consistent and delicious espresso shots through precise ratio management isn’t solely about technique; it’s also about having the right tools. High-quality equipment doesn’t just make the process easier; it makes it possible to maintain the necessary precision for optimal extraction. Here’s a breakdown of the essential gear every aspiring home barista needs.
High-Quality Espresso Machine: Consistency is Key
Your espresso machine is the heart of your setup. While budget machines can pull espresso, higher-end models offer superior temperature stability and pressure control, which are critical for repeatable results.
- Key Features to Look For:
- PID Controller: Ensures stable brew water temperature, preventing temperature fluctuations that can cause inconsistent extraction.
- Volumetric Dosing (Optional): Some machines allow you to program the shot volume, but for precise ratio control, a scale is always superior.
- Pre-infusion Capabilities: Gently saturates the coffee puck before full pressure, leading to more even extraction and reducing channeling.
- Consistent Pressure: A stable 9 bars of pressure is ideal for espresso.
A machine that consistently delivers hot, stable water at the right pressure is foundational to controlling your espresso ratio effectively. Without it, even the most meticulous measurements can be undermined by inconsistent brewing conditions.
Precision Grinder: The Foundation of Good Extraction
Often cited as the most important piece of equipment after the coffee beans themselves, a high-quality espresso grinder is non-negotiable for ratio control. It’s what allows you to make the micro-adjustments necessary to hit your target brew time and extraction. Blade grinders are a definite no-go; you need a burr grinder.
- Key Features to Look For:
- Stepless or Micro-Stepped Adjustments: Essential for fine-tuning grind size. Stepless grinders offer infinite adjustments, while micro-stepped grinders have very small, incremental steps.
- Conical or Flat Burrs: Both can produce excellent results, but consistency is paramount.
- Minimal Retention: Grinders that retain less stale coffee from previous grinds ensure you’re always using fresh grounds for your shot.
- Dose by Weight (Optional but Recommended): Some advanced grinders can grind to a precise weight, which greatly simplifies the dosing step of ratio management.
Without a grinder capable of consistent, precise, and finely adjustable grind sizes, you simply cannot properly dial in your espresso ratio or achieve consistent shot times.
Digital Scale: Your Most Important Tool for Ratio Accuracy
This is arguably the single most important tool for managing espresso ratio, and thankfully, it’s often the most affordable. A good digital scale allows you to accurately measure both your coffee dose (in grams) and your espresso yield (also in grams).
- Key Features to Look For:
- 0.1g Accuracy: Crucial for precise dosing and yield measurement.
- Fast Response Time: Essential for stopping your shot precisely at your target yield.
- Compact Size: Must fit comfortably on your espresso machine’s drip tray with your cup on top.
- Water Resistance: Espresso brewing is a wet business; a splash-proof design is a bonus.
- Integrated Timer: Many scales designed for espresso include a built-in timer, making it easy to track brew time alongside yield.
Do not underestimate the importance of a good scale. It removes all guesswork from the “coffee in” and “espresso out” measurements, making ratio management an exact science.
Timer: Crucial for Shot Diagnostics
While many espresso scales now have integrated timers, a separate timer (or using your phone) is essential if your scale lacks this feature. The timer helps you diagnose whether your shot is running too fast (under-extracted) or too slow (over-extracted), guiding your grind adjustments.
- Functionality: Start the timer as soon as you hit the brew button (or first drops appear) and stop it when you reach your target yield.
Dosing Funnels and Distribution Tools: Enhancing Workflow
While not strictly necessary for measuring ratio, these tools significantly improve workflow and consistency, which indirectly aids ratio management.
- Dosing Funnel: Sits on top of your portafilter basket, preventing ground coffee from spilling over during grinding. This ensures all your measured dose makes it into the basket, reducing waste and maintaining accuracy.
- Distribution Tools (e.g., WDT Tool, Distribution Leveller): Help evenly distribute the coffee grounds within the basket before tamping. This prevents channeling (where water finds easy paths through unevenly distributed grounds), leading to more even extraction and a more consistent shot.
Portafilters and Baskets: The Unsung Heroes
Your portafilter and, more specifically, your filter basket play a crucial role in how well water flows through the coffee. Most espresso machines come with standard baskets, but upgrading to a “precision” or “VST” basket can significantly improve consistency.
- Precision Baskets: Feature more uniform hole size and distribution, leading to more even extraction and reducing the likelihood of channeling.
- Basket Size: Ensure your dose (e.g., 18g) fits comfortably in your basket without being too shallow or overflowing after tamping. This affects headspace and can impact extraction.
Here’s a comparison of common espresso scales, highlighting features relevant to ratio management:
| Scale Model | Accuracy (grams) | Max Capacity (grams) | Integrated Timer | Key Benefit for Espresso Ratio |
|---|---|---|---|---|
| Acaia Lunar | 0.1g | 2000g | Yes | Extremely fast response, durable, small footprint, app connectivity for tracking. |
| Timemore Black Mirror Basic Plus | 0.1g | 2000g | Yes | Excellent value, minimalist design, auto-timer mode, good accuracy for price. |
| Hario V60 Drip Scale | 0.1g | 2000g | Yes | Reliable, popular, good for beginners, though larger footprint can be an issue. |
| Brewista Smart Scale II | 0.1g | 2000g | Yes | Multiple modes (espresso, pour-over), water resistant, rechargeable. |
| Felicita Incline | 0.1g | 2000g | Yes | Angled display for easier reading under portafilter, fast response. |
Investing in these essential tools will not only make your espresso brewing more enjoyable but will also give you the precision needed to master the espresso ratio and consistently pull incredible shots.
Beyond the Basics: Advanced Espresso Ratio Techniques and Considerations
Once you’ve mastered the fundamentals of espresso ratio, grind, and time, a deeper world of variables opens up. Advanced baristas and enthusiasts delve into factors that subtly, yet significantly, influence extraction and flavor. These considerations allow for even greater control and customization of your espresso shots.
Temperature Stability and its Impact on Extraction
Water temperature plays a critical role in the solubility of coffee compounds. Generally, hotter water extracts more quickly and extracts more solids. Cooler water extracts slower and less efficiently. Inconsistent brewing temperature is a common cause of frustratingly variable shots, even when dose, yield, and time are kept constant.
- How it Affects Ratio: If your machine’s temperature fluctuates, a consistent ratio can suddenly taste under- or over-extracted. A drop in temperature might require a finer grind or a slightly longer ratio to achieve desired extraction, while an increase might demand a coarser grind or shorter ratio.
- Solution: Invest in an espresso machine with a PID (Proportional-Integral-Derivative) controller, which maintains a highly stable brew temperature. Pre-heating your portafilter and cup also ensures that heat isn’t drawn away from the brew water.
- Experimentation: Some experienced baristas even experiment with different brew temperatures for different roast levels or bean types (e.g., lower temps for dark roasts to reduce bitterness, higher temps for light roasts to aid extraction).
Pressure Profiling and Pre-Infusion: Manipulating Extraction Dynamics
Most home espresso machines operate at a fixed pressure (around 9 bars). However, advanced machines offer pressure profiling, allowing you to manipulate the pressure curve throughout the shot. This can dramatically impact extraction uniformity and flavor development.
- Pre-infusion: This is a form of low-pressure saturation of the coffee puck before full brewing pressure is applied. It allows the coffee bed to fully saturate and swell, reducing the likelihood of channeling and promoting a more even extraction. Even machines without full pressure profiling often have a pre-infusion phase.
- Pressure Profiling: By varying pressure, you can control the flow rate and extraction rate at different stages of the shot. For example, starting with lower pressure, ramping up, and then tapering off can lead to more nuanced and balanced flavors, especially with challenging beans.
- Impact on Ratio: While the final ratio remains constant, pressure profiling can make it easier to achieve that ratio with improved flavor. It provides another lever to fine-tune the extraction process, making previously unattainable flavor profiles possible with a given ratio.
Coffee Bean Varietals and Roasts: How They Influence Optimal Ratio
Not all coffee beans are created equal, and their unique characteristics demand different approaches to ratio. The varietal, processing method, and especially the roast level, all play a significant role.
- Light Roasts: Tend to be denser and less soluble. They often benefit from slightly longer ratios (e.g., 1:2.5 to 1:3) to fully extract their complex acids and aromatics, sometimes with higher brew temperatures and longer brew times. They can be more challenging to extract without sourness.
- Medium Roasts: Often the most forgiving. They typically perform well within the classic 1:2 to 1:2.2 ratio, showcasing a balanced profile.
- Dark Roasts: More soluble and can easily become bitter if over-extracted. They often respond best to shorter ratios (e.g., 1:1.5 to 1:2) and potentially lower brew temperatures, which help to mitigate bitterness and emphasize their inherent sweetness and body.
- Bean Age: Freshly roasted beans release more CO2, affecting resistance. As beans age, they degas and become more porous, often requiring a finer grind to maintain the same brew time and ratio.
Always consider the origin and roast level of your coffee when deciding on a starting ratio. What works for a bright Ethiopian natural will likely not work for a bold Italian blend.
Water Quality: An Often Overlooked Factor
Coffee is 98% water, yet water quality is frequently overlooked by home baristas. The mineral content of your water (hardness, alkalinity, presence of chlorides) significantly impacts extraction and flavor.
- Ideal Water: Should contain a balanced amount of minerals (e.g., calcium and magnesium) to aid in extraction, but not so much that it causes scale buildup or negatively impacts taste. Total Dissolved Solids (TDS) between 75-150 ppm is a common recommendation.
- Impact on Ratio: Poor water quality can either hinder extraction (too soft/distilled, leading to sourness even with ideal ratio) or over-extract quickly (too hard, leading to bitterness). Even with a perfect ratio, bad water can make your coffee taste flat, dull, or off.
- Solution: Use filtered water, a water softener, or reverse osmosis water with added minerals for optimal brewing. Many specialty coffee suppliers offer water recipes or pre-mixed mineral packets.
Dive deeper into the science of water for coffee brewing in our dedicated article.
Adapting Ratio for Milk-Based Drinks vs. Straight Espresso
The “perfect” espresso for drinking straight might not be the ideal base for a milk drink. When milk is added, its sweetness and fat content can mask certain delicate flavors or amplify others. This often leads baristas to adjust their ratio specifically for different applications.
- For Straight Espresso: You’re looking for balance, complexity, and a clean finish. A 1:2 or 1:2.2 ratio is often perfect, emphasizing the coffee’s unique characteristics.
- For Milk-Based Drinks (Lattes, Cappuccinos):
- Slightly Shorter Ratio (e.g., 1:1.5 to 1:2): A ristretto or a shorter normale can provide a more concentrated, robust coffee flavor that stands up better to the sweetness and creaminess of milk. This
Espresso Ratio Explained: The Definitive Guide to Unlocking Perfect Flavor
Affiliate disclosure: This article may contain affiliate links. Recommendations are independent and editorially driven.
For many, the morning ritual of brewing espresso is a sacred act. The hiss of the machine, the rich aroma filling the kitchen, and that first invigorating sip. But what separates a merely good espresso from one that is truly exceptional? The answer, more often than not, lies in understanding and mastering the espresso ratio.
The espresso ratio is the fundamental equation that dictates the relationship between the weight of your dry coffee grounds (dose) and the weight of the liquid espresso extracted (yield). It’s a simple concept with profound implications for flavor, body, and overall shot quality. Ignoring it is akin to baking without measuring ingredients – you might get something palatable, but consistency and perfection will remain elusive.
In the vibrant world of specialty coffee, where precision and palate meet, the espresso ratio is not just a guideline; it’s the bedrock upon which all other variables are built. From the nuanced sweetness of a perfectly pulled shot to the bold intensity of a ristretto, the ratio guides your hand and refines your brew. This comprehensive guide from cafeserre will demystify the espresso ratio, helping you navigate its complexities and empower you to consistently pull shots that not only meet but exceed your expectations. Prepare to transform your home barista skills and elevate your daily coffee experience to new heights.
Understanding the Fundamentals: What Exactly is Espresso Ratio?
At its heart, espresso ratio is an elegant simplification of a complex process. It’s a mathematical representation of how much coffee you put into your machine and how much liquid you get out. This ratio, typically expressed as “coffee in:espresso out” by weight, is the primary driver of extraction and, consequently, the taste profile of your shot.
The Core Definition: Coffee In vs. Espresso Out
Let’s break down the core components. “Coffee in” refers to the weight of your dry, ground coffee dose, measured in grams. This is the starting point, the raw material for your espresso. “Espresso out” refers to the weight of the liquid espresso that flows into your cup, also measured in grams. By comparing these two figures, we derive the ratio.
For example, if you use 18 grams of ground coffee (coffee in) and extract 36 grams of liquid espresso (espresso out), your ratio is 1:2. This means for every 1 gram of coffee, you extracted 2 grams of espresso. This simple calculation provides a consistent benchmark for reproducibility and adjustment.
The beauty of using weight, rather than volume, is its inherent accuracy. Coffee density can vary, and crema volume can be misleading. Weight offers an undeniable, precise measurement that ensures consistency across different beans, grind settings, and even different days.
Why Ratio Matters: Unlocking Flavor Profiles
The espresso ratio is a powerful lever for influencing the flavor, body, and aroma of your espresso. Think of it as a spectrum of extraction:
- Shorter Ratios (e.g., 1:1, 1:1.5 – Ristretto): These produce a highly concentrated, often sweeter, and more viscous shot. Less water has passed through the coffee bed, meaning fewer solids are dissolved, but those that are tend to be the richer, more soluble compounds extracted early in the process. Expect intense flavors, sometimes syrupy body, and pronounced acidity or sweetness depending on the bean.
- Medium Ratios (e.g., 1:2, 1:2.5 – Normale): This range is often considered the “sweet spot” for many espresso blends and single origins. It offers a balance of sweetness, acidity, and bitterness, with a pleasant body and aromatic complexity. It’s the classic espresso shot that many café patrons are familiar with.
- Longer Ratios (e.g., 1:3, 1:4+ – Lungo): As you increase the amount of water passing through the coffee, more solids are extracted. This can lead to a thinner body, less intensity, and potentially more bitterness if extraction goes too far. While some beans shine in a lungo, revealing delicate notes, others might become watery or astringent. It’s about finding the balance where desirable flavors are amplified without over-extracting undesirable ones.
By understanding and manipulating the espresso ratio, you gain direct control over these flavor outcomes, allowing you to tailor your espresso to specific beans, roast profiles, and personal preferences.
Common Notations: 1:2, 1:3, and Beyond
The most common way to express espresso ratio is a simple X:Y format, where X represents the weight of the dry coffee dose and Y represents the weight of the liquid espresso yield. For instance:
- 1:1 (Ristretto): For every 1 gram of coffee in, you aim for 1 gram of espresso out. (e.g., 18g in, 18g out)
- 1:2 (Normale/Classic Espresso): For every 1 gram of coffee in, you aim for 2 grams of espresso out. (e.g., 18g in, 36g out) This is a widely adopted starting point for many baristas.
- 1:2.5: A slightly longer classic espresso. (e.g., 18g in, 45g out)
- 1:3 (Lungo): For every 1 gram of coffee in, you aim for 3 grams of espresso out. (e.g., 18g in, 54g out)
- 1:4+ (Extended Lungo or Cafe Crème): Even longer extractions for specific profiles. (e.g., 18g in, 72g+ out)
These notations provide a universal language for baristas and coffee enthusiasts, allowing for precise communication and consistency across different machines and settings. Mastering this language is your first step towards becoming a true espresso aficionado.
[INLINE IMAGE 1: place after second H2 | alt=”espresso ratio concept illustration”]
The Holy Trinity of Espresso: Ratio, Grind, and Time
While espresso ratio is paramount, it doesn’t exist in a vacuum. It’s one leg of a three-legged stool, inextricably linked with grind size and brew time. To truly master espresso, you must understand the dynamic interplay between these three variables. Adjusting one inevitably impacts the others, creating a delicate balance that requires continuous calibration.
The Interplay: Adjusting One Affects All
Imagine espresso extraction as water flowing through a bed of coffee grounds. The espresso ratio defines your target “how much liquid for how much coffee.” Brew time is “how long it takes.” Grind size is “how easily the water flows.”
- If your grind is too coarse: Water flows too quickly (short brew time), resulting in an under-extracted shot. To compensate, you might try a longer ratio, but the flavors will likely still be weak and sour.
- If your grind is too fine: Water flows too slowly (long brew time), leading to an over-extracted shot. You might hit your target ratio, but the flavors could be bitter and astringent.
- Adjusting the ratio itself: If you pull a 1:2 ratio in 15 seconds (too fast), you would typically fine your grind to slow it down. If it takes 45 seconds (too slow), you would coarsen your grind. Sometimes, however, you might deliberately adjust the ratio to achieve a different flavor profile, then re-tune the grind to hit your desired brew time for that new ratio.
This constant dance between ratio, grind, and time is what makes espresso brewing both challenging and incredibly rewarding. There’s no single “correct” setting, but rather an optimal balance found through experimentation and tasting.
Grind Size: Surface Area and Extraction Speed
Grind size is arguably the most critical variable after the ratio itself. It dictates the surface area of the coffee particles exposed to hot water and, consequently, the resistance to water flow and the speed of extraction.
- Finer Grind: Increases surface area, creating more resistance. This slows down the water flow, allowing for more contact time between water and coffee, leading to greater extraction. Too fine, and the shot will choke (very slow or no flow) and become over-extracted and bitter.
- Coarser Grind: Decreases surface area, reducing resistance. Water flows more quickly, leading to less contact time and less extraction. Too coarse, and the shot will gush (very fast flow) and be under-extracted, sour, and weak.
The ideal espresso grind is extremely fine, almost like powdered sugar, but with enough texture to avoid clumping and allow for even water distribution. Small adjustments to your grinder are often necessary daily, as factors like humidity, bean age, and even ambient temperature can influence how coffee grinds and extracts.
Brew Time: Contact and Flavor Development
Brew time, or shot time, is the duration from when the pump engages until you reach your target espresso yield. For a classic espresso, this typically falls within a range of 25-30 seconds, but this is a guideline, not an unbreakable rule. The “correct” brew time is the one that produces the best taste for your chosen ratio and dose.
- Shorter Brew Time (e.g., 15-20 seconds): Often indicates an under-extracted shot, possibly due to a grind that’s too coarse or too low a dose. Flavors will be thin, sour, and lacking complexity.
- Longer Brew Time (e.g., 35-40+ seconds): Can indicate an over-extracted shot, likely due to a grind that’s too fine or too high a dose. Flavors might be bitter, astringent, and muted.
While the 25-30 second window is a common starting point for a 1:2 ratio, remember that different ratios will naturally have different ideal brew times. A ristretto (1:1) might finish in 15-20 seconds, while a lungo (1:3) might extend to 35-40 seconds or even longer, all while being perfectly balanced if the grind is appropriately adjusted. Always prioritize taste over a rigid adherence to a specific time, using time as a diagnostic tool rather than an absolute target.
Understanding your grinder and its settings is crucial for managing brew time effectively.
Exploring Popular Espresso Ratios and Their Flavor Signatures
The beauty of espresso lies in its versatility. By simply adjusting the ratio, you can dramatically alter the beverage in your cup. Each ratio has a distinct character, appealing to different palates and serving different purposes. Let’s delve into the most popular ratios and what makes them unique.
The Ristretto (1:1 to 1:1.5): Concentrated Intensity
The word “ristretto” is Italian for “restricted,” and it perfectly describes this short, intense shot. Pulled with a tight ratio, typically 1:1 to 1:1.5 (e.g., 18g in, 18-27g out), the ristretto extracts only the earliest and often sweetest compounds from the coffee bed. Because less water passes through, it tends to leave behind the more bitter components that are extracted later in the process.
- Flavor Profile: Expect a rich, concentrated flavor, often with pronounced sweetness, syrupy body, and a vibrant aroma. The acidity can be bright, and the bitterness is typically minimal. It showcases the primary characteristics of the bean in a powerful, undiluted form.
- When to Use It: Ideal for specific single-origin coffees that shine with concentrated sweetness, or for blends intended to be very intense. It’s also a fantastic base for small, strong milk drinks like a Gibraltar or a very small cappuccino, as its intensity cuts through the milk without getting lost.
- Brewing Tips: Because it’s a shorter extraction, you might need a slightly finer grind than for a normale to achieve proper resistance and extraction in the typical 15-20 second window.
The Normale/Espresso (1:2 to 1:2.5): The Balanced Classic
This is what most people picture when they think of an espresso. The “normale” (normal) or simply “espresso” is the workhorse of the coffee world, offering a beautifully balanced profile that showcases the full spectrum of a coffee’s flavor potential. The ratio typically falls between 1:2 and 1:2.5 (e.g., 18g in, 36-45g out).
- Flavor Profile: A well-pulled normale is a symphony of sweetness, acidity, and bitterness, all in harmony. It has a medium body, a creamy texture, and a complex aroma that evolves as you sip. This ratio aims for optimal extraction, bringing out the best of the coffee without over- or under-doing it.
- When to Use It: This is the go-to for most espresso blends and single-origin coffees. It’s perfect for drinking straight, as a base for standard lattes and cappuccinos, or in an Americano. It’s the benchmark by which many baristas judge their skills.
- Brewing Tips: Aim for a grind size that allows for a brew time of 25-30 seconds to hit your target yield. This is usually the starting point for dialing in any new bean.
The Lungo (1:3 to 1:4+): Extended Extraction, Milder Body
Meaning “long” in Italian, a lungo is an espresso shot where more water is passed through the coffee bed, resulting in a larger volume. The ratio typically ranges from 1:3 to 1:4 or even longer (e.g., 18g in, 54-72g+ out).
- Flavor Profile: Compared to a normale, a lungo will have a lighter body, often a more diluted flavor, and can emphasize different notes of the coffee. If pulled correctly, it can reveal delicate, subtle flavors that might be masked by the intensity of a ristretto or normale. However, there’s a higher risk of extracting undesirable bitter or astringent compounds if the grind isn’t adjusted appropriately.
- When to Use It: Some specific coffee beans, particularly certain lighter roasts or floral single origins, can shine as a lungo, offering a different, sometimes fruitier or tea-like experience. It’s also popular with those who prefer a larger, less intense “coffee-like” drink without adding extra water like an Americano.
- Brewing Tips: For a lungo, you will typically need a slightly coarser grind than a normale to prevent over-extraction and maintain a reasonable brew time (often 30-40+ seconds). The key is to avoid excessive bitterness.
The Americano/Long Black: Not a Ratio, But a Related Concept
While often discussed alongside ratios, the Americano and Long Black are distinct beverages, not ratios themselves. They involve diluting an espresso shot with hot water, typically after the shot is pulled. This is crucial: the dilution happens *post-extraction*, meaning the espresso itself is pulled to a standard ratio (usually 1:2 or 1:2.5).
- Americano: Espresso shot(s) added to hot water. This can result in the crema dissipating more quickly.
- Long Black: Hot water added to espresso shot(s). This method helps preserve the crema and often results in a visually more appealing and texturally richer drink.
Both offer a larger volume coffee drink with the characteristic espresso flavor profile, but without the potential bitterness that can arise from over-extracting a lungo. They allow you to enjoy the intensity of a well-pulled espresso in a more relaxed, extended format, making them excellent alternatives if a lungo isn’t yielding the desired results for your beans.
[INLINE IMAGE 2: place after fourth H2 | alt=”espresso ratio comparison illustration”]
How to Dial In Your Perfect Espresso Ratio: A Step-by-Step Guide
Dialing in an espresso shot is an iterative process of adjustment and tasting. It’s less about finding a single “correct” setting and more about discovering the optimal balance for your specific coffee, equipment, and palate. This systematic approach will guide you towards consistently delicious results.
Step 1: Start with a Baseline Ratio (e.g., 1:2)
For most coffee beans and espresso machines, a 1:2 ratio is an excellent starting point. This means for every 1 gram of ground coffee you put in, you aim for 2 grams of liquid espresso out. For example, if you’re using an 18-gram dose (a common double shot dose), your target yield would be 36 grams of espresso.
- Why 1:2? It’s a widely accepted ratio that typically produces a balanced, flavorful shot for a broad range of beans, serving as a reliable foundation before you start experimenting with ristrettos or lungos.
Step 2: Measure Your Input (Dose) Accurately
Consistency starts with your dose. Use a precision digital scale to measure your ground coffee. For a double shot, a dose between 17-20 grams is common, depending on your portafilter basket size and desired strength. Once you’ve chosen your dose, stick with it throughout the dialing-in process to eliminate one variable.
- Tips for Dosing:
- Weigh your portafilter basket empty, then grind directly into it.
- Use a dosing funnel to minimize mess and ensure all grounds make it into the basket.
- Distribute the grounds evenly before tamping to prevent channeling.
Step 3: Measure Your Output (Yield) Precisely
Place your espresso cup (or a separate small vessel) on a digital scale before you start brewing. Tare the scale to zero. Begin your shot, and stop the extraction when your scale reaches your target yield (e.g., 36 grams for an 18-gram dose at a 1:2 ratio). The scale is your best friend here, as volume measurements are unreliable due to crema.
- Integrated Scales: Some high-end machines have built-in scales, but an external scale is perfectly adequate for most home setups.
Step 4: Time Your Shot
While the scale is measuring yield, keep an eye on the clock. Start timing from the moment you engage the pump (or when the first drop hits the cup, depending on your preference for consistency). For a 1:2 ratio, you’re generally aiming for a brew time between 25-30 seconds. Record this time alongside your dose and yield.
- Importance of Time: Brew time is a diagnostic indicator. If your shot runs too fast or too slow, it signals a need to adjust your grind size.
Step 5: Taste and Evaluate
This is the most crucial step! Don’t just look at the numbers; taste the espresso. What are its characteristics? Is it:
- Sour, thin, weak, lacking body? Likely under-extracted.
- Bitter, astringent, harsh, burnt? Likely over-extracted.
- Sweet, balanced, complex, with a pleasant body and finish? You’re getting close!
Pay attention to the aroma, the crema, the texture, and the aftertaste. Take notes if you can; it helps in tracking your progress.
Learn more about developing your palate for espresso tasting in our advanced guide.
Step 6: Adjust Grind, Dose, or Ratio Systematically
Based on your taste evaluation and brew time, make one adjustment at a time:
- If Under-extracted (sour, fast shot):
- Finier Grind: This is usually the first adjustment. A finer grind increases resistance, slows the shot, and allows for more extraction.
- Increase Dose (slightly): More coffee grounds can also increase resistance and extraction.
- Decrease Ratio (e.g., 1:1.8): A shorter ratio might concentrate flavors, but this should be done after grind adjustments.
- If Over-extracted (bitter, slow shot):
- Coarser Grind: Reduces resistance, speeds up the shot, and decreases extraction.
- Decrease Dose (slightly): Less coffee can reduce resistance.
- Increase Ratio (e.g., 1:2.2): A longer ratio might dilute bitterness, but again, after grind adjustments.
Repeat steps 2-6 until you achieve a shot that is balanced and delicious according to your preference. Remember, the goal is not just to hit the numbers, but to hit the numbers *and* love the taste.
The Importance of Consistency: Repeatability for Perfection
Once you’ve found your ideal ratio, grind, and time for a particular coffee, strive for consistency in every step. This means:
- Using the same measured dose every time.
- Tamping with consistent pressure and technique.
- Stopping the shot at the exact target yield.
- Keeping your equipment clean and well-maintained.
Consistency allows you to identify subtle changes in your coffee (e.g., aging beans) or equipment and make targeted adjustments. It’s the secret sauce for replicating that perfect shot day after day.
Equipment Essentials for Precision Espresso Ratio Management
Achieving consistent and delicious espresso shots through precise ratio management isn’t solely about technique; it’s also about having the right tools. High-quality equipment doesn’t just make the process easier; it makes it possible to maintain the necessary precision for optimal extraction. Here’s a breakdown of the essential gear every aspiring home barista needs.
High-Quality Espresso Machine: Consistency is Key
Your espresso machine is the heart of your setup. While budget machines can pull espresso, higher-end models offer superior temperature stability and pressure control, which are critical for repeatable results.
- Key Features to Look For:
- PID Controller: Ensures stable brew water temperature, preventing temperature fluctuations that can cause inconsistent extraction.
- Volumetric Dosing (Optional): Some machines allow you to program the shot volume, but for precise ratio control, a scale is always superior.
- Pre-infusion Capabilities: Gently saturates the coffee puck before full pressure, leading to more even extraction and reducing channeling.
- Consistent Pressure: A stable 9 bars of pressure is ideal for espresso.
A machine that consistently delivers hot, stable water at the right pressure is foundational to controlling your espresso ratio effectively. Without it, even the most meticulous measurements can be undermined by inconsistent brewing conditions.
Precision Grinder: The Foundation of Good Extraction
Often cited as the most important piece of equipment after the coffee beans themselves, a high-quality espresso grinder is non-negotiable for ratio control. It’s what allows you to make the micro-adjustments necessary to hit your target brew time and extraction. Blade grinders are a definite no-go; you need a burr grinder.
- Key Features to Look For:
- Stepless or Micro-Stepped Adjustments: Essential for fine-tuning grind size. Stepless grinders offer infinite adjustments, while micro-stepped grinders have very small, incremental steps.
- Conical or Flat Burrs: Both can produce excellent results, but consistency is paramount.
- Minimal Retention: Grinders that retain less stale coffee from previous grinds ensure you’re always using fresh grounds for your shot.
- Dose by Weight (Optional but Recommended): Some advanced grinders can grind to a precise weight, which greatly simplifies the dosing step of ratio management.
Without a grinder capable of consistent, precise, and finely adjustable grind sizes, you simply cannot properly dial in your espresso ratio or achieve consistent shot times.
Digital Scale: Your Most Important Tool for Ratio Accuracy
This is arguably the single most important tool for managing espresso ratio, and thankfully, it’s often the most affordable. A good digital scale allows you to accurately measure both your coffee dose (in grams) and your espresso yield (also in grams).
- Key Features to Look For:
- 0.1g Accuracy: Crucial for precise dosing and yield measurement.
- Fast Response Time: Essential for stopping your shot precisely at your target yield.
- Compact Size: Must fit comfortably on your espresso machine’s drip tray with your cup on top.
- Water Resistance: Espresso brewing is a wet business; a splash-proof design is a bonus.
- Integrated Timer: Many scales designed for espresso include a built-in timer, making it easy to track brew time alongside yield.
Do not underestimate the importance of a good scale. It removes all guesswork from the “coffee in” and “espresso out” measurements, making ratio management an exact science.
Timer: Crucial for Shot Diagnostics
While many espresso scales now have integrated timers, a separate timer (or using your phone) is essential if your scale lacks this feature. The timer helps you diagnose whether your shot is running too fast (under-extracted) or too slow (over-extracted), guiding your grind adjustments.
- Functionality: Start the timer as soon as you hit the brew button (or first drops appear) and stop it when you reach your target yield.
Dosing Funnels and Distribution Tools: Enhancing Workflow
While not strictly necessary for measuring ratio, these tools significantly improve workflow and consistency, which indirectly aids ratio management.
- Dosing Funnel: Sits on top of your portafilter basket, preventing ground coffee from spilling over during grinding. This ensures all your measured dose makes it into the basket, reducing waste and maintaining accuracy.
- Distribution Tools (e.g., WDT Tool, Distribution Leveller): Help evenly distribute the coffee grounds within the basket before tamping. This prevents channeling (where water finds easy paths through unevenly distributed grounds), leading to more even extraction and a more consistent shot.
Portafilters and Baskets: The Unsung Heroes
Your portafilter and, more specifically, your filter basket play a crucial role in how well water flows through the coffee. Most espresso machines come with standard baskets, but upgrading to a “precision” or “VST” basket can significantly improve consistency.
- Precision Baskets: Feature more uniform hole size and distribution, leading to more even extraction and reducing the likelihood of channeling.
- Basket Size: Ensure your dose (e.g., 18g) fits comfortably in your basket without being too shallow or overflowing after tamping. This affects headspace and can impact extraction.
Here’s a comparison of common espresso scales, highlighting features relevant to ratio management:
Scale Model Accuracy (grams) Max Capacity (grams) Integrated Timer Key Benefit for Espresso Ratio Acaia Lunar 0.1g 2000g Yes Extremely fast response, durable, small footprint, app connectivity for tracking. Timemore Black Mirror Basic Plus 0.1g 2000g Yes Excellent value, minimalist design, auto-timer mode, good accuracy for price. Hario V60 Drip Scale 0.1g 2000g Yes Reliable, popular, good for beginners, though larger footprint can be an issue. Brewista Smart Scale II 0.1g 2000g Yes Multiple modes (espresso, pour-over), water resistant, rechargeable. Felicita Incline 0.1g 2000g Yes Angled display for easier reading under portafilter, fast response. Investing in these essential tools will not only make your espresso brewing more enjoyable but will also give you the precision needed to master the espresso ratio and consistently pull incredible shots.
Beyond the Basics: Advanced Espresso Ratio Techniques and Considerations
Once you’ve mastered the fundamentals of espresso ratio, grind, and time, a deeper world of variables opens up. Advanced baristas and enthusiasts delve into factors that subtly, yet significantly, influence extraction and flavor. These considerations allow for even greater control and customization of your espresso shots.
Temperature Stability and its Impact on Extraction
Water temperature plays a critical role in the solubility of coffee compounds. Generally, hotter water extracts more quickly and extracts more solids. Cooler water extracts slower and less efficiently. Inconsistent brewing temperature is a common cause of frustratingly variable shots, even when dose, yield, and time are kept constant.
- How it Affects Ratio: If your machine’s temperature fluctuates, a consistent ratio can suddenly taste under- or over-extracted. A drop in temperature might require a finer grind or a slightly longer ratio to achieve desired extraction, while an increase might demand a coarser grind or shorter ratio.
- Solution: Invest in an espresso machine with a PID (Proportional-Integral-Derivative) controller, which maintains a highly stable brew temperature. Pre-heating your portafilter and cup also ensures that heat isn’t drawn away from the brew water.
- Experimentation: Some experienced baristas even experiment with different brew temperatures for different roast levels or bean types (e.g., lower temps for dark roasts to reduce bitterness, higher temps for light roasts to aid extraction).
Pressure Profiling and Pre-Infusion: Manipulating Extraction Dynamics
Most home espresso machines operate at a fixed pressure (around 9 bars). However, advanced machines offer pressure profiling, allowing you to manipulate the pressure curve throughout the shot. This can dramatically impact extraction uniformity and flavor development.
- Pre-infusion: This is a form of low-pressure saturation of the coffee puck before full brewing pressure is applied. It allows the coffee bed to fully saturate and swell, reducing the likelihood of channeling and promoting a more even extraction. Even machines without full pressure profiling often have a pre-infusion phase.
- Pressure Profiling: By varying pressure, you can control the flow rate and extraction rate at different stages of the shot. For example, starting with lower pressure, ramping up, and then tapering off can lead to more nuanced and balanced flavors, especially with challenging beans.
- Impact on Ratio: While the final ratio remains constant, pressure profiling can make it easier to achieve that ratio with improved flavor. It provides another lever to fine-tune the extraction process, making previously unattainable flavor profiles possible with a given ratio.
Coffee Bean Varietals and Roasts: How They Influence Optimal Ratio
Not all coffee beans are created equal, and their unique characteristics demand different approaches to ratio. The varietal, processing method, and especially the roast level, all play a significant role.
- Light Roasts: Tend to be denser and less soluble. They often benefit from slightly longer ratios (e.g., 1:2.5 to 1:3) to fully extract their complex acids and aromatics, sometimes with higher brew temperatures and longer brew times. They can be more challenging to extract without sourness.
- Medium Roasts: Often the most forgiving. They typically perform well within the classic 1:2 to 1:2.2 ratio, showcasing a balanced profile.
- Dark Roasts: More soluble and can easily become bitter if over-extracted. They often respond best to shorter ratios (e.g., 1:1.5 to 1:2) and potentially lower brew temperatures, which help to mitigate bitterness and emphasize their inherent sweetness and body.
- Bean Age: Freshly roasted beans release more CO2, affecting resistance. As beans age, they degas and become more porous, often requiring a finer grind to maintain the same brew time and ratio.
Always consider the origin and roast level of your coffee when deciding on a starting ratio. What works for a bright Ethiopian natural will likely not work for a bold Italian blend.
Water Quality: An Often Overlooked Factor
Coffee is 98% water, yet water quality is frequently overlooked by home baristas. The mineral content of your water (hardness, alkalinity, presence of chlorides) significantly impacts extraction and flavor.
- Ideal Water: Should contain a balanced amount of minerals (e.g., calcium and magnesium) to aid in extraction, but not so much that it causes scale buildup or negatively impacts taste. Total Dissolved Solids (TDS) between 75-150 ppm is a common recommendation.
- Impact on Ratio: Poor water quality can either hinder extraction (too soft/distilled, leading to sourness even with ideal ratio) or over-extract quickly (too hard, leading to bitterness). Even with a perfect ratio, bad water can make your coffee taste flat, dull, or off.
- Solution: Use filtered water, a water softener, or reverse osmosis water with added minerals for optimal brewing. Many specialty coffee suppliers offer water recipes or pre-mixed mineral packets.
Dive deeper into the science of water for coffee brewing in our dedicated article.
Adapting Ratio for Milk-Based Drinks vs. Straight Espresso
The “perfect” espresso for drinking straight might not be the ideal base for a milk drink. When milk is added, its sweetness and fat content can mask certain delicate flavors or amplify others. This often leads baristas to adjust their ratio specifically for different applications.
- For Straight Espresso: You’re looking for balance, complexity, and a clean finish. A 1:2 or 1:2.2 ratio is often perfect, emphasizing the coffee’s unique characteristics.
- For Milk-Based Drinks (Lattes, Cappuccinos):
- Slightly Shorter Ratio (e.g., 1:1.5 to 1:2): A ristretto or a shorter normale can provide a more concentrated, robust coffee flavor that stands up better to the sweetness and creaminess of milk. This
- Slightly Shorter Ratio (e.g., 1:1.5 to 1:2): A ristretto or a shorter normale can provide a more concentrated, robust coffee flavor that stands up better to the sweetness and creaminess of milk. This