
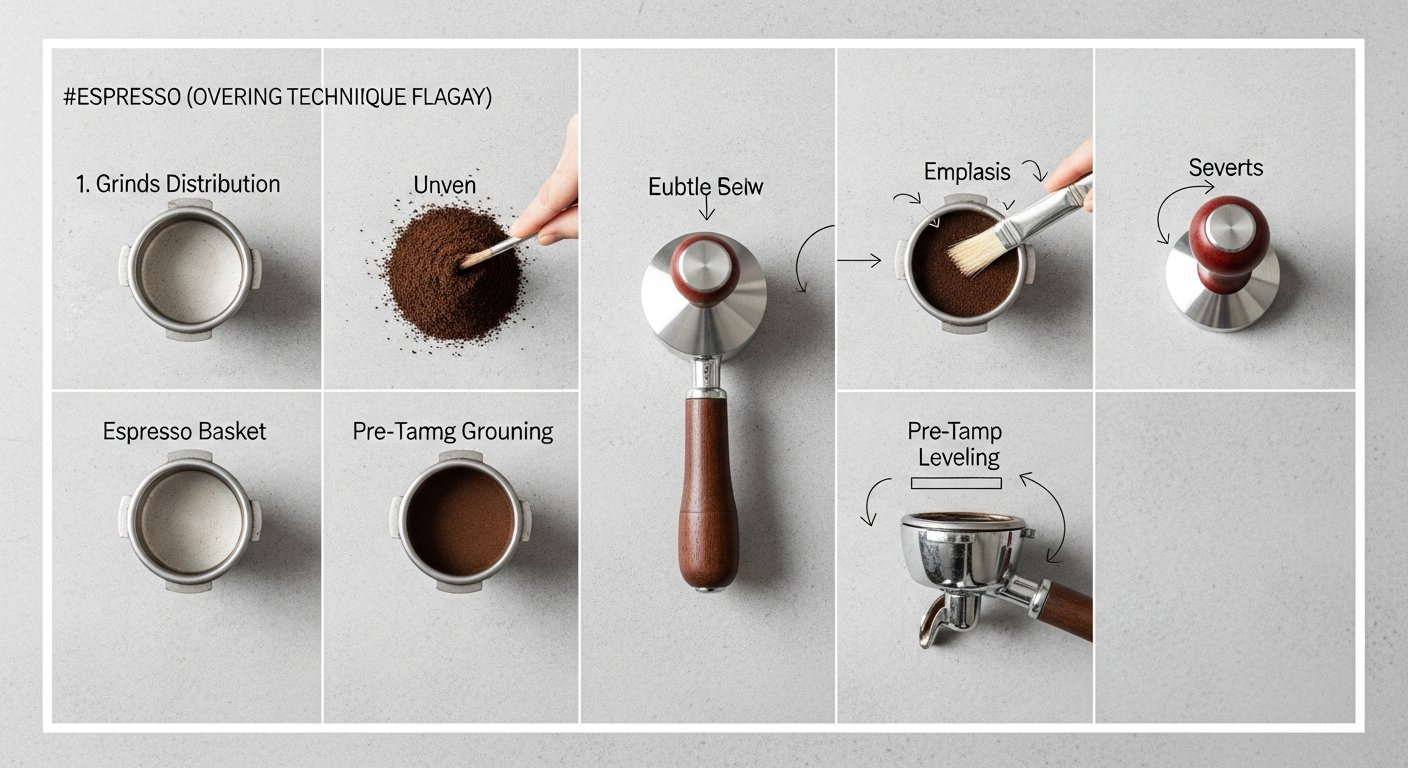
Espresso Tamping Technique
Mastering the Espresso Tamping Technique: Your Ultimate Guide to Perfect Espresso Extraction
Affiliate disclosure: This article may contain affiliate links. Recommendations are independent and editorially driven.
For many, the morning ritual of making espresso is a sacred one. The whir of the grinder, the scent of freshly ground beans, the hiss and gurgle of the machine – it all culminates in that rich, amber shot of liquid gold. Yet, within this symphony of senses and mechanics, there lies a deceptively simple action that can make or break your espresso: tamping. The espresso tamping technique isn’t just about pressing coffee grounds; it’s a critical bridge between your carefully selected beans and the exquisite shot you’re aiming for. It’s the silent conductor ensuring every drop of water extracts flavor evenly, consistently, and beautifully.
In the vast and intricate world of specialty coffee, where baristas meticulously weigh doses, measure yields, and fine-tune grind settings to fractions of a micron, the tamper often receives less fanfare than it deserves. However, without a precise and repeatable tamping technique, even the most expensive grinder or state-of-the-art espresso machine will struggle to deliver its full potential. An imperfect tamp can lead to channeling, uneven extraction, and ultimately, a shot that is either sour and underdeveloped or bitter and over-extracted. It’s the difference between a passable coffee and a truly sublime espresso experience.
This comprehensive guide from cafeserre will demystify the art and science of the espresso tamping technique. We’ll delve into the ‘why’ behind tamping, exploring the physics and fluid dynamics at play. We’ll equip you with the knowledge to choose the right tools and walk you through a step-by-step process that you can replicate with confidence. Furthermore, we’ll address common pitfalls, discuss advanced considerations, and help you train your palate to discern the subtle impacts of a perfectly executed tamp. Whether you’re a home barista seeking consistency or a professional looking to refine your craft, prepare to elevate your espresso game significantly.
The Foundation: Why Tamping Matters So Much for Espresso Quality
Before we dissect the mechanics of tamping, it’s crucial to understand its fundamental purpose. Tamping isn’t merely about compacting coffee; it’s about creating an optimal, uniform environment for water to pass through. Think of it as preparing the stage for the brewing process, where every particle plays its part in delivering a balanced performance. Without proper tamping, the stage is uneven, leading to chaos and a less-than-stellar show.
The Role of the Puck: Consistency is King
The “puck” refers to the compacted disc of ground coffee in your portafilter basket. Its integrity is paramount for proper espresso extraction. When you tamp, you transform a fluffy pile of coffee grounds into a dense, solid mass. This transformation is vital for two primary reasons: resistance and uniformity. Water under pressure will always seek the path of least resistance. If your coffee puck is inconsistent in density, water will inevitably flow through the looser areas, bypassing the denser sections. This leads to uneven extraction, where some coffee particles are over-extracted while others are under-extracted, resulting in a muddled and unbalanced flavor profile.
A consistently dense puck ensures that water encounters uniform resistance across its entire surface area. This forces the water to saturate all the coffee particles evenly, maximizing the extraction of soluble solids and aromatic compounds. The result is a more balanced, flavorful, and aromatic espresso shot, characterized by its complexity and nuanced notes. Consistency in the puck means consistency in every shot, which is the hallmark of a skilled barista.
Channeling and Uneven Extraction: The Tamping Foe
Channeling is the bane of any espresso enthusiast. It occurs when water creates specific “channels” or pathways through the coffee puck, typically due to inconsistencies in density. Imagine water flowing through a sandy beach: it will carve out small streams rather than permeating the entire surface evenly. In espresso, these channels mean that certain parts of the coffee puck are severely over-extracted (the coffee in the channels), while other parts are barely touched (the coffee around the channels). Visually, channeling can sometimes be identified by “spitting” or uneven flow from the portafilter spouts, or by a pale, watery stream emerging too quickly.
Poor tamping is a primary culprit for channeling. An uneven tamp, where one side of the puck is denser than the other, or a fragmented puck due to air pockets or loose grounds, provides ample opportunity for water to find these paths of least resistance. The consequence is a shot that lacks body, crema, and exhibits a strong imbalance of flavors – often intensely bitter from the over-extracted channels and sour/underdeveloped from the bypassed coffee. A perfect tamp aims to eliminate these weak points, forcing water to interact uniformly with all coffee particles, thereby preventing channeling and ensuring a smooth, even extraction.
Building the Perfect Crema
Crema, the reddish-brown foam that sits atop a freshly pulled espresso shot, is often seen as the visual hallmark of a quality espresso. While its presence and thickness are influenced by many factors – bean freshness, roast level, grind size, and water temperature – proper tamping plays a significant role in its formation and stability. Crema is essentially an emulsion of coffee oils, proteins, and sugars, saturated with CO2 gases released during the roasting process and trapped during extraction.
A well-tamped puck facilitates a consistent, high-pressure extraction, which is essential for emulsifying these elements and creating a robust, long-lasting crema. When extraction is uneven due to poor tamping, the pressure profile within the puck is inconsistent. This can lead to a thin, bubbly, or quickly dissipating crema, indicative of an under-extracted or improperly prepared shot. Conversely, a consistently tamped puck promotes optimal pressure resistance, encouraging a complete and even release of CO2 and oils, resulting in that beautiful, tiger-striped crema that connoisseurs adore.
Understanding the Science Behind the Espresso Tamping Technique
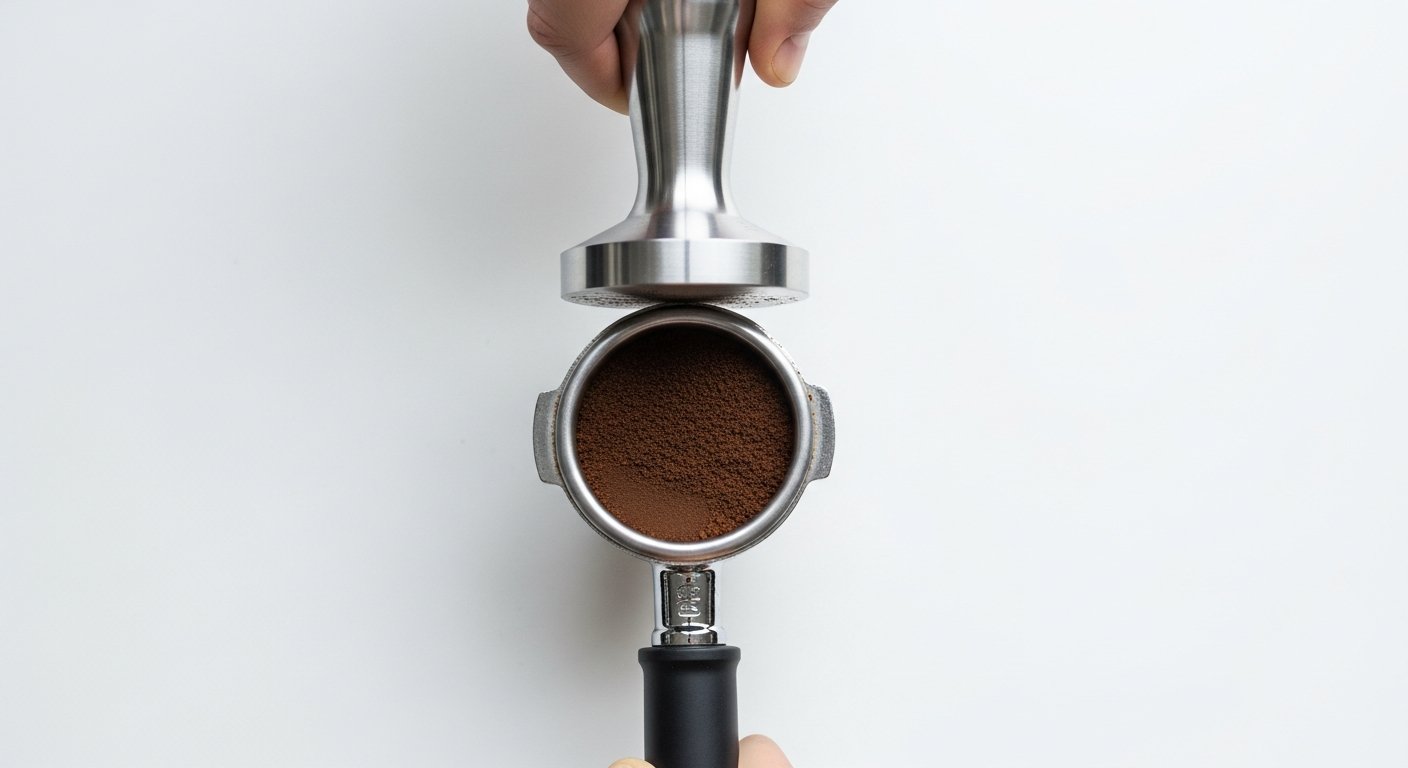
While the act of tamping may seem straightforward, there’s a fascinating interplay of physics and material science at its core. Appreciating these underlying principles can transform tamping from a mundane task into a thoughtful, deliberate action, significantly enhancing your control over the final product.
Particle Distribution and Density
At its heart, tamping is about controlling particle distribution and density within the coffee puck. Freshly ground coffee is a heterogeneous mix of particles of various sizes (even with a high-quality grinder) and shapes. When it first enters the portafilter, these particles are loosely packed, with numerous air pockets and an uneven distribution. The primary goal of tamping is to collapse these air pockets and rearrange the particles into a dense, homogeneous mass.
The force applied during tamping overcomes the friction between individual coffee particles, allowing them to settle into a more compact arrangement. This increases the overall density of the puck. A higher, more uniform density means that water, when introduced under pressure, will encounter consistent resistance from every angle. This uniform resistance is what prevents channeling and ensures even saturation and extraction across the entire puck. The ideal scenario is a puck where the density gradient from top to bottom and side to side is as minimal as possible.
The Physics of Water Flow Through Coffee
The science of fluid dynamics, specifically Darcy’s Law, is highly relevant here. Darcy’s Law describes the flow of fluid through a porous medium. In the context of espresso, the coffee puck is that porous medium, and water is the fluid. The law states that the flow rate of fluid is proportional to the pressure difference across the medium and inversely proportional to the resistance of the medium. The resistance, in turn, is significantly influenced by the porosity and permeability of the coffee puck.
A well-tamped puck reduces porosity (the volume of empty space) and creates a uniform permeability (the ease with which fluid can pass through). This uniform permeability is critical. If permeability varies – for instance, if one part of the puck is looser than another – water will preferentially flow through the path of least resistance, leading to those dreaded channels. The dense, even puck created by proper tamping ensures that the water is forced to extract solubles from all coffee particles equally, creating an ideal pressure drop across the puck and optimizing contact time for consistent flavor extraction.
Pressure, Grind Size, and Dosage: An Interconnected System
Tamping pressure isn’t an isolated variable; it exists within a complex ecosystem of other factors, most notably grind size and dose weight. These three elements are intrinsically linked and must be considered holistically when dialing in your espresso.
- Grind Size: This is arguably the most crucial variable. A finer grind increases the surface area of coffee particles, enhancing extraction efficiency, but also dramatically increases resistance to water flow. If your grind is too fine, even a light tamp can lead to an excessively slow shot or chokes the machine. If it’s too coarse, water rushes through, resulting in an under-extracted shot, regardless of how hard you tamp.
- Dose Weight: The amount of coffee grounds used directly impacts the volume and density of the puck. Too little coffee in a large basket means a thin puck, less resistance, and potential for channeling at the edges. Too much coffee can lead to an over-filled basket, making it difficult to tamp evenly and potentially causing the coffee to touch the shower screen, which can disrupt extraction and create messy conditions.
- Tamping Pressure: This variable works in conjunction with grind size and dose. The primary goal of tamping pressure is to achieve a consistent, uniform density, not necessarily maximum density. While a certain degree of firmness is needed to consolidate the puck, excessively hard tamping on an already fine grind can lead to over-compaction, impeding water flow entirely. Conversely, too light a tamp on a coarse grind will result in insufficient resistance.
The ideal approach is to establish your dose and then use grind size as your primary adjustment for flow rate. Tamping pressure should then be applied consistently to ensure that the resistance provided by the puck is uniform. The relationship is synergistic: change one, and you likely need to adjust another to maintain balance.
[INLINE IMAGE 1: place after second H2 | alt=”espresso tamping technique concept illustration”]
The Essential Tools for a Superior Espresso Tamping Technique
While skill is paramount, the right tools can significantly aid in achieving consistency and precision in your espresso tamping technique. Investing in quality equipment is a commitment to better coffee, and these items are often one-time purchases that last for years.
The Tamper: Flat vs. Convex, Size, and Material
The tamper is your primary interface with the coffee puck, and its characteristics profoundly influence your tamping results.
- Size: This is non-negotiable. Your tamper MUST precisely fit your portafilter basket. Most commercial baskets are 58mm, but many home machines (especially entry-level ones) use smaller sizes like 51mm, 53mm, or 54mm. A tamper that is too small will leave a ring of untamped coffee around the edges, leading to severe channeling. A tamper that is too large won’t fit. Always measure your basket accurately before purchasing. Many high-quality tampers are available in 0.5mm increments (e.g., 58mm, 58.5mm, 58.35mm) to provide a truly snug fit.
- Base Shape (Flat vs. Convex):
- Flat Base: This is the most common and widely recommended shape. It creates an even, level surface on the coffee puck, promoting uniform resistance. For consistency and ease of use, a flat base is ideal, especially for beginners.
- Convex Base: A convex base is slightly rounded. Proponents argue it helps push coffee towards the edges of the basket, potentially reducing edge channeling. However, it can also create an uneven density profile, with the center being slightly less dense. Most experts recommend sticking to a flat base for consistency.
- Material: The base is almost always stainless steel for durability, weight, and ease of cleaning. Handles can vary from wood (aesthetic, ergonomic) to aluminum, stainless steel, or plastic. The weight of the tamper can influence the perceived effort of tamping, but the actual pressure applied is still entirely up to the user.
- Types of Tampers:
- Standard Handle Tamper: The classic design, requiring manual force.
- Calibrated Tamper: Features an internal spring that clicks when a preset pressure (e.g., 25-30 lbs) is reached. Excellent for consistency, especially for those learning or in busy café environments.
- Palm Tamper (Force Distributor): Ergonomically designed to be pressed down with the palm, distributing pressure more evenly and reducing wrist strain. Often height-adjustable to fit different doses.
Distribution Tools: WDT and Leveling Devices
Before tamping, even high-quality grinders can produce some clumps or an uneven mound of coffee. Distribution tools are designed to break up clumps and evenly distribute the grounds, creating a perfectly level bed for tamping.
- WDT (Weiss Distribution Technique) Tool: This involves stirring the coffee grounds in the portafilter with fine needles to break up clumps and evenly distribute the particles. It’s incredibly effective at reducing channeling and creating a more homogeneous puck. This is arguably one of the most impactful, yet inexpensive, upgrades to your workflow.
- Leveling/Distribution Tool (Spinning Distributor): These tools sit on top of the portafilter and are rotated to move coffee grounds around, creating a flat, even surface. While they can be effective for leveling, they don’t always address underlying clumping as effectively as WDT. Many baristas use a WDT tool first, followed by a leveling tool, or simply rely on WDT and a gentle tap on the counter.
Tamping Mats and Stations: Ergonomics and Protection
A good tamping mat or station protects both your countertop and your portafilter. It provides a stable, non-slip surface for tamping, preventing slips and ensuring a level tamp. They come in various materials, most commonly silicone or rubber, and can be simple pads or elaborate corner mats that wrap around your counter edge, providing a secure spot for your portafilter.
Precision Scales: Dosage Accuracy
While not directly a tamping tool, a precision scale is absolutely critical for consistency in your espresso preparation, which directly impacts the tamping process. You cannot consistently tamp if your dose weight is inconsistent. Weighing your ground coffee to the nearest 0.1 gram before tamping ensures that each puck starts with the same amount of material, making your tamping technique more predictable and repeatable. This foundational step eliminates a significant variable that could otherwise undermine your best tamping efforts.
Portafilter Baskets: The Unsung Heroes
The basket itself plays a crucial role. Standard baskets often have less precise hole sizes and distributions compared to precision baskets (e.g., VST, IMS). Precision baskets ensure a more uniform flow of water through the coffee bed, complementing a perfect tamp. While not a direct tamping tool, the basket is the vessel in which your perfectly tamped puck resides, and its quality significantly influences extraction uniformity.
| Tamper Type | Key Features | Pros | Cons | Best For |
|---|---|---|---|---|
| Standard Handle Tamper | Ergonomic handle, stainless steel base (flat/convex). | Simple, durable, wide variety of styles and materials. Allows full control over pressure. | Requires practice to achieve consistent pressure. | Experienced baristas, those who prefer tactile feedback. |
| Calibrated Tamper | Internal spring mechanism that “clicks” at a preset pressure (e.g., 25-30 lbs). | Ensures highly consistent tamping pressure, great for beginners or high-volume environments. | Less tactile feedback, pressure setting is fixed. Can be pricier. | Beginners, busy cafes, anyone prioritizing pressure consistency. |
| Palm Tamper (Force Distributor) | No traditional handle; pressed with the palm, often height-adjustable. | Ergonomic, reduces wrist strain, naturally promotes level tamping. | Can feel less traditional, may require adjustment for different doses. | Baristas with wrist issues, those seeking ergonomic design and level tamp. |
| Automatic Tamper | Electronic device that tamps automatically at a set pressure and level. | Ultimate consistency and speed, eliminates human error, reduces repetitive strain. | Very expensive, large footprint, purely functional (less “art”). | High-volume cafes, establishments prioritizing maximum consistency. |
Step-by-Step Guide to Mastering the Espresso Tamping Technique
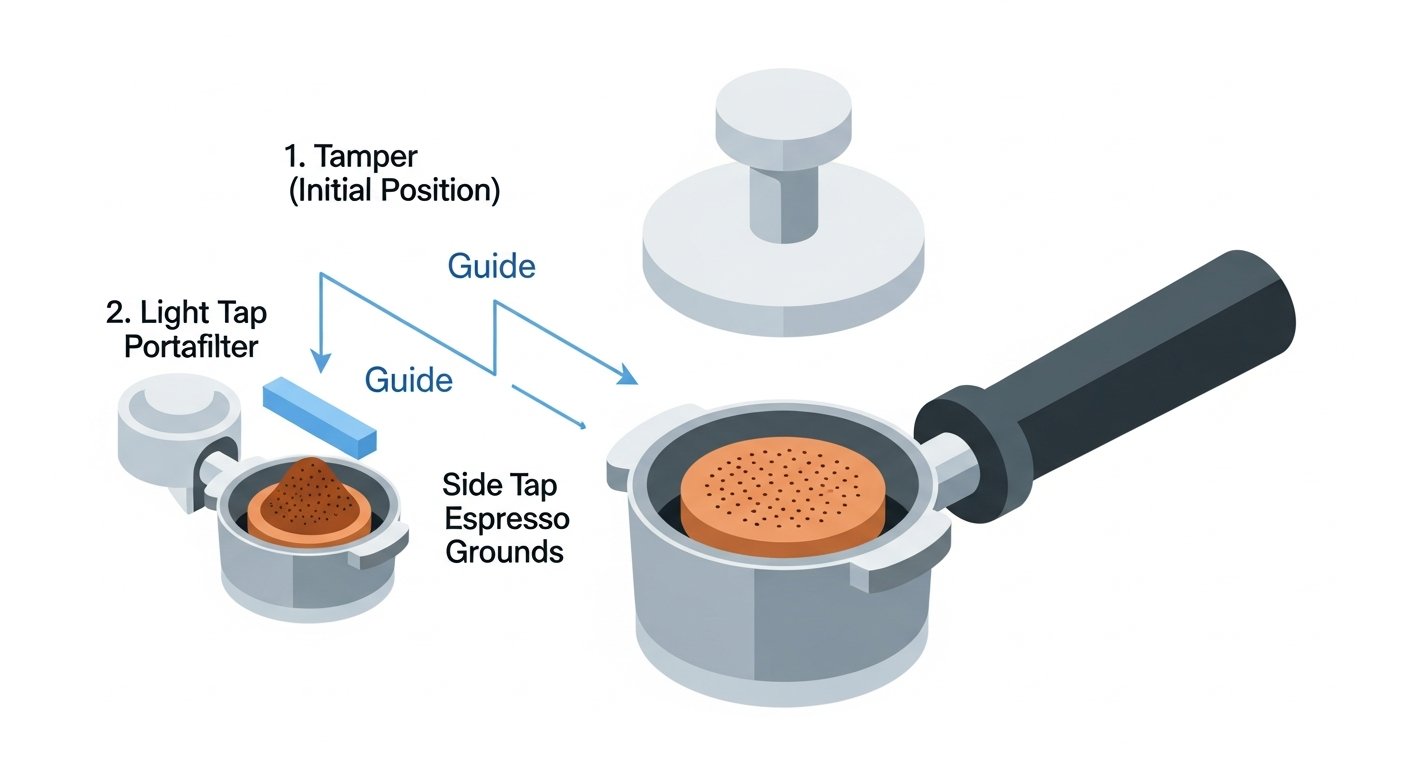
Now that we’ve covered the ‘why’ and the ‘what,’ let’s dive into the ‘how.’ Mastering the espresso tamping technique involves a sequence of deliberate steps, each contributing to the final quality of your shot. Consistency is your ultimate goal here.
Grinding and Dosing: The Pre-Tamp Ritual
Your tamping journey begins even before the tamper touches the coffee. Precision at this stage sets the foundation for success:
- Weigh Your Beans: Always weigh your whole beans before grinding. A consistent dose is the first step towards a consistent shot. Typical doses range from 18-22 grams for a double shot, depending on your basket size and desired recipe.
- Grind Directly into the Portafilter: Grind your beans directly into your portafilter basket. Aim for an even distribution of grounds, avoiding large mounds in the center or gaps on the sides. Many grinders have a dosing funnel that can help with this.
- Check for Consistency: Visually inspect the grounds. Are there any large clumps? Is the distribution relatively even? This is where your distribution tools come into play.
Distribution: Leveling the Playing Field
This is a critical, often overlooked step that dramatically impacts your tamping success. Uneven distribution before tamping guarantees an uneven puck, regardless of your tamping skill.
- WDT (Weiss Distribution Technique): Use a WDT tool (a small set of fine needles) to gently stir the coffee grounds. Move the needles in circles, from the bottom of the basket upwards, breaking up any clumps and evenly distributing the coffee. Aim to fluff and level the bed of coffee. This is arguably the most effective step in ensuring even extraction.
- Gentle Tap (Optional but Recommended): After WDT, give the portafilter a gentle, flat tap on a tamping mat or counter. This helps settle the grounds further and creates a more level surface before tamping. Avoid aggressive banging, which can create density differences within the puck.
- Leveling Tool (Optional): If you use a leveling tool, place it on top of the portafilter and give it a few gentle rotations to flatten the surface. Remember, this tool primarily levels; the WDT handles the de-clumping and distribution within the coffee bed itself.
The Perfect Grip: Stance and Posture
Your physical approach to tamping is vital for applying even pressure. A shaky or awkward grip will result in a slanted tamp.
- Stable Surface: Place your portafilter on a flat, stable surface (like a tamping mat on a counter or a dedicated tamping station).
- Firm Grip: Hold the tamper like a doorknob, with your thumb and fingers wrapped around the handle. Your hand should be directly above the tamper base.
- Elbow at 90 Degrees: Stand comfortably, keeping your wrist straight and your elbow bent at approximately a 90-degree angle. This allows you to apply pressure directly downwards using your body weight, rather than just arm strength.
- Check for Level: Before applying pressure, ensure the tamper base is perfectly parallel to the top of the portafilter basket. Use your knuckles as a guide, resting them on the portafilter rim to ensure the tamper is level.
Applying Pressure: How Much is Enough? (The “Polish” Myth)
This is where much debate lies, but simplicity is key. The goal is consistent, firm pressure, not extreme force.
- Consistent Pressure: Aim for a firm, consistent pressure. The commonly cited range is 20-30 pounds of force, but this is less about hitting an exact number and more about developing a feel for what is “firm and consistent” for *you*. If you have a calibrated tamper, let it guide you.
- Use Body Weight: Lean into the tamp using your body weight, keeping your arm straight and elbow locked. This ensures even, controlled pressure.
- The Myth of “Polishing”: You might hear about a “polish” tamp – a second, lighter tamp or twist to smooth the surface. While a gentle twist *can* help release the tamper without disturbing the puck, a second full tamp is generally unnecessary and can actually introduce inconsistencies by creating micro-fractures in the puck. One firm, level tamp is usually sufficient.
The Twist and Finish: Sealing the Deal
Once you’ve applied your firm, even pressure:
- Gentle Twist (Optional): While still applying downward pressure, give the tamper a slight, gentle twist (about a quarter turn). This helps to “seal” the surface of the puck and prevents suction when you lift the tamper, which could otherwise pull coffee particles up and disturb the puck.
- Lift Straight Up: Gently and slowly lift the tamper straight up and out of the basket. Avoid any jerky movements that could disturb the carefully formed puck.
Checking Your Work: Visual Cues and Consistency
After tamping, take a moment to visually inspect your work:
- Level Puck: Is the surface of the coffee puck perfectly flat and level? There should be no visible slopes or angles.
- No Loose Grounds: Check the rim of the portafilter basket for any loose coffee grounds. If present, gently brush them away, as they can interfere with the seal between the portafilter and the group head.
- Consistent Depth: The depth of the coffee puck should be consistent across the entire basket.
Remember, the ultimate test of your tamping technique will be the espresso shot itself. Pay attention to flow rate, extraction time, and the flavor profile. These will be your truest indicators of success and areas for improvement.
[INLINE IMAGE 2: place after fourth H2 | alt=”espresso tamping technique comparison illustration”]
Common Tamping Mistakes and How to Avoid Them
Even with the best intentions and tools, it’s easy to fall into common tamping traps. Recognizing these mistakes is the first step toward correcting them and consistently pulling perfect shots.
Uneven Tamp: The Dreaded Slanted Puck
Perhaps the most common and detrimental tamping error is an uneven tamp. This occurs when one side of the coffee puck is pressed down more firmly or lower than the other, resulting in a slanted surface. Visually, it might appear subtle, but its impact on extraction is anything but.
- The Problem: A slanted puck creates varying densities across the coffee bed. Water, following the path of least resistance, will preferentially flow through the looser, less dense side. This leads to severe channeling and uneven extraction. One side of the puck will be over-extracted (bitter), and the other will be under-extracted (sour), yielding a highly unbalanced and unpleasant shot.
- How to Avoid:
- Stable Surface: Always tamp on a flat, stable surface, such as a tamping mat.
- Proper Stance: Keep your wrist straight, elbow at 90 degrees, and apply pressure directly downwards using your body weight.
- Visual Cues: Before pressing, rest your knuckles on the portafilter rim to ensure the tamper is perfectly level.
- Distribution First: Ensure your coffee grounds are evenly distributed and level *before* tamping. A lopsided mound of coffee is impossible to tamp evenly.
Insufficient or Excessive Pressure
While often debated, the *consistency* of pressure is far more important than the absolute number of pounds you apply. However, going to either extreme can cause problems.
- Insufficient Pressure: A light tamp leaves the coffee puck too loose and porous. Water will rush through too quickly, resulting in an under-extracted shot that is watery, sour, and lacks body and crema. The puck may also disintegrate upon removal.
- Excessive Pressure: Tamping too hard, especially with an already fine grind, can over-compact the coffee. This creates too much resistance for the water, leading to a choked machine (no flow or very slow drips) or an over-extracted shot that is bitter, astringent, and thick. There’s a point of diminishing returns; once the particles are sufficiently compacted, more pressure doesn’t add benefit and can damage the puck’s structure.
- How to Avoid:
- Calibrated Tamper: If struggling with consistency, a calibrated tamper is an excellent investment.
- Develop a “Feel”: Practice applying a firm, consistent pressure. It’s less about raw strength and more about controlled, even force. Aim for a pressure that feels like a solid handshake, not a death grip.
- Adjust Grind: If your shots are too fast or too slow despite consistent tamping, adjust your grind size. Tamping should consolidate, not compensate for incorrect grind.
Grooming Issues: Clumps and Channels Before Tamping
The state of your coffee grounds *before* tamping is just as important as the tamp itself. Many problems stem from poor distribution and clumping.
- The Problem: If your coffee grounds have clumps or are unevenly distributed (e.g., a high peak in the center, gaps on the sides), tamping will only compact these inconsistencies. Clumps become dense pockets, while voids become pathways for channeling. Even a perfect tamp on a poorly distributed bed will yield a bad shot.
- How to Avoid:
- WDT (Weiss Distribution Technique): Use a WDT tool to break up clumps and evenly distribute grounds throughout the basket. This is the most effective solution.
- Dosing Funnel: Use a dosing funnel to prevent grounds from spilling and aid in even distribution during grinding.
- Gentle Tap: After grinding and WDT, a gentle tap of the portafilter on the counter can help settle the grounds before tamping.
Multi-Tamp Madness: The Myth of the Double Tap
Some baristas advocate for multiple tamps, or a tamp followed by a tap on the counter and another tamp. This is almost universally considered detrimental to puck integrity.
- The Problem: A second tamp or a tap-then-tamp routine can fracture the already consolidated coffee puck. Tiny fissures or cracks can form, providing immediate pathways for water to channel, undermining all your prior efforts.
- How to Avoid:
- One Firm, Level Tamp: Stick to a single, firm, and level tamp. If your initial distribution was good, one tamp is all that’s needed to consolidate the puck.
- Gentle Release: Lift the tamper straight up and gently to avoid suction that could disturb the puck. A slight twist as you lift can help release it cleanly.
Ignoring the Grind: Tamping Won’t Fix Everything
It’s vital to remember that tamping is one piece of the espresso puzzle. It works in conjunction with other variables. Many beginners try to “fix” a bad grind by adjusting their tamp.
- The Problem: If your grind is too coarse, no amount of tamping pressure will create enough resistance for proper extraction. Water will still rush through. If your grind is too fine, no amount of careful tamping will prevent choking. Relying solely on tamping to correct flow issues is a losing battle.
- How to Avoid:
- Dial In Your Grind First: Establish your dose and then primarily use grind size to control your extraction time and flow rate.
- Consistent Tamp as a Baseline: Once you’ve found the right grind, use a consistent tamping technique to ensure that variable remains stable, allowing you to fine-tune other factors.
- Systematic Approach: Change one variable at a time (grind, then dose, then perhaps tamp *consistency* if it’s truly erratic) and observe the results. Don’t try to troubleshoot everything at once.
Advanced Espresso Tamping Techniques and Considerations
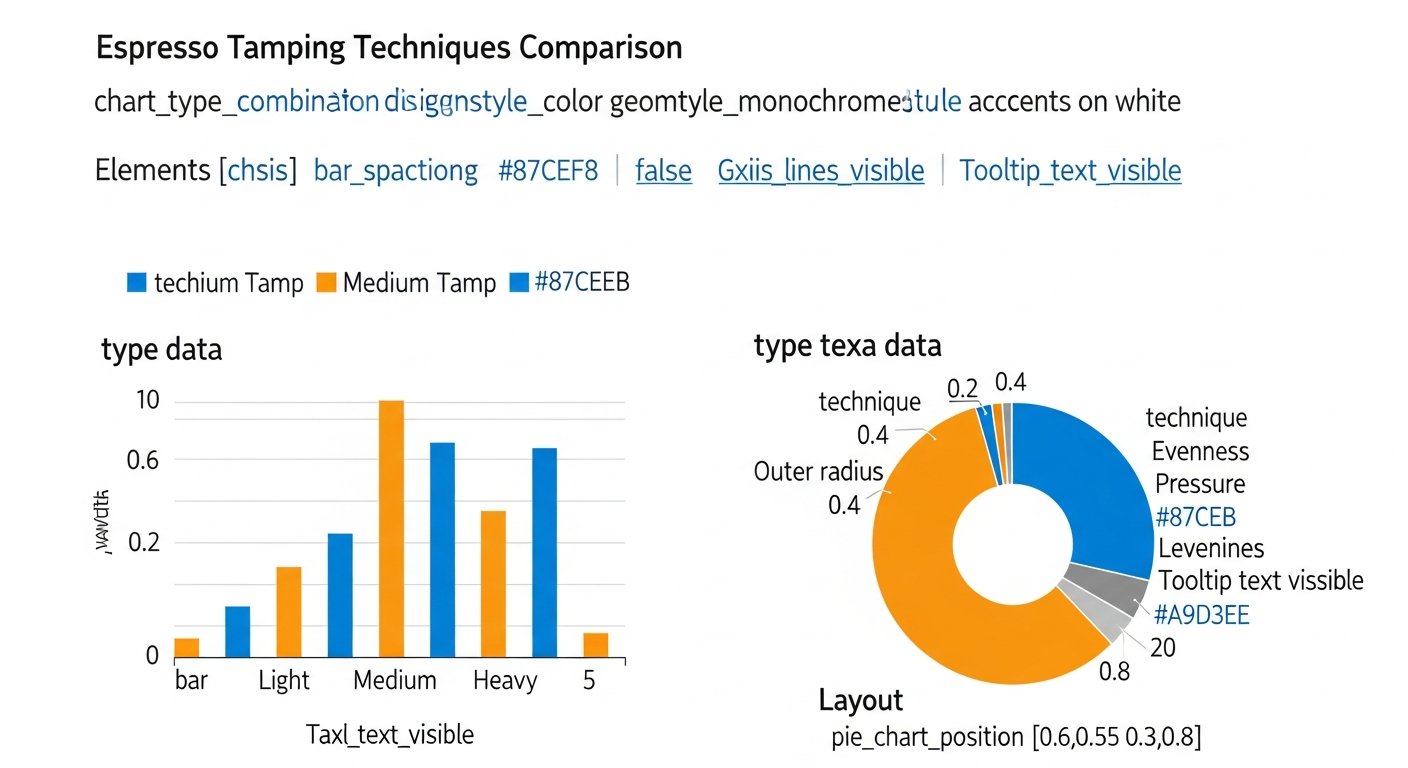
While the fundamentals of a single, level tamp are crucial, the world of espresso is constantly evolving. For those seeking to push the boundaries or understand niche practices, here are some advanced considerations and techniques.
The Nordic “Flick” Technique (Pre-Tamp Distribution)
This technique, often associated with competitive baristas from Nordic countries, is an evolution of pre-tamp distribution. Instead of just a WDT and tap, it involves a specific series of gentle taps and flicks to settle the coffee bed.
- The Method: After grinding and perhaps an initial WDT, the portafilter is gently tapped or “flicked” on its side, rather than straight down on the base. This aims to settle the grounds horizontally, evening out the density across the puck without creating vertical density gradients often associated with harsh downward taps. The portafilter might then be rotated and flicked again from a different angle.
- Purpose: To achieve an even distribution of grounds, particularly at the edges of the basket, potentially reducing channeling and promoting a more uniform extraction even before the tamper makes contact. It requires a delicate touch and much practice to master.
- Relevance: While not for every home barista, it highlights the extreme lengths some go to ensure perfect distribution, reinforcing that initial distribution is as critical as the tamp itself.
Pressure Profiling and Its Impact on Tamping
Modern high-end espresso machines offer pressure profiling, allowing baristas to vary the water pressure during different stages of extraction. How does this interact with tamping?
- The Concept: Pressure profiling can soften the impact of minor tamping inconsistencies. For example, a pre-infusion phase at lower pressure allows the coffee puck to saturate more gently and evenly, potentially masking slight unevenness in the tamp. Similarly, a declining pressure profile might be more forgiving of a very dense puck.
- Impact on Tamping: While pressure profiling offers a degree of flexibility, it doesn’t negate the need for a good tamp. A perfectly tamped puck provides the ideal baseline for pressure profiling to work its magic. Without it, even the most sophisticated pressure profile will struggle to correct fundamental flaws. In fact, a perfectly tamped puck allows the barista to explore the full potential of pressure profiling without having to compensate for basic extraction issues.
- Consideration: For machines without pressure profiling, a consistent and flawless tamp becomes even more critical, as the machine relies solely on the puck’s resistance to create the necessary back pressure for extraction.
Automatic Tampers: Consistency at a Button’s Push
For high-volume cafes and environments where ultimate consistency and ergonomics are paramount, automatic tampers have become increasingly popular.
- How They Work: These devices automatically tamp the portafilter with a precisely calibrated, level, and consistent pressure every single time. The barista simply places the portafilter into the machine, and it does the rest.
- Pros:
- Unparalleled Consistency: Eliminates human variability in tamping pressure and level.
- Ergonomic: Significantly reduces repetitive strain injuries for baristas.
- Speed: Tamps almost instantly, speeding up workflow.
- Cons:
- Cost: Very expensive, typically only justified in commercial settings.
- Loss of “Feel”: Some baristas miss the tactile feedback and control of manual tamping.
- Footprint: Can take up valuable counter space.
- Relevance to Home Baristas: While largely out of reach for home use due to cost, their existence underscores the importance of tamping consistency. If a machine can deliver perfect tamps consistently, it highlights how much impact human error in manual tamping can have.
The Art of the “Flair” Tamp: Beyond Functionality
In some café settings, particularly in competition or high-end establishments, baristas might incorporate a “flair” into their tamping routine – a subtle movement or technique designed to look elegant or add a signature touch.
- The Method: This isn’t about altering the functional tamp itself, but rather the presentation around it. It could be a specific way of holding the tamper, a confident flourish, or a very deliberate, almost ritualistic motion.
- Purpose: Primarily aesthetic and theatrical. It’s about enhancing the customer experience and demonstrating mastery, rather than directly improving the puck’s integrity (assuming the underlying functional tamp is already perfect).
- Consideration: While engaging, any flair must *never* compromise the foundational principles of a level, consistent tamp. Form should follow function. For home baristas, focusing on perfect functional technique should always take precedence over stylistic embellishments.
These advanced techniques and considerations demonstrate that while the core principles of tamping are straightforward, the pursuit of perfection in espresso is an ongoing journey that can delve into minute details and specialized tools.
The Interplay of Tamping with Other Espresso Variables
Espresso is a delicate balance of interconnected variables. Tamping, while crucial, doesn’t exist in a vacuum. Understanding its symbiotic relationship with other factors allows for a more holistic approach to brewing and helps in troubleshooting.
Grind Size and Its Symbiotic Relationship
As touched upon earlier, grind size is perhaps the most significant variable that dictates resistance to water flow, and tamping acts as its partner in crime (or success).
- Fine Grind, Lighter Tamp (Potentially): If your grind is very fine, the coffee particles naturally pack together more densely, offering significant resistance. In this scenario, excessive tamping pressure might lead to over-compaction, choking the machine. A firm, but not overly aggressive, tamp might be ideal to simply consolidate the bed.
- Coarse Grind, Firmer Tamp (Potentially): Conversely, if your grind is slightly coarser, the larger particles create more voids. A firmer tamp might be necessary to adequately consolidate the puck and create enough uniform resistance for proper extraction. However, there are limits; an overly coarse grind cannot be saved by brute force tamping.
- Dialing In: The most common method for dialing in espresso is to establish a consistent dose and tamping technique, then adjust the grind size to achieve the desired extraction time (e.g., 25-30 seconds for a double shot). Tamping ensures that the resistance created by the grind is uniformly presented to the water.
Dose Weight: The Foundation of the Puck
The amount of coffee you use (dose weight) fundamentally defines the size and density potential of your puck, which directly influences how you tamp.
- Optimal Headspace: The dose must be appropriate for your basket size, leaving adequate headspace between the tamped puck and the shower screen. Too little coffee leads to a shallow puck, reduced resistance, and potential edge channeling. Too much coffee means the puck might touch the shower screen, causing messy extractions, channeling, and poor saturation.
- Tamp Depth: A consistent dose allows you to develop a consistent tamp depth. If your dose varies, your tamp depth will also vary, making it harder to develop muscle memory for pressure application and levelness. This is why weighing your dose is absolutely non-negotiable for consistency.
Water Temperature and Pressure: Indirect Influences
While tamping directly affects the physical resistance of the puck, the machine’s water temperature and pump pressure play vital roles in how water interacts with that puck.
- Water Temperature: The temperature of the
Mastering the Espresso Tamping Technique: Your Ultimate Guide to Perfect Espresso Extraction
Affiliate disclosure: This article may contain affiliate links. Recommendations are independent and editorially driven.
For many, the morning ritual of making espresso is a sacred one. The whir of the grinder, the scent of freshly ground beans, the hiss and gurgle of the machine – it all culminates in that rich, amber shot of liquid gold. Yet, within this symphony of senses and mechanics, there lies a deceptively simple action that can make or break your espresso: tamping. The espresso tamping technique isn’t just about pressing coffee grounds; it’s a critical bridge between your carefully selected beans and the exquisite shot you’re aiming for. It’s the silent conductor ensuring every drop of water extracts flavor evenly, consistently, and beautifully.
In the vast and intricate world of specialty coffee, where baristas meticulously weigh doses, measure yields, and fine-tune grind settings to fractions of a micron, the tamper often receives less fanfare than it deserves. However, without a precise and repeatable tamping technique, even the most expensive grinder or state-of-the-art espresso machine will struggle to deliver its full potential. An imperfect tamp can lead to channeling, uneven extraction, and ultimately, a shot that is either sour and underdeveloped or bitter and over-extracted. It’s the difference between a passable coffee and a truly sublime espresso experience.
This comprehensive guide from cafeserre will demystify the art and science of the espresso tamping technique. We’ll delve into the ‘why’ behind tamping, exploring the physics and fluid dynamics at play. We’ll equip you with the knowledge to choose the right tools and walk you through a step-by-step process that you can replicate with confidence. Furthermore, we’ll address common pitfalls, discuss advanced considerations, and help you train your palate to discern the subtle impacts of a perfectly executed tamp. Whether you’re a home barista seeking consistency or a professional looking to refine your craft, prepare to elevate your espresso game significantly.
The Foundation: Why Tamping Matters So Much for Espresso Quality
Before we dissect the mechanics of tamping, it’s crucial to understand its fundamental purpose. Tamping isn’t merely about compacting coffee; it’s about creating an optimal, uniform environment for water to pass through. Think of it as preparing the stage for the brewing process, where every particle plays its part in delivering a balanced performance. Without proper tamping, the stage is uneven, leading to chaos and a less-than-stellar show.
The Role of the Puck: Consistency is King
The “puck” refers to the compacted disc of ground coffee in your portafilter basket. Its integrity is paramount for proper espresso extraction. When you tamp, you transform a fluffy pile of coffee grounds into a dense, solid mass. This transformation is vital for two primary reasons: resistance and uniformity. Water under pressure will always seek the path of least resistance. If your coffee puck is inconsistent in density, water will inevitably flow through the looser areas, bypassing the denser sections. This leads to uneven extraction, where some coffee particles are over-extracted while others are under-extracted, resulting in a muddled and unbalanced flavor profile.
A consistently dense puck ensures that water encounters uniform resistance across its entire surface area. This forces the water to saturate all the coffee particles evenly, maximizing the extraction of soluble solids and aromatic compounds. The result is a more balanced, flavorful, and aromatic espresso shot, characterized by its complexity and nuanced notes. Consistency in the puck means consistency in every shot, which is the hallmark of a skilled barista.
Channeling and Uneven Extraction: The Tamping Foe
Channeling is the bane of any espresso enthusiast. It occurs when water creates specific “channels” or pathways through the coffee puck, typically due to inconsistencies in density. Imagine water flowing through a sandy beach: it will carve out small streams rather than permeating the entire surface evenly. In espresso, these channels mean that certain parts of the coffee puck are severely over-extracted (the coffee in the channels), while other parts are barely touched (the coffee around the channels). Visually, channeling can sometimes be identified by “spitting” or uneven flow from the portafilter spouts, or by a pale, watery stream emerging too quickly.
Poor tamping is a primary culprit for channeling. An uneven tamp, where one side of the puck is denser than the other, or a fragmented puck due to air pockets or loose grounds, provides ample opportunity for water to find these paths of least resistance. The consequence is a shot that lacks body, crema, and exhibits a strong imbalance of flavors – often intensely bitter from the over-extracted channels and sour/underdeveloped from the bypassed coffee. A perfect tamp aims to eliminate these weak points, forcing water to interact uniformly with all coffee particles, thereby preventing channeling and ensuring a smooth, even extraction.
Building the Perfect Crema
Crema, the reddish-brown foam that sits atop a freshly pulled espresso shot, is often seen as the visual hallmark of a quality espresso. While its presence and thickness are influenced by many factors – bean freshness, roast level, grind size, and water temperature – proper tamping plays a significant role in its formation and stability. Crema is essentially an emulsion of coffee oils, proteins, and sugars, saturated with CO2 gases released during the roasting process and trapped during extraction.
A well-tamped puck facilitates a consistent, high-pressure extraction, which is essential for emulsifying these elements and creating a robust, long-lasting crema. When extraction is uneven due to poor tamping, the pressure profile within the puck is inconsistent. This can lead to a thin, bubbly, or quickly dissipating crema, indicative of an under-extracted or improperly prepared shot. Conversely, a consistently tamped puck promotes optimal pressure resistance, encouraging a complete and even release of CO2 and oils, resulting in that beautiful, tiger-striped crema that connoisseurs adore.
Understanding the Science Behind the Espresso Tamping Technique
While the act of tamping may seem straightforward, there’s a fascinating interplay of physics and material science at its core. Appreciating these underlying principles can transform tamping from a mundane task into a thoughtful, deliberate action, significantly enhancing your control over the final product.
Particle Distribution and Density
At its heart, tamping is about controlling particle distribution and density within the coffee puck. Freshly ground coffee is a heterogeneous mix of particles of various sizes (even with a high-quality grinder) and shapes. When it first enters the portafilter, these particles are loosely packed, with numerous air pockets and an uneven distribution. The primary goal of tamping is to collapse these air pockets and rearrange the particles into a dense, homogeneous mass.
The force applied during tamping overcomes the friction between individual coffee particles, allowing them to settle into a more compact arrangement. This increases the overall density of the puck. A higher, more uniform density means that water, when introduced under pressure, will encounter consistent resistance from every angle. This uniform resistance is what prevents channeling and ensures even saturation and extraction across the entire puck. The ideal scenario is a puck where the density gradient from top to bottom and side to side is as minimal as possible.
The Physics of Water Flow Through Coffee
The science of fluid dynamics, specifically Darcy’s Law, is highly relevant here. Darcy’s Law describes the flow of fluid through a porous medium. In the context of espresso, the coffee puck is that porous medium, and water is the fluid. The law states that the flow rate of fluid is proportional to the pressure difference across the medium and inversely proportional to the resistance of the medium. The resistance, in turn, is significantly influenced by the porosity and permeability of the coffee puck.
A well-tamped puck reduces porosity (the volume of empty space) and creates a uniform permeability (the ease with which fluid can pass through). This uniform permeability is critical. If permeability varies – for instance, if one part of the puck is looser than another – water will preferentially flow through the path of least resistance, leading to those dreaded channels. The dense, even puck created by proper tamping ensures that the water is forced to extract solubles from all coffee particles equally, creating an ideal pressure drop across the puck and optimizing contact time for consistent flavor extraction.
Pressure, Grind Size, and Dosage: An Interconnected System
Tamping pressure isn’t an isolated variable; it exists within a complex ecosystem of other factors, most notably grind size and dose weight. These three elements are intrinsically linked and must be considered holistically when dialing in your espresso.
- Grind Size: This is arguably the most crucial variable. A finer grind increases the surface area of coffee particles, enhancing extraction efficiency, but also dramatically increases resistance to water flow. If your grind is too fine, even a light tamp can lead to an excessively slow shot or chokes the machine. If it’s too coarse, water rushes through, resulting in an under-extracted shot, regardless of how hard you tamp.
- Dose Weight: The amount of coffee grounds used directly impacts the volume and density of the puck. Too little coffee in a large basket means a thin puck, less resistance, and potential for channeling at the edges. Too much coffee can lead to an over-filled basket, making it difficult to tamp evenly and potentially causing the coffee to touch the shower screen, which can disrupt extraction and create messy conditions.
- Tamping Pressure: This variable works in conjunction with grind size and dose. The primary goal of tamping pressure is to achieve a consistent, uniform density, not necessarily maximum density. While a certain degree of firmness is needed to consolidate the puck, excessively hard tamping on an already fine grind can lead to over-compaction, impeding water flow entirely. Conversely, too light a tamp on a coarse grind will result in insufficient resistance.
The ideal approach is to establish your dose and then use grind size as your primary adjustment for flow rate. Tamping pressure should then be applied consistently to ensure that the resistance provided by the puck is uniform. The relationship is synergistic: change one, and you likely need to adjust another to maintain balance.
[INLINE IMAGE 1: place after second H2 | alt=”espresso tamping technique concept illustration”]
The Essential Tools for a Superior Espresso Tamping Technique
While skill is paramount, the right tools can significantly aid in achieving consistency and precision in your espresso tamping technique. Investing in quality equipment is a commitment to better coffee, and these items are often one-time purchases that last for years.
The Tamper: Flat vs. Convex, Size, and Material
The tamper is your primary interface with the coffee puck, and its characteristics profoundly influence your tamping results.
- Size: This is non-negotiable. Your tamper MUST precisely fit your portafilter basket. Most commercial baskets are 58mm, but many home machines (especially entry-level ones) use smaller sizes like 51mm, 53mm, or 54mm. A tamper that is too small will leave a ring of untamped coffee around the edges, leading to severe channeling. A tamper that is too large won’t fit. Always measure your basket accurately before purchasing. Many high-quality tampers are available in 0.5mm increments (e.g., 58mm, 58.5mm, 58.35mm) to provide a truly snug fit.
- Base Shape (Flat vs. Convex):
- Flat Base: This is the most common and widely recommended shape. It creates an even, level surface on the coffee puck, promoting uniform resistance. For consistency and ease of use, a flat base is ideal, especially for beginners.
- Convex Base: A convex base is slightly rounded. Proponents argue it helps push coffee towards the edges of the basket, potentially reducing edge channeling. However, it can also create an uneven density profile, with the center being slightly less dense. Most experts recommend sticking to a flat base for consistency.
- Material: The base is almost always stainless steel for durability, weight, and ease of cleaning. Handles can vary from wood (aesthetic, ergonomic) to aluminum, stainless steel, or plastic. The weight of the tamper can influence the perceived effort of tamping, but the actual pressure applied is still entirely up to the user.
- Types of Tampers:
- Standard Handle Tamper: The classic design, requiring manual force.
- Calibrated Tamper: Features an internal spring that clicks when a preset pressure (e.g., 25-30 lbs) is reached. Excellent for consistency, especially for those learning or in busy café environments.
- Palm Tamper (Force Distributor): Ergonomically designed to be pressed down with the palm, distributing pressure more evenly and reducing wrist strain. Often height-adjustable to fit different doses.
Distribution Tools: WDT and Leveling Devices
Before tamping, even high-quality grinders can produce some clumps or an uneven mound of coffee. Distribution tools are designed to break up clumps and evenly distribute the grounds, creating a perfectly level bed for tamping.
- WDT (Weiss Distribution Technique) Tool: This involves stirring the coffee grounds in the portafilter with fine needles to break up clumps and evenly distribute the particles. It’s incredibly effective at reducing channeling and creating a more homogeneous puck. This is arguably one of the most impactful, yet inexpensive, upgrades to your workflow.
- Leveling/Distribution Tool (Spinning Distributor): These tools sit on top of the portafilter and are rotated to move coffee grounds around, creating a flat, even surface. While they can be effective for leveling, they don’t always address underlying clumping as effectively as WDT. Many baristas use a WDT tool first, followed by a leveling tool, or simply rely on WDT and a gentle tap on the counter.
Tamping Mats and Stations: Ergonomics and Protection
A good tamping mat or station protects both your countertop and your portafilter. It provides a stable, non-slip surface for tamping, preventing slips and ensuring a level tamp. They come in various materials, most commonly silicone or rubber, and can be simple pads or elaborate corner mats that wrap around your counter edge, providing a secure spot for your portafilter.
Precision Scales: Dosage Accuracy
While not directly a tamping tool, a precision scale is absolutely critical for consistency in your espresso preparation, which directly impacts the tamping process. You cannot consistently tamp if your dose weight is inconsistent. Weighing your ground coffee to the nearest 0.1 gram before tamping ensures that each puck starts with the same amount of material, making your tamping technique more predictable and repeatable. This foundational step eliminates a significant variable that could otherwise undermine your best tamping efforts.
Portafilter Baskets: The Unsung Heroes
The basket itself plays a crucial role. Standard baskets often have less precise hole sizes and distributions compared to precision baskets (e.g., VST, IMS). Precision baskets ensure a more uniform flow of water through the coffee bed, complementing a perfect tamp. While not a direct tamping tool, the basket is the vessel in which your perfectly tamped puck resides, and its quality significantly influences extraction uniformity.
Comparison of Tamper Types and Their Benefits Tamper Type Key Features Pros Cons Best For Standard Handle Tamper Ergonomic handle, stainless steel base (flat/convex). Simple, durable, wide variety of styles and materials. Allows full control over pressure. Requires practice to achieve consistent pressure. Experienced baristas, those who prefer tactile feedback. Calibrated Tamper Internal spring mechanism that “clicks” at a preset pressure (e.g., 25-30 lbs). Ensures highly consistent tamping pressure, great for beginners or high-volume environments. Less tactile feedback, pressure setting is fixed. Can be pricier. Beginners, busy cafes, anyone prioritizing pressure consistency. Palm Tamper (Force Distributor) No traditional handle; pressed with the palm, often height-adjustable. Ergonomic, reduces wrist strain, naturally promotes level tamping. Can feel less traditional, may require adjustment for different doses. Baristas with wrist issues, those seeking ergonomic design and level tamp. Automatic Tamper Electronic device that tamps automatically at a set pressure and level. Ultimate consistency and speed, eliminates human error, reduces repetitive strain. Very expensive, large footprint, purely functional (less “art”). High-volume cafes, establishments prioritizing maximum consistency. Step-by-Step Guide to Mastering the Espresso Tamping Technique
Now that we’ve covered the ‘why’ and the ‘what,’ let’s dive into the ‘how.’ Mastering the espresso tamping technique involves a sequence of deliberate steps, each contributing to the final quality of your shot. Consistency is your ultimate goal here.
Grinding and Dosing: The Pre-Tamp Ritual
Your tamping journey begins even before the tamper touches the coffee. Precision at this stage sets the foundation for success:
- Weigh Your Beans: Always weigh your whole beans before grinding. A consistent dose is the first step towards a consistent shot. Typical doses range from 18-22 grams for a double shot, depending on your basket size and desired recipe.
- Grind Directly into the Portafilter: Grind your beans directly into your portafilter basket. Aim for an even distribution of grounds, avoiding large mounds in the center or gaps on the sides. Many grinders have a dosing funnel that can help with this.
- Check for Consistency: Visually inspect the grounds. Are there any large clumps? Is the distribution relatively even? This is where your distribution tools come into play.
Distribution: Leveling the Playing Field
This is a critical, often overlooked step that dramatically impacts your tamping success. Uneven distribution before tamping guarantees an uneven puck, regardless of your tamping skill.
- WDT (Weiss Distribution Technique): Use a WDT tool (a small set of fine needles) to gently stir the coffee grounds. Move the needles in circles, from the bottom of the basket upwards, breaking up any clumps and evenly distributing the coffee. Aim to fluff and level the bed of coffee. This is arguably the most effective step in ensuring even extraction.
- Gentle Tap (Optional but Recommended): After WDT, give the portafilter a gentle, flat tap on a tamping mat or counter. This helps settle the grounds further and creates a more level surface before tamping. Avoid aggressive banging, which can create density differences within the puck.
- Leveling Tool (Optional): If you use a leveling tool, place it on top of the portafilter and give it a few gentle rotations to flatten the surface. Remember, this tool primarily levels; the WDT handles the de-clumping and distribution within the coffee bed itself.
The Perfect Grip: Stance and Posture
Your physical approach to tamping is vital for applying even pressure. A shaky or awkward grip will result in a slanted tamp.
- Stable Surface: Place your portafilter on a flat, stable surface (like a tamping mat on a counter or a dedicated tamping station).
- Firm Grip: Hold the tamper like a doorknob, with your thumb and fingers wrapped around the handle. Your hand should be directly above the tamper base.
- Elbow at 90 Degrees: Stand comfortably, keeping your wrist straight and your elbow bent at approximately a 90-degree angle. This allows you to apply pressure directly downwards using your body weight, rather than just arm strength.
- Check for Level: Before applying pressure, ensure the tamper base is perfectly parallel to the top of the portafilter basket. Use your knuckles as a guide, resting them on the portafilter rim to ensure the tamper is level.
Applying Pressure: How Much is Enough? (The “Polish” Myth)
This is where much debate lies, but simplicity is key. The goal is consistent, firm pressure, not extreme force.
- Consistent Pressure: Aim for a firm, consistent pressure. The commonly cited range is 20-30 pounds of force, but this is less about hitting an exact number and more about developing a feel for what is “firm and consistent” for *you*. If you have a calibrated tamper, let it guide you.
- Use Body Weight: Lean into the tamp using your body weight, keeping your arm straight and elbow locked. This ensures even, controlled pressure.
- The Myth of “Polishing”: You might hear about a “polish” tamp – a second, lighter tamp or twist to smooth the surface. While a gentle twist *can* help release the tamper without disturbing the puck, a second full tamp is generally unnecessary and can actually introduce inconsistencies by creating micro-fractures in the puck. One firm, level tamp is usually sufficient.
The Twist and Finish: Sealing the Deal
Once you’ve applied your firm, even pressure:
- Gentle Twist (Optional): While still applying downward pressure, give the tamper a slight, gentle twist (about a quarter turn). This helps to “seal” the surface of the puck and prevents suction when you lift the tamper, which could otherwise pull coffee particles up and disturb the puck.
- Lift Straight Up: Gently and slowly lift the tamper straight up and out of the basket. Avoid any jerky movements that could disturb the carefully formed puck.
Checking Your Work: Visual Cues and Consistency
After tamping, take a moment to visually inspect your work:
- Level Puck: Is the surface of the coffee puck perfectly flat and level? There should be no visible slopes or angles.
- No Loose Grounds: Check the rim of the portafilter basket for any loose coffee grounds. If present, gently brush them away, as they can interfere with the seal between the portafilter and the group head.
- Consistent Depth: The depth of the coffee puck should be consistent across the entire basket.
Remember, the ultimate test of your tamping technique will be the espresso shot itself. Pay attention to flow rate, extraction time, and the flavor profile. These will be your truest indicators of success and areas for improvement.
[INLINE IMAGE 2: place after fourth H2 | alt=”espresso tamping technique comparison illustration”]
Common Tamping Mistakes and How to Avoid Them
Even with the best intentions and tools, it’s easy to fall into common tamping traps. Recognizing these mistakes is the first step toward correcting them and consistently pulling perfect shots.
Uneven Tamp: The Dreaded Slanted Puck
Perhaps the most common and detrimental tamping error is an uneven tamp. This occurs when one side of the coffee puck is pressed down more firmly or lower than the other, resulting in a slanted surface. Visually, it might appear subtle, but its impact on extraction is anything but.
- The Problem: A slanted puck creates varying densities across the coffee bed. Water, following the path of least resistance, will preferentially flow through the looser, less dense side. This leads to severe channeling and uneven extraction. One side of the puck will be over-extracted (bitter), and the other will be under-extracted (sour), yielding a highly unbalanced and unpleasant shot.
- How to Avoid:
- Stable Surface: Always tamp on a flat, stable surface, such as a tamping mat.
- Proper Stance: Keep your wrist straight, elbow at 90 degrees, and apply pressure directly downwards using your body weight.
- Visual Cues: Before pressing, rest your knuckles on the portafilter rim to ensure the tamper is perfectly level.
- Distribution First: Ensure your coffee grounds are evenly distributed and level *before* tamping. A lopsided mound of coffee is impossible to tamp evenly.
Insufficient or Excessive Pressure
While often debated, the *consistency* of pressure is far more important than the absolute number of pounds you apply. However, going to either extreme can cause problems.
- Insufficient Pressure: A light tamp leaves the coffee puck too loose and porous. Water will rush through too quickly, resulting in an under-extracted shot that is watery, sour, and lacks body and crema. The puck may also disintegrate upon removal.
- Excessive Pressure: Tamping too hard, especially with an already fine grind, can over-compact the coffee. This creates too much resistance for the water, leading to a choked machine (no flow or very slow drips) or an over-extracted shot that is bitter, astringent, and thick. There’s a point of diminishing returns; once the particles are sufficiently compacted, more pressure doesn’t add benefit and can damage the puck’s structure.
- How to Avoid:
- Calibrated Tamper: If struggling with consistency, a calibrated tamper is an excellent investment.
- Develop a “Feel”: Practice applying a firm, consistent pressure. It’s less about raw strength and more about controlled, even force. Aim for a pressure that feels like a solid handshake, not a death grip.
- Adjust Grind: If your shots are too fast or too slow despite consistent tamping, adjust your grind size. Tamping should consolidate, not compensate for incorrect grind.
Grooming Issues: Clumps and Channels Before Tamping
The state of your coffee grounds *before* tamping is just as important as the tamp itself. Many problems stem from poor distribution and clumping.
- The Problem: If your coffee grounds have clumps or are unevenly distributed (e.g., a high peak in the center, gaps on the sides), tamping will only compact these inconsistencies. Clumps become dense pockets, while voids become pathways for channeling. Even a perfect tamp on a poorly distributed bed will yield a bad shot.
- How to Avoid:
- WDT (Weiss Distribution Technique): Use a WDT tool to break up clumps and evenly distribute grounds throughout the basket. This is the most effective solution.
- Dosing Funnel: Use a dosing funnel to prevent grounds from spilling and aid in even distribution during grinding.
- Gentle Tap: After grinding and WDT, a gentle tap of the portafilter on the counter can help settle the grounds before tamping.
Multi-Tamp Madness: The Myth of the Double Tap
Some baristas advocate for multiple tamps, or a tamp followed by a tap on the counter and another tamp. This is almost universally considered detrimental to puck integrity.
- The Problem: A second tamp or a tap-then-tamp routine can fracture the already consolidated coffee puck. Tiny fissures or cracks can form, providing immediate pathways for water to channel, undermining all your prior efforts.
- How to Avoid:
- One Firm, Level Tamp: Stick to a single, firm, and level tamp. If your initial distribution was good, one tamp is all that’s needed to consolidate the puck.
- Gentle Release: Lift the tamper straight up and gently to avoid suction that could disturb the puck. A slight twist as you lift can help release it cleanly.
Ignoring the Grind: Tamping Won’t Fix Everything
It’s vital to remember that tamping is one piece of the espresso puzzle. It works in conjunction with other variables. Many beginners try to “fix” a bad grind by adjusting their tamp.
- The Problem: If your grind is too coarse, no amount of tamping pressure will create enough resistance for proper extraction. Water will still rush through. If your grind is too fine, no amount of careful tamping will prevent choking. Relying solely on tamping to correct flow issues is a losing battle.
- How to Avoid:
- Dial In Your Grind First: Establish your dose and then primarily use grind size to control your extraction time and flow rate.
- Consistent Tamp as a Baseline: Once you’ve found the right grind, use a consistent tamping technique to ensure that variable remains stable, allowing you to fine-tune other factors.
- Systematic Approach: Change one variable at a time (grind, then dose, then perhaps tamp *consistency* if it’s truly erratic) and observe the results. Don’t try to troubleshoot everything at once.
Advanced Espresso Tamping Techniques and Considerations
While the fundamentals of a single, level tamp are crucial, the world of espresso is constantly evolving. For those seeking to push the boundaries or understand niche practices, here are some advanced considerations and techniques.
The Nordic “Flick” Technique (Pre-Tamp Distribution)
This technique, often associated with competitive baristas from Nordic countries, is an evolution of pre-tamp distribution. Instead of just a WDT and tap, it involves a specific series of gentle taps and flicks to settle the coffee bed.
- The Method: After grinding and perhaps an initial WDT, the portafilter is gently tapped or “flicked” on its side, rather than straight down on the base. This aims to settle the grounds horizontally, evening out the density across the puck without creating vertical density gradients often associated with harsh downward taps. The portafilter might then be rotated and flicked again from a different angle.
- Purpose: To achieve an even distribution of grounds, particularly at the edges of the basket, potentially reducing channeling and promoting a more uniform extraction even before the tamper makes contact. It requires a delicate touch and much practice to master.
- Relevance: While not for every home barista, it highlights the extreme lengths some go to ensure perfect distribution, reinforcing that initial distribution is as critical as the tamp itself.
Pressure Profiling and Its Impact on Tamping
Modern high-end espresso machines offer pressure profiling, allowing baristas to vary the water pressure during different stages of extraction. How does this interact with tamping?
- The Concept: Pressure profiling can soften the impact of minor tamping inconsistencies. For example, a pre-infusion phase at lower pressure allows the coffee puck to saturate more gently and evenly, potentially masking slight unevenness in the tamp. Similarly, a declining pressure profile might be more forgiving of a very dense puck.
- Impact on Tamping: While pressure profiling offers a degree of flexibility, it doesn’t negate the need for a good tamp. A perfectly tamped puck provides the ideal baseline for pressure profiling to work its magic. Without it, even the most sophisticated pressure profile will struggle to correct fundamental flaws. In fact, a perfectly tamped puck allows the barista to explore the full potential of pressure profiling without having to compensate for basic extraction issues.
- Consideration: For machines without pressure profiling, a consistent and flawless tamp becomes even more critical, as the machine relies solely on the puck’s resistance to create the necessary back pressure for extraction.
Automatic Tampers: Consistency at a Button’s Push
For high-volume cafes and environments where ultimate consistency and ergonomics are paramount, automatic tampers have become increasingly popular.
- How They Work: These devices automatically tamp the portafilter with a precisely calibrated, level, and consistent pressure every single time. The barista simply places the portafilter into the machine, and it does the rest.
- Pros:
- Unparalleled Consistency: Eliminates human variability in tamping pressure and level.
- Ergonomic: Significantly reduces repetitive strain injuries for baristas.
- Speed: Tamps almost instantly, speeding up workflow.
- Cons:
- Cost: Very expensive, typically only justified in commercial settings.
- Loss of “Feel”: Some baristas miss the tactile feedback and control of manual tamping.
- Footprint: Can take up valuable counter space.
- Relevance to Home Baristas: While largely out of reach for home use due to cost, their existence underscores the importance of tamping consistency. If a machine can deliver perfect tamps consistently, it highlights how much impact human error in manual tamping can have.
The Art of the “Flair” Tamp: Beyond Functionality
In some café settings, particularly in competition or high-end establishments, baristas might incorporate a “flair” into their tamping routine – a subtle movement or technique designed to look elegant or add a signature touch.
- The Method: This isn’t about altering the functional tamp itself, but rather the presentation around it. It could be a specific way of holding the tamper, a confident flourish, or a very deliberate, almost ritualistic motion.
- Purpose: Primarily aesthetic and theatrical. It’s about enhancing the customer experience and demonstrating mastery, rather than directly improving the puck’s integrity (assuming the underlying functional tamp is already perfect).
- Consideration: While engaging, any flair must *never* compromise the foundational principles of a level, consistent tamp. Form should follow function. For home baristas, focusing on perfect functional technique should always take precedence over stylistic embellishments.
These advanced techniques and considerations demonstrate that while the core principles of tamping are straightforward, the pursuit of perfection in espresso is an ongoing journey that can delve into minute details and specialized tools.
The Interplay of Tamping with Other Espresso Variables
Espresso is a delicate balance of interconnected variables. Tamping, while crucial, doesn’t exist in a vacuum. Understanding its symbiotic relationship with other factors allows for a more holistic approach to brewing and helps in troubleshooting.
Grind Size and Its Symbiotic Relationship
As touched upon earlier, grind size is perhaps the most significant variable that dictates resistance to water flow, and tamping acts as its partner in crime (or success).
- Fine Grind, Lighter Tamp (Potentially): If your grind is very fine, the coffee particles naturally pack together more densely, offering significant resistance. In this scenario, excessive tamping pressure might lead to over-compaction, choking the machine. A firm, but not overly aggressive, tamp might be ideal to simply consolidate the bed.
- Coarse Grind, Firmer Tamp (Potentially): Conversely, if your grind is slightly coarser, the larger particles create more voids. A firmer tamp might be necessary to adequately consolidate the puck and create enough uniform resistance for proper extraction. However, there are limits; an overly coarse grind cannot be saved by brute force tamping.
- Dialing In: The most common method for dialing in espresso is to establish a consistent dose and tamping technique, then adjust the grind size to achieve the desired extraction time (e.g., 25-30 seconds for a double shot). Tamping ensures that the resistance created by the grind is uniformly presented to the water.
Dose Weight: The Foundation of the Puck
The amount of coffee you use (dose weight) fundamentally defines the size and density potential of your puck, which directly influences how you tamp.
- Optimal Headspace: The dose must be appropriate for your basket size, leaving adequate headspace between the tamped puck and the shower screen. Too little coffee leads to a shallow puck, reduced resistance, and potential edge channeling. Too much coffee means the puck might touch the shower screen, causing messy extractions, channeling, and poor saturation.
- Tamp Depth: A consistent dose allows you to develop a consistent tamp depth. If your dose varies, your tamp depth will also vary, making it harder to develop muscle memory for pressure application and levelness. This is why weighing your dose is absolutely non-negotiable for consistency.
Water Temperature and Pressure: Indirect Influences
While tamping directly affects the physical resistance of the puck, the machine’s water temperature and pump pressure play vital roles in how water interacts with that puck.
- Water Temperature: The temperature of the